Pages

Friday 30 January 2015

Welcome Barbarayaya and new winners.

Hello everyone, another Friday has come round and we have more fabulous inspiration for you from the wonderfully talented Barbarayaya.


"Hello everyone, I'm Barbara from Italy and I'm really thrilled to be your Guest Creative Guide today!

I began to be creative since I was a little girl, 5 years I had with me scissors and newspapers to make collages! My colored pencils were divided by shades, all red, all yellow etc. etc. I always had an obsession with the nuances! I went through different stages, are passed from collage, decoupage, to cardmaking, I discovered scrapbooking in 2006, after the birth of my youngest child. I started from traditional scrapbooking with Layout and photos, then in 2008, wandering the web, I found Tim Holtz! In this moment there was my turning point! I am totally in love with his style, Distress inks are absolutely my favorite inks, in all possible variations! I love everything of Tim : dies, Idea-ology, inks, stencils, stamps .... So now that I have found my true way to make art, I continue on that!!! I'll be happy if you will want to to check out my blog to know me better : http://yayascrap.blogspot.it/!

This challenge is hosted by the amazing artist Astrid Maclean and the theme is "love is in the air"!

For you, I created an ATB! I love so much to make ATBs, they are versatile, you can put together in many ways and interpret in all styles! The photos that I used are really vintage, are my parents at the time of their engagement in the 50s!

I really hope you like it and you can take some creative ideas!"

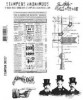
"Let's go! I prepared four collage of photos that show you how I made this project.


I cut on Manila cardstock my cubes and I've colored them with Distress Stain and Distress sprays stain (Evergreen bough, Tumbled glass and Pumice stone).
I like this technique with these colors so fluid and mixable, and the effect that is created after drying!
This is the result after drying and inking of the edges with my favourite Distress, Walnut stain!


Once I have completed the coloring, I cut on opposite sides, two hearts with Tim's die, to create a hole, under which to put my photos.

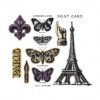
As embellishments for the two sides without hole, I cut with the same die, two hearts on grungeboard, I have colored them and then I add  Mica flakes in large quantities.


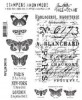
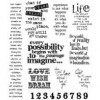
To create the background I used two Tim's stamps. The first one, with the letter, in a traditional way, using Distress ink. For the second one,with the rays, I used a method "alternative", I stamped with acrylic. I recommend you to clean it immediatly after stamping, otherwise your stamp will not be usable another time.


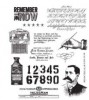
The latest series of pictures is completely dedicated to finishing the project. I used various techniques, crackle paint, staining with distress paints, hot embossing with powder colored copper/patina. I would add that the small pictures of my parents were printed on sticky back canvas, to make them even more vintage!"

I hope you enjoyed my ATB, thanks from my heart to the wonderful creatives who gave me the opportunity to participate as Guest Creative guides! "


It's certainly a great pleasure to have you join us Barbara and with such a wonderful project to share with all our readers. I adore the ATB statue with the most wonderful photo of your parents on it and those gorgeous hearts are just delightful. Thank you for sharing it with us and for a very informative post as well.


********************************************************


So to finish off we now share who the winner and Pinworthy Mentions are for the last challenge and it was the lovely S@ndy who had the pleasure of making the final decisions.


For this challenge we had so many excellent entries it was difficult for the team to come up with only one winner. As you will see, they are all well deserved. Congratulations Ladies.


Winner:


#27 Sara of Sarascloset 


Sara shared her Gentlemen's Club flip frame filled with so many yummy layers of Tim's goodness. Love the flip frame.

Congratulations Sara your badge and voucher from Country View Crafts will be on it's way very soon.


Pinworthies:


#12 Chris of pearshapedcrafting


Chris shared a wonderful project where she used a portrait of her Grandfather "Billy". So clever and well done.


#20 Jan of Scrapbooking From The Attic


Jan used many layers of fabric and sewing to show her lovely journal cover. A great way to begin a journal.


#21 Ruth of Lerusho


Ruth's beautifully textured frame was perfect for showing off a sweet portrait. Love the rusty gears.


Congratulations to all of you too for also creating beautiful projects that captured the hearts of the Creative Guides.


Today sees the beginning of the second week of our challenge 'love is in the air' and we would 'love' to see you join in with a 'love/Valentine' themed project and if you haven't yet seen the amazing inspirational projects from the Creative Guides I would like to point you over to take a look.

Have a wonderful weekend from everyone at AVJ.

hugs Brenda xxx

Monday 26 January 2015

Destination Inspiration : Just the Ticket!


Hello Everyone!

Jennie here today to share with you some ideas for some mini art ticket strips which are both fun to make and fun to use on your atcs, cards, tags and mixed media journal pages.

Back in 2013 Tim shared a project for Mini Masterpieces using Journalling Tickets and the "concept" has been in my mind ever since. You can see the full tutorial here as to how Tim made and then used his tickets.

As usual my take is very different! As a user of stamped tickets in pretty well all my projects I wanted something a little smaller.


I started by cutting some strips of tickets using the mini-ticket die and plain cream cardstock. I was a child who loved to make postage stamps using my Nana's old sewing machine so already I was getting excited ! I had a good look through my stamps and gathered together a pile of small(ish) stamps and a palette of Distress Inks: Antique Linen, Fired Brick, Gathered Twigs, Peeled Paint, Walnut Stain, Faded Jeans and Salty Ocean.


And this is the process: at the top you will see that I have used post-it notes to mask out the adjoining tickets. I started with a background stamp in Antique Linen and then started layering other images over the top. Once I had a design it was quick and easy to work along the ticket strip. Finally I edged each strip with some Walnut Stain Distress Ink.


Here are some of my other ticket strips using Tim's stamps - I am are you will recognise them!


I also used some larger stamps which initially I thought would be too big for these mini tickets, but as Tim's stamps have the design printed on the back of the stamp it was easy to determine whether they would fit the ticket and where to place them.

Again I am sure you will recognise these fine gentlemen and of course the top of the Effeil Tower.


By this time I had spent time trawling through ALL my stamps and found that quite large flower stamps could be easily stamped in the little space. I stamped these designs in Ranger Arcival Black Ink and then painted the design with Distress Inks.


I love painting with Distress Inks - I just squish a two or three colours on the craft mat and spritz with a little water and layer the colours over each other. The colours blend beautifully with very little effort.


The one thing I have done is to stamp each ticket with a background stamp even though the overstamped design was quite detailed. It isn't very visible but it is amazing how effective having something in the background is. I found this text stamp from the Mercantile set just perfect - not too large - and of course Antique Linen Distress Ink is just perfect.


Well I do hope that has given you some ideas for using your ticket strip die and I am looking forward to using these little tickets on future projects. But be warned - it does get a little bit addictive !!

Have fun!

Jennie


Friday 23 January 2015

Challenge 24 Love is in the Air

Hello dear friends, followers and visitors, thank you for coming by here today. This is Astrid hosting our latest challenge.

It being nearly the end of January, it's not long until Valentines day. And as the saying goes:
A flower cannot blossom without sunshine,
And man cannot live without love.

For this challenge please share what moves your heart with us, be it a Valentine's card for a loved one, a heart themed project, or something else that expresses what true love means to you. Just make sure that Tim's style is evident in what you make.

Like always, our winner will receive a £10 shop voucher from our wonderful sponsor, Country View Crafts as well as a blog badge and the opportunity to join us here as a guest for a future month's challenge. We also award 'Pinworthy' badges to 3 runners up.

My amazing team mates have poured lots of love into their wonderful creations, I'm sure you will agree that there is lots of inspiration!

Despite the fact that the theme is Love is in the Air, I decided not to go the traditional Valentines route, but instead to share my love of all things Tim! I designed a booklet with 12 pockets to hold my 12 tags of 2015. For a full tutorial and step by step, please visit my blog

This whole piece is created on a vintage book board from a hardback which was disintegrating. The board had some Russian ephemera on the inside page, so that was the starting point for the collage around this young Russian bridal pair. The dark red accents in the collage echo the colour of the book cover cloth. Come over to Words and Pictures to hear the couple's story, and find out the name of the book too!

For this theme I have created a layered card using a variety of products both from Tim Holtz and other suppliers. Lots of embossing and distress paints create the layers and the hearts. Do pop over to Addicted to Art for more details.

My Valentine's card is inspired by Tim's Classics #8 stamps and his 'flick distress technique' but it's been made with his Distress inks and Lovestruck dies too! My step x step can be found HERE. Chris xxx

S@ndy

For this great challenge I wanted to share a page from my flip calendar. It is easy to see Tim's influence here. I used his movers and shapers dies as well as his Love Struck Die. You can see more details by visiting my blog "My Crafty Life On The Internet".

Julia

Astrid's timely challenge inspired me to use Tim's In the Bag die to create two sweet vintage Valentine treat bags. I used lots of Idea-ology items, crackle paint, stenciling and inks. I have lots of pictures and a description of how I made these sweet Vintage Valentine Treat Bags on my blog post here.

Jennie

I decided to use the opportunity to journal the fact that in April it will be 40 years since my husband and I first started going out together - where does the time go ? This mixed media page is very much in my own style but using Tim's products - tissue tape, stamps, texture paste, layering stencils, ink, spray and dies - which goes to show how versatile they are in mixed media pieces. There are more details on my blog if you wish to join me!

Jools

I have long wanted to produce a project based on Tim’s Heart and Soul project so Astrid’s challenge theme was the ideal opportunity.  Please click here to see how I made my Valentines Heart with Soul.

Terry

I was so happy that Astrid chose "Love is in the Air" for our next challenge, as I needed that encouragement to create something a little sweet for my honey! Tim came to the rescue with his movers and shapers, stencil and stamps and all added to a mixed media background of paints, stains and crackle! Stop by for all the details HERE.

Julie

I made a Memory album for this project which I gave to my Husband Chris, to hold photographs of our Wedding Anniversaries over the years. Please pop over HERE to my blog to see close up shots of my detail.

Brenda

I think I should call this red on red don't you? I bet you can guess I've made a Valentine card for my hubby using lots of Tim goodies. It has layers of papers, inks, paints, die-cuts and ephemera, all mounted on a kraft card. I wonder what he will make of it?


Well I hope we have inspired you and given you some ideas, so hopefully you will play along and share with us what love means to you! It's not necessary to use Tim Holtz products, but as we are a Tim inspired challenge, please make sure to tell us what Tim's influence in your creation is.

Happy Valentines to you all and much love from your creative guides!!