Pages

Monday 29 January 2018

Destination Inspiration - Terminal 4 with Anne

Hello fellow travellers, Anne here to welcome you to Terminal 4 
with January's Travel Bag to play with:

Product:  Sprays
Technique:  Stamping
Colour: Blue and Brown
Substrate:  Wood or Chipboard

Here's what I created:
I have to be honest, I am not a big fan of brown so I challenged myself to use as much brown as possible in my creation.  I wasn't so happy with my nearly all brown tag, so I mounted it onto a canvas that I made a while back....
I started by sticking down some Tim Holtz burlap to a piece of Ranger Manila card.  I stencilled over this with Tim's Burlap stencil using Walnut Stain Distress Spray Stain.  I love the look of this technique and am always amazed that the stain does not 'seep' under the stencil!
I used my Tim Holtz Tag and Bookplate die to cut the tag.  I then inked around the edges of the tag with Walnut Stain Distress ink.
I found some chipboard cogs in my stash and I used Walnut Stain Distress Spray Stain to colour the cogs.  I 'roughed' them up a bit with a piece of sandpaper to give them some texture and sprayed two more coats of the stain to give a good cover.
For my 'blue' element I added some DecoArt Cobalt Teal Hue paint in a random fashion over the tag.  To give a more realistic look of rust to the cogs I gave them a spray of Rusty Hinge Distress Spray Stain.  To add a 'patina' look to the cogs I mixed some Peacock Feathers Distress Spray Stain with some Prima Artisan Powder in Trianon Patina and dabbed this here and there on the cogs.
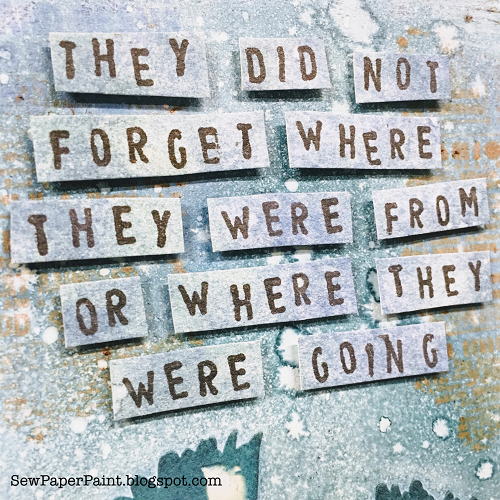
I mounted the cogs onto the tag, added one of Tim's Paper Dolls (I inked around the edge to take away the whiteness) and added a sentiment stamped from one of Alison Bomber's sentiment stamp range.  I only used part of the sentiment.- that's the beauty of Alison's stamps...
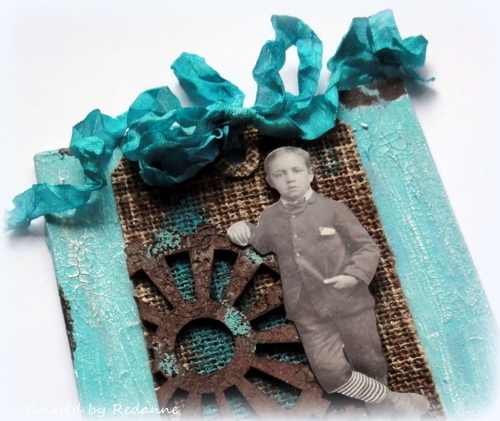
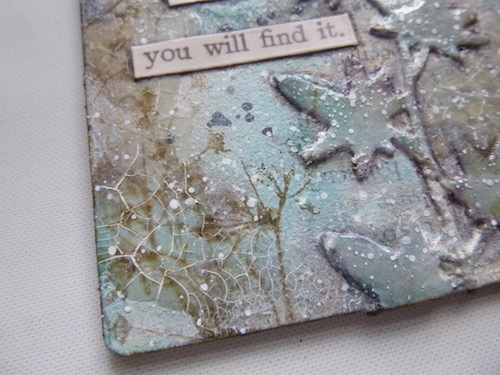
I dyed some seam binding with Peacock Feathers Distress Spray Stain, crinkled it up and added it to the top of the tag.  As I mentioned above, I thought the brown was a bit overpowering and I added the tag to a blue crackled canvas that I made a while back.  I think it gives a bit of a 'lift' to the tag!  I cannot remember what I used to create the canvas but it would most certainly be Weathered Wood Crackle and Broken China Distress Paint on top.

Since I am the last one up on Destination Inspiration for January, here is a recap of the other wonderfully inspiring DI posts for the month:

Alison - Terminal 1

Autumn - Terminal 2

Jennie - Terminal 3

I hope that we have inspired you with our Destination Inspiration posts!   Our current challenge, 'Think Inside or Outside the Box' hosted by the talented Deb, still has a few days to run.  If you have not joined in yet, we hope you will!

Thanks from me, Anne, and all the Creative Guides!

Monday 22 January 2018

Destination Inspiration : January : Terminal 3 with Jennie

Hello everyone, Jennie waiting for you here today at Terminal 3 with January's travel bag of goodies to share with  you.  A quick peek inside to refresh our memories of what is there:

Product: Sprays
Technique: Stamping
Colour: Blue & Brown
Substrate: Wood or Chipboard

Both Alison and Autumn have shared two lovely projects with these goodies and here is what I put together with what has to be my favourite ever travel bag!


I decided to use some chipboard pieces from a Tando kit and liked the idea of layering the smaller arches onto the larger one.


I glued everything together before I started, which was a big mistake! as I then couldn't get my planned texture paste to run from the inner arch to the outer arch, so I had to start thinking again about how I was going to add my texture!


I am afraid that there are no pictures of the actual process of getting to this stage - I thought I had taken some, but I must have got completely carried away! 

I gave everything a good coat of gesso before using my texture paste on the inner arches and then some crackle paste around the edges of the outer arch. Once this was dry I sprayed here and there with Broken China, Faded Jeans and Vintage Photo Distress Spray Inks adding a lot of water to get these lighter colours. However, I did allow it to puddle on the texture paste.


Finally I added some stamping using brown Archival ink. I thought the edges needed a little definition so used my gold pen and also rubbed a little gold wax here and there on the texture paste.


I love this wooden bird and greenery flourish from Calico Craft Parts and thought he would look good on my background.


I stippled two colours of brown paint here and there on the greenery with a stiff paintbrush and once it dried I was able to add a little gold wax.


And the wonderful bird (I am not sure what sort!) got painted gold and crackled. I added more stamping using this lovely quote from fellow Creative Guide Alison Bombers set of wonderful quotes about silence and singing (PaperArtsy EAB03).


This is quite a different piece for me (no flowers!!) and I have really enjoyed putting it together and creating the background despite making the mistake of sticking it together at the beginning. As a result it is a totally different project to one that I had in mind to make!

I do hope you will join us here next Monday where another Creative Guide will be ready to welcome you to Terminal 4.  In the meantime there is still time to join in our current challenge 

THINK INSIDE OR OUTSIDE THE BOX

all the details can be found HERE.

Thank you for joining me today and have a great week!

Jennie x


SaveSave

Friday 19 January 2018

A New Year And New Inspiration From Our Pinworthies

Hello everyone and thank you for stopping by, we have a real treat to share with you today. Two of our Pinworthy winners from October are here to share their beautiful creations for our current Think Inside or Outside The Box challenge.  Please join me in welcoming Maria of Magic Attic Design and Swagatika of Paperbugz, enjoy!

**********************************************


Hello!   My name is Maria Lillepruun, I am the owner of the Magic Attic Design blog.  I am a mixed media artist, a paper crafter, an educator and a museum conservator based in Tallinn, Estonia. 


Most often I create notebooks, sometimes photo albums, cards, layouts and various art objects.  I also do create and alter boxes sometimes, but only the ones for the most darling friends and family :)  My favorite styles is vintage, so I feel myself really comfortable showing my project on a blog called A Vintage Journey!  For the box challenge I altered a simple cardstock box into a little vintage treasury.


First of all I added some texture onto the box with texture paste and stencils.  After that I colored the box with ink sprays and alcohol inks.  I used some green patina to age the texture.


The box is richly decorated with "jewels", beads, Prima flowers and other resin and metallic embellishments.  I colored them all partly to incorporate all together.


This special box is meant to hide something very beautiful inside...


Thank you for your attention! You are welcome to visit my blog and Youtube channel where I post some tutorials from time to time.  Have a wonderful winter!


Hi, my name is Swagatika. I am absolutely delighted and honored to be a guest designer at A Vintage Journey, this is such a talented design team! And moreover I am so excited as this is my first ever design post for a blog.


A little about me: I come from India, a mother of six-month-old baby girl and a loving wife of a loving husband :D I started crafting 2 years back and have found my love in mixed media and Decoupage art. I find fun working on DIY projects, sketching cartoons while my little one sleeps and pastime while babysitting. I find inspiration in every little thing around me, everyday beauty, in nature and photos and my own work as it develops, grows and ‘shapes up on a life of its own’. I want to share my creative story in whatever way possible, through my artwork. I love following different crafters all over the world and try to take inspiration from them as I feel there is always some cultural essence in every art. You can find my project on my blog here: http://paperbugz.com/

For this theme I chose to alter a Chocolate box ;) I had this Gudrun Chocolate box which was saved from a very long time and I grabbed this chance to work on this box :D


I tried outside of the box look like a shabby chic and inside the box a vintage look. 


A detailed explanation on the complete process, you can find on my blog.


I have used many mixed media techniques to create this project and the materials used were from Itsy Bitsy store India. The product that I have over used in this project is chalk paint and have tried many techniques using it.  Hope you like my project and give it a try!!


**********************************************

Thank you so much to Maria and Swagatika for sharing their fabulous boxes with us, they are so beautiful. I hope that you have all been inspired to join in our Think Inside or Outside The Box challenge after seeing these gorgeous creations, you have until February 1st to link up your projects, can't wait to see what you all create!


Deb and the Creative Guides

Monday 15 January 2018

Destination Inspiration - Terminal 2 with Autumn

Hi there!  Autumn here, arriving at Destination Inspiration with a lovely travel bag of goodies to play with.  Here's what we've packed:

Product: Sprays
Technique: Stamping
Colour: Blue & Brown
Substrate: Wood or Chipboard

I went to my favorite substrate, this altered address book to which I added chipboard pages to make into an art journal.  


I must confess, I was right at home with these colors and products.  Stamping is my favorite thing and I tend to lean towards a blue/green palette - always with the addition of browns.


I removed my pages from the binder gave a rough brushing of gesso.  I stenciled the Small Wildflowers stencil by Darkroom Door onto my pages, with Liquitex light modeling paste.  I love this paste for working with sprays because it soaks up the color and leaves such beautiful contrast.  I was anxious to see how Lindy's Stamp Gang Flat Fabio sprays would work over sponged Distress Oxides, so I sponged on some color roughly.  I sprayed over the blue DOX with Lindy's Danny Zuko's Denim and spritzed with a little water to let the color bleed down the page.  I turned the pages upside down and spritzed the bottom with Lindy's Sandra Dee Sepia and let it bleed into the blue.  


Because my stenciling wasn't dry, I accidentally scraped off a portion of one of the flowers.  I decided to scrape off each other flower to make highlights and really liked this look - happy accidents!  :)


I perched a the house stamp from the Darkroom Door Home Sweet Home set atop the tallest flower.  I added two die cut Prima leaves and a die cut Tim Holtz Wildflower die cut.


I blended the wildflower die cut with the stenciling.  Here you can see where the spray colors meet.


The Tim Holtz paper dolls, layered over Tim Holtz doily die, remind me of my Grandma and her oldest sister.  There were 13 children in the family living on a farm.  When Pearl, the oldest child, went to work at the local mill they were able to buy flour for bread and shoes for the first times in their lives.  When they were much older, they loved fashion, after being raised so poor.  But their hearts were always humble and grounded.


I stamped the Gazette texture stamp in the background in DOX and spritzed it to get that faded look.  I used one of the $1 alphabet stamp sets to add the text.  I really like how the DOX changed the properties of the sprays and I was able to get the beautiful "spritz and fleck" look.  

I hope you're getting inspired by Terminal One with Alison and today's stop.  Join us next Monday for even more ideas with this month's travel bag contents.  And don't forget our current challenge, Think Inside or Outside the Box.  One lucky participant will win a $25 gift certificate to the Funkie Junkie Boutique.  We truly hope you will play along.

Friday 12 January 2018

Winter Wonderland Winner and Pinworthies

Hi Vintage Journey Travelers,

Thank you everyone who entered. We had a fabulous array of talent this month. 
Our winner chosen by random org is:

That's #70 Aimeslee Winans of Paper-Paisley's Art Adventures with this lovely Artist Post Card featuring vintage German scrap images.


Congratulations Aimeslee!  We'll be in touch shortly with your winner's badge and details of your sponsor prize from the fabulous Andy Skinner.

We had so many wonderful entries this month that it was very difficult for the team to decide on our Pinworthy winners but here are the results. 

Our talented winners are:

Toni of Artistic Craft Dabbler 
https://craftdabbler-toni.blogspot.co.uk/2017/12/festive-stamps-and-stencils-stamps-and.html

Nicola of Paper Profusion
https://paperprofusion.blogspot.ie/2017/12/merry-christmas.html

Christine of Crafty Endeavours
http://craftyfield.blogspot.co.uk/2017/12/glistening-snow-and-winter-trees.html

Huge congratulations to our three Pinworthies this month, you really did create the most wonderful Winter Wonderlands. We will contact you shortly regarding your Pinworthy badge. 

We hope you will visit again on Monday for our regular Destination Inspiration post, using the contents of the monthly travel bag, and we hope too, that you will join in our current challenge - Think Inside Or Outside The Box, details of which can be found HERE.

Wishing you a creative weekend,

S@ndy and the Creative Guides 

Monday 8 January 2018

Destination Inspiration - Terminal 1 with Alison

Hello all, Alison here, arriving at Destination Inspiration with a travel bag of goodies to play with.  Let's take a look inside and see what we have:

Product: Sprays
Technique: Stamping
Colour: Blue & Brown
Substrate: Wood or Chipboard

And here's what I've created with some of my favourite things...


It was a lucky travel bag for me!


I hope I'll be allowed my slight variation on the substrate - it's actually an MDF ATC from Calico Craft Parts - so it's somewhere between Wood and Chipboard, I suppose.


I stuck down some book pages scraps and an ivy die-cut, added some DecoArt One-Step Crackle and lightly gesso'd over it all once the crackle was dry.  I then added a few spritzes of Distress Stain Sprays in blues and browns and sprayed with water to soften them.  Next, I took the spray nozzle out of the bottle and added some inky spray directly to the edges, softening again with water; and then flicked a few droplets of Ground Espresso from the end of the tube onto the ATC.


So that all that would stay in place as I added more layers, I covered it with a layer of DecoArt Ultra Matte Varnish before going any further.  The next step was a layer of Antiquing Cream in White, knocked back to give this lovely misty effect.


Of course it stays in the cracks though, which I love.


For my stamping, I used some tiny brambly branches - I think they may be by Penny Black - stamped in either Coffee or Potting Soil Archival.


(It's a long time since I made this, I'm afraid, so I'm not quite sure any longer.)


I wanted to make the ivy leaves stand out a little more so I gave them a coat of DecoArt Triple Thick Gloss Glaze.  I love the subtle gleam when it catches the light.


Some Clippings stickers provide the words...


... a good New Year thought to take me through the year ahead.


And of course there's plenty of white spatter...


It may be a tiny ATC, but I think it packs a punch.  I love all the layers, and the soft, smoky blues and browns.


I hope you're looking forward to seeing who arrives at Destination Inspiration next Monday - I know I can't wait to see what the other Creative Guides do with these travel bag contents.  And while you're waiting, why not come and join in with this month's Think Inside or Outside the Box challenge, hosted by the fabulous Deb?  We hope to see you there soon.

Alison xx