Today we have our fourth Guest Creative Guide at A Vintage Journey and we are so pleased to welcome the lovely….
Andrea Ockey Parr

Andrea is a self-proclaimed literary nerd and eternal librarian who can never get enough Ralph Waldo Emerson or Gesso. Her artsy style is whimsical and colorful with some grungy vintage elements mixed in. Though she failed to sew an A-worthy 90's floral vest in her junior high sewing class (patterns give her hives), she does love to incorporate fabric and stitching into her projects. In addition to fabric scraps, she enjoys working with paper, stamps, ink and paint. Her creations have been featured in several publications, including cover art, in such magazines as Cloth Paper Scissors, Stuffed, Somerset Studio, SEW Somerset, and The Stampers’ Sampler. She has also served on several prominent Design Teams and enjoys teaching local crafting classes. To see her work, visit snappingmonsters.blogspot.com.

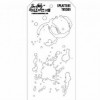
When I heard the theme of "Spring Flowers," I immediately pictured some sort of forest nymph with flowers adorning her gown. And so my project was born! I made the body of this mixed media doll from a re-purposed jewelry hanger that came in the shape of a torso. I removed the jewelry hooks from her neck and arms and replaced them with a head and arms that I molded out of clay.

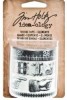
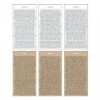
I made my girl a brand new wardrobe using Tim Holtz's fabulous "Dictionary" fabric for her dress. This is such a great fabric to use for a text-filled background on any project. I adhered scraps of colored fabric to my girl's dress and rubbed on some Tim Holtz Distress ink to give it more dimension. I also stamped some butterflies onto her dress using Tim Holtz's Papillon stamp set. Once the gown was finished, I adorned it with flowers.

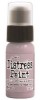
The flowers I used started out white, but I gave them an ethereal-looking paint job using Tim Holtz Distress Inks and water. Since I wanted my girl to look like a nymph or fairy, I created some wings for her out of craft wire, scraps and string. Lastly, I gave her a head of gorgeous orange hair made from various yarns and fibers with one section tied back with another flower. This theme was so inspiring and it was a thrill to use Tim's products to welcome in Spring after a long, gray, slushy Winter!

Thanks Andrea for joining us for this leg of our journey as a Guest Creative Guide and for sharing this amazing project with us. It’s fabulous to see Tim’s fabric being used and in something so creative and inspirational.
To find out more about Andrea's fabulous work please pop over to her blog to see more of the amazing art she produces.
Don’t forget you have another four days to join in with our current challenge which is ‘Spring Flowers’ hosted by the lovely Jennie and please remember to TELL US IN YOUR POST WHAT THE STRONG INFLUENCE TO TIM HOLTZ IS SO THAT WE CAN FULLY UNDERSTAND YOUR THINKING and know the inspiration behind the project you have made.
I have to give a shout out to the amazing Creative Guides where 5 of us got an amazing accolade from Tim on his Springtime Blogworthy Links post last week. Thanks Tim for including us in your special mentions.
Before I finish – have you got your Compendium of Curiosities 3 yet? It’s packed full of Tim’s newest wonderful techniques and you can get your copy from Tim himself (who will sign it for you) or from Country View Crafts (sorry not signed by Tim although Susan said she would sign it for you if you wished lol. She also has CC1 and CC2 available if you want them too). Once you have your book you will be able to join in the CC3 Challenge at Linda Ledbetter's blog Studio L3 where she is the amazing host and leader of this wonderful challenge. She has also gathered a fabulous Curiosity Crew who have provided some incredible inspiration. Do go take a look at this weeks theme which is great technique from Tim.
Thanks again to Andrea for sharing her incredible project with us here at A Vintage Journey and to all of you who jump aboard to travel along with us.
Have a great week everyone.
hugs Brenda xx
![clip_image002_thumb[1]](https://blogger.googleusercontent.com/img/b/R29vZ2xl/AVvXsEj5HtwHqJWBHNZuvnVZ1YdJA-8pvQFMuppacRSOu0LP4jimBkb2LUzN0Om1M3nVGAHNKV_iivmzxtmkCnZ5t7SrliSDIKa8Z33RpgfF-TwpmPPNvIV1oUxzRE3dqsZ2d81TBa4T_I2wyzOz/s1600-h/clip_image002_thumb12.jpg "clip_image002_thumb[1]")
![clip_image002[5]_thumb[2]](https://blogger.googleusercontent.com/img/b/R29vZ2xl/AVvXsEgqcHsGZxLE8BhBgsgCO7am1vB6rmjnq1zEKsaASuZXFsPLdpv2osYeeLX9xTiZQ0KNkgSfMXUK2jDij80SqASgDQxNEbQ2pFOGbeS4vAZN_Cqd_vUAIfIUtfvqDvaoKs-rYpC84HM86uHp/s1600-h/clip_image0025_thumb22.jpg "clip_image002[5]_thumb[2]")
![clip_image004_thumb[2]](https://blogger.googleusercontent.com/img/b/R29vZ2xl/AVvXsEjPKevnfnLhuS0R2WELenDDbpam-1OOoYabkLQ1aUu5ZVjqRPJymj4FLa-9l8sXtdZUEU_Ov_C50YKhBFOvyWU7gNT_dzIufErKfGALym3WFJx3q23f_DmZJXymxstPBLl5THewKbxKBqMk/s1600-h/clip_image004_thumb22.jpg "clip_image004_thumb[2]")
![clip_image006_thumb[1]](https://blogger.googleusercontent.com/img/b/R29vZ2xl/AVvXsEjs9ZZ5htWsF_AuM6v-HRbhg0OyDw-WGi-JN1Wer9lGthm023YUuR_CJnczZ7QILwdnyEQl1wWXPqc_w6q0270x2GuYvXS2bVm2XfwiIZd5nURL0WcMzOAo5GLgsJZPzBYhyphenhyphena5dui9RKydc/s1600-h/clip_image006_thumb12.jpg "clip_image006_thumb[1]")
![clip_image008_thumb[1]](https://blogger.googleusercontent.com/img/b/R29vZ2xl/AVvXsEhDM8ssnJujjQF10p3ImLJ25g5MavMDTwCeAuWw0xudSj1d2YOnN1r6xf_iaWo-WgA5W81XBYYuxlf0ehF6AYmUYagO3a8M0rtBTrGCZeS56c6aXWR2gXtFuDoH55F-x8iTo1RwTouC3EJP/s1600-h/clip_image008_thumb12.jpg "clip_image008_thumb[1]")
![clip_image010_thumb[1]](https://blogger.googleusercontent.com/img/b/R29vZ2xl/AVvXsEhVMFYRbeH82SW_VhjvNc3naY1nnE-nq51T0sV-LaC0bDRS7ALtHHhmJ6Z5fWlM2U4Ia-Y10khVJYBqnzBjGEdnZs2GaNI6QvNu1vj1fj-7x8SSCIw15jNuTCFNdbKb03WdZmvMe8dBykk2/s1600-h/clip_image010_thumb12.jpg "clip_image010_thumb[1]")
![clip_image012_thumb[1]](https://blogger.googleusercontent.com/img/b/R29vZ2xl/AVvXsEhWKObaQaev6xy_Fr0dwPB4IGuXTrI6GDzKP9kbcuOvy3pQaPtCD5QJ-1gjesXpRb9UnovbBfUu5lQEMkV9Zs3zrxxuc_1qFfpqwVWAhRJXLzPhAQL4UQgCkoNQykGwXdHhAOnR7prQ9AW6/s1600-h/clip_image012_thumb12.jpg "clip_image012_thumb[1]")
![clip_image014_thumb[1]](https://blogger.googleusercontent.com/img/b/R29vZ2xl/AVvXsEirBm6CMBXQyIEBDdI9ss5X1x4XVFHTiyqSS3T4jXJjP3CzrgKsYUZLa-G0-CRgJ41tGCcIU19JCaHqUfepMvrc7d4LydsRFIJGoo1tyKhP5dD1W93pT8KLJeaconrs9CPmBIRJHxoK5wYs/s1600-h/clip_image014_thumb12.jpg "clip_image014_thumb[1]")
![clip_image016_thumb[1]](https://blogger.googleusercontent.com/img/b/R29vZ2xl/AVvXsEgMpY90t41hC312jZcIcCN9H2hQowSMJd08acY7-moSuxzpxGWSdtf16x4VNWTFXEuhXJgn6oaYLaBu7_c9OCofSCuTpSzdHMyccfYqKFbQSdtCBbR4uXUdRMgeWzeFcMEBRVLcp4uVfhkL/s1600-h/clip_image016_thumb12.jpg "clip_image016_thumb[1]")
![clip_image018_thumb[1]](https://blogger.googleusercontent.com/img/b/R29vZ2xl/AVvXsEiAA5fzIg4DHp1h5f33Sxapxg2NIj5j1qTzI-uZCqillkUHIhFK-M8MhskC2YtuhauuV925plniC4hQKb_WrZDILh0BKEviCK2ABFwS1TJtRYGwTOJIx2RfTPa-0c-8-53zLQAQ2LZfjPfU/s1600-h/clip_image018_thumb12.jpg "clip_image018_thumb[1]")
![clip_image020_thumb[1]](https://blogger.googleusercontent.com/img/b/R29vZ2xl/AVvXsEgPOF6nRLNRgXi29lWG7j3KxgjzIfZljNmz2kIAzW6s7dAV035Dy1sJ6l8p_D88khRv4ocGt8yBPrGQGzLH9WE0sWYH613tVw1DlngcbQ3KokaWp5Jku6NPxdzdgrd0z13NLKSApHkfJE1y/s1600-h/clip_image020_thumb12.jpg "clip_image020_thumb[1]")
![clip_image022_thumb[1]](https://blogger.googleusercontent.com/img/b/R29vZ2xl/AVvXsEjwMwR4o9Wv2UxoxkpyBL1pcgcuvj4BEnFxzGHeNz7c8Xn3RLG6LJPTez4Qy2pXiQEh34jRaE3CC1AYrcewKRGbZjqwOf08qOLZKwMqdOHAjlqZ8eFSQL1opNz4oz9JVeukrPrj7eMIdkj0/s1600-h/clip_image022_thumb12.jpg "clip_image022_thumb[1]")
![clip_image024_thumb[1]](https://blogger.googleusercontent.com/img/b/R29vZ2xl/AVvXsEjBQ9nAD41U8j0YNfA9H2VSKo5C2ocwcabyZyVLfoYqila8-sgGZsytWc_A7PCUpr6-rIk0tmhnIlbDN-OfBZ2fkDWS0PW8SULq1WTr19ldCJVtZZpLKcEoqkSd_Z5lu_G3IuSyBkeUIS_3/s1600-h/clip_image024_thumb12.jpg "clip_image024_thumb[1]")
![clip_image026_thumb[1]](https://blogger.googleusercontent.com/img/b/R29vZ2xl/AVvXsEhIRouKrDPVXOOgyFfN-jrOC2qQB3apPTMARKRHHPNjb4DgbKllSrF2H8jp20Ae1waMNwDFukrBtnrSPDnuYb5yllBxbpGNypUxnIp_cW51bM7zl6jlNXx3suvjEM9V-dST-xKPq8vtztLw/s1600-h/clip_image026_thumb12.jpg "clip_image026_thumb[1]")