This is a unique challenge blog where we are inspired by and focus on the Vintage; shabby; mixed-media; art journaling; industrial, timeworn and steampunk genres and encompass the talent, flair, expertise and ideas of many artists that we are inspired by. We welcome all types of projects - cards, journaling, assemblage, layouts, albums, atcs, altered art in fact whatever you want to share (as long as it is in good taste).
Hello everyone, Deb here to announce our choices for the May Book It! challenge and for our May Tag Friday linkup! As is always the case you did not make the Creative Guide's choices easy, so many amazing entries and we want to thank all of you for joining in our challenges.
First up, here are our Pinworthy picks for the Book It! challenge:
Cathy's amazing medical themed vintage book is incredibly detailed but the most wonderful part of all is how she dedicated it to her father-in-law who was a doctor.
The cover of Katrina's fab Dogs and Pups lap book has a wonderful vintage feel and her decision to donate it to a local dog rescue association (where she found her own beloved pup Luther!) was such a special and generous idea.
Love that Beulah Bee used that wonderful vintage wedding photo and then showcased it so perfectly inside the Idea-ology Lace Frame with that lovely floral lace stamp and Perfect Pearls!
Congratulations to all our amazingly talented winners, we will be sending you your AVJ Pinworthy badges to display on your blogs very soon.
Thanks again to everyone who entered our May challenges and we hope that you will also enter our current Tissue Paper challenge for a chance to win your very own Pinworthy badge! Thanks as always for stopping by today and happy creating,
Hello everyone and thanks for stopping by, it's Deb here today to share a tutorial with you on how I created by vintage nature inspired folio album for our current Book It! challenge.
This folio album was inspired by a YouTube tutorial by papercrafter45. She has a wonderful 6 part video tutorial on how she made her 8-Pocket Mini Folio so be sure to check it out. I've changed the dimensions and the design of some of the tuck spots and pockets on mine (think I ended up with 22 pockets and tucks!) but many of the design aspects follow her videos pretty closely. The measurements that I am going to give you in my tutorial are for the outside dimensions of the pages and pockets only and do not include the 1/2" edge flaps (see papercrafter45's videos to see what I'm talking about!) so take that into consideration if you decide to make one of your own. This tutorial is pretty long so grab a cup or glass of our favourite beverage and let's get started!
NB: most of the papers and images used on this project are courtesy of Ephemeras Vintage Garden, Vectoria Designs and Far Far Hill.
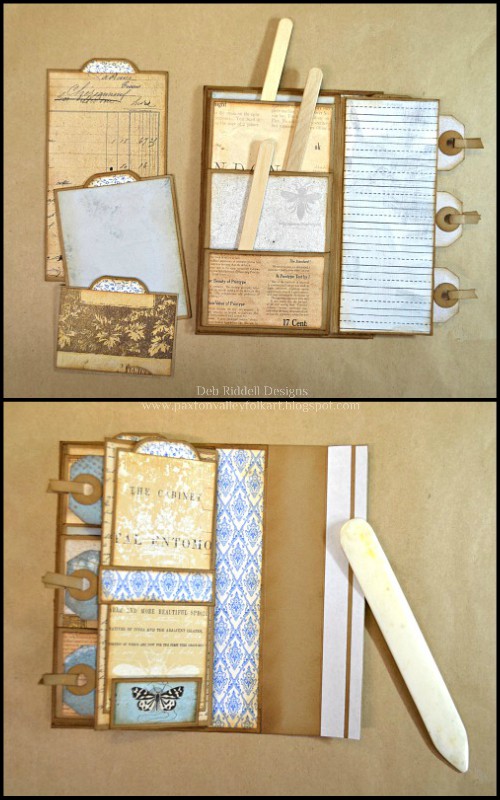
As is my usual style, I started this project very backwards by making an insert to put inside the folio album before I ever made the album! I saw another video tutorial by papercrafer45 for an envelope pocket made from a No. 10 envelope and decided to make a little 3 pocket envelope folio. I adhered two of the envelope pockets back to back (see papercrafter45's video for the envelope pocket how to, she explains it much better than I ever could!) and made a cardstock 'spine' to attach them to the 3rd envelope pocket
Six tags were made to insert into the two main pockets on each of the three envelopes (Tim Holtz's Bird Feather stamp set and Wildflower die cuts).
The crossed fold on each pocket seemed like a good place to tuck some tickets so I stamped up Tim Holtz's Ticket Booth stamps and printed out some more tickets from Vectoria Designs to add to each of the three pockets.
Now that I had my first insert I knew what size of folio album I had to make! I made a back cover measuring 4 1/2" x 6 1/4" (remember, that doesn't include the 1/2" measurements for the reinforced edges) and added a tuck pocket with an 1/8" gusset to the inside that opened to the left and top.
The No. 10 envelope folio was attached to the tuck pocket, leaving another pocket behind the envelope folio by only gluing it on three sides and leaving the top open.
A flap was adhered to the left edge of the tuck pocket with a 1/2" gusset to accommodate the depth of the No. 10 envelope folio underneath it.
A belly band and a tag stop (the little bee image from Ephemeras Vintage Garden) were added to the inside of the flap along with a tab for easy opening.
A journaling card was made to insert under the belly band.
On the front of the flap, two pockets were added.
And two folded tags were created to slip inside them to create a faux waterfall effect.
A little mini art journal was made to slide inside the back cover tuck pocket. I filled it with a few pages of mixed media papers and simply tied them in with a piece of elastic cording so they could easily be removed and new ones added as the journal pages were completed.
Back cover done, now on to the front cover! Same dimensions of course as the back cover (4 1/2" x 6 1/4") and this time I made a pocket measuring 6" x 3 1/4" with an 1/8" gusset for another little mini art journal.
Another flap was added to the front cover pocket, this flap was created as a pocket flap with three spots for little No. 1 manila tags and a belly band.
The No. 1 manila tags were stamped with a discontinued Crafty Secrets stamp set, a tag was made to slide underneath the belly band and another tag stop added to the bottom (the butterfly image from Ephemera Vintage Garden).
Another mini art journal was created in the same manner as the first one to slide inside the front cover pocket.
Three pockets were added underneath the pocket flap.
And three tags were made to slide into the pockets.
Time to put it all together! I stacked the front and back covers together and measured the depth of the folio album. This became the width that I needed for the album spine plus I added about a 1/4" more in case I decided to stuff more into it (although at this point it's pretty well stuffed!). I added an inch on each side to this measurement, scored the cardstock at 1" on each long side and attached the spine to the outside of the front cover with double sided tape.
The spine was then attached to the outside of the back cover and voila, a folio album!
The covers and spine were covered with decorative papers, a few embellishments were added here and there (Tim Holtz's Mini Detailed Butterfly, Small Tattered Florals and Cameo Frame) and a belly band created to keep it closed (it just slides off and on). And that was it, my folio album was complete.
I made a little flip through video to show you the completed project, hope you will enjoy seeing it.
Thanks as always for stopping by today and thank you for bearing with me to the end, that was one long post! Hope that I've inspired you to enter our Book It! challenge, there is something so satisfying about making these little albums and I love the challenge of figuring out how to construct them. Have a wonderful weekend everyone and happy creating,
Hello everyone, Deb here today to announce our new challenge for the month of May:
Book It!
There is nothing better than curling up with a good book to take us away
to another place! This month we'd like you think about books - perhaps
you will make a book, or a journal, create a journal page showing a
scene from one of your favourite books (do please tell us what book!) or
a card showing someone reading or made using text stamps, stencils or
word stickers. Just remember to create in one of our preferred styles of
vintage, shabby, mixed media, art journaling, industrial, timeworn or
steampunk.
We love books and book making here at A Vintage Journey and we cannot wait to see what you create! You have until June 6th to link up your book inspired creations for a chance to be chosen by the Creative Guides as one of our three Pinworthies. Our Pinworthies receive a badge to place on their blog or website and will also be pinned to our Pinworthy board on Pinterest. Need a little inspiration to get you started? The Creative Guides have made some wonderful projects to share with you as always so enjoy the book inspired creations below and then Book It!
I have been consumed lately with making art journals and mini albums so the timing of our Book It! challenge was perfect! This little nature inspired folio album is based upon a design by papercrafter45 and is filled with pockets and tags and tuck spots and even a couple of little mini art journals. Pop by my blog for a peek at the inside and a flip through video and come back here to AVJ in two weeks time when I'll have a tutorial to share with you on how it was constructed.
I
used Eileen Hull's brand new Sizzix Notebook Die to create a book where
my 6 year old grand niece, Mila, can record the books she has read as a
new reader this year! I am so pleased that she loves to read, just
like her great aunt! Please stop by my blog to see the details and more photos of how I put this together!
Our
fabulous new challenge coincides with me flying off for a week's
holiday in Cyprus, so I just had to make a journal to record what I am
sure will be a fabulous holiday with my two old school friends. I have
used Eileen Hull's Journal Die and some gorgeous papers with a
Mediterranean feel for the covers and inside are ready to journal pages
with small collages and quotes. Please do join me over on my blog for more details.
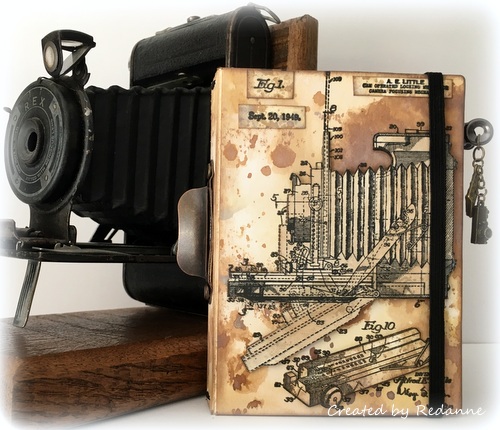
I
have a real love for old cameras and for making journals, so I combined
the two for Deb's challenge and created this grungy journal. If
you would like to see more please visit my BLOG.
For Deb's great challenge I have decided to revisit one of my favorite makes which is my Art Journal Cover. I created this cover over 5 years ago and I still love it. I hope you will join me to see more details on my blog here.
After
some mixed media meltdowns, I ended up going down a very simple route
for this challenge... using some Oxide playtime tags which had been
around for months to cover a couple of notebooks. Come over to Words and Pictures to find out what went wrong!
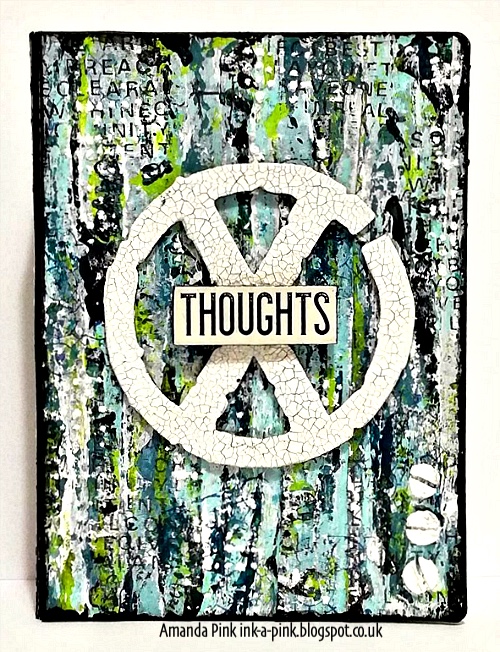
Having recently been treated to Eileen Hull's new notebook die Debs challenge provided the perfect opportunity for me to 'break it in' and create my own personal notebook that I can use to record my daily 'thoughts' of which I can assure you there are many - probably far too many!! I really wanted to 'make it my own' so have used colours, mediums, stamps dies and stencils that I love. To find out more please feel free to stop by my blog.
I attended an Antonis Tzanidakis workshop last weekend and felt in a very grungy mood when I embarked on creating this Eileen Hull journal/passport book. I have used patterned papers, acrylic paints and crackle glaze with oil paint to get this deep look to the finished covers. If you would like to see more details I'd love to see you at Bumblebees and Butterflies where all will be revealed.
Well, as always, the Creative Guides do not disappoint, what a wonderful and varied array of fabulous book themed projects! Hope that you've been inspired to join in the fun, just add your project to our InLinkz link up before 6:00 p.m. BST (that's British Summer Time) on June 6th, we can't wait to see what you create!