This is a unique challenge blog where we are inspired by and focus on the Vintage; shabby; mixed-media; art journaling; industrial, timeworn and steampunk genres and encompass the talent, flair, expertise and ideas of many artists that we are inspired by. We welcome all types of projects - cards, journaling, assemblage, layouts, albums, atcs, altered art in fact whatever you want to share (as long as it is in good taste).

Showing posts with label S@ndy. Show all posts

Friday, 20 December 2019

Holly Jolly Christmas Card Tutorial

Hello again Vintage Travelers,

It's S@ndy here with you today to share how I made this festive Holly Jolly Christmas Card.

I hope your holiday season is Merry & Bright and that you have had a chance to join our challenge this month.

When I hear Holly Jolly, my mind goes straight to Santa.  For this Santa the St Nick die from Tim Holtz was used.  When using this die, it is an exercise in paper piecing.  This is a large card measuring 5" X 7" leaving lots of space on the inside for writing a personal note.

I kept the inside clean and simple by using one extra panel edged with Vintage Photo Oxide Ink and one stamp from Elizabeth Craft Designs.  The other cards I made for this year are smaller but I needed a few larger ones for those special people in my life.


 Start with the basic card shown here in manila.  The other two panels for the front of the card are shown above as well.  

 Beginning with the craft colored panel stamp with background stamp in different areas using first and second generation stamping.  This panel was stamped with one of Tim Holtz's older script stamps and the Gina K amalgam ink, Chocolate Truffle.

 To give the panel a wintery look, rub some white pigment ink around the outside of the panel.  By doing this, it will make the background seem to move to the back.

 To give the panel a vintage look, it was stamped around the edges with the same amalgam ink and then clear embossing powder was added and heated.  This gives a nice frame for Santa.  I used some stamps from my stash that were stamped off the edge of the panel.

 When using a die that has not been used for awhile, I need a refresher.   A practice template, shown above, was made to help me remember how the pieces go together.  This is also a good way to see if edging is needed.  I liked the Vintage Photo Ink on the beard.  I drew around the face section so I could cut it out.

The template was used to cut out the face section on the final piece. By lining them up and then drawing around the opening - you get perfect placement.

 The face section was cut away because Velvet paper was used here - I wanted the face to look as if it were in the background behind his beard.

 Before Santa is placed on the card, the holly leaves need to be trimmed off (shown in the circle above) because they will be replaced with green later.

 After Santa was edged - he was placed on the card and then the mustache, hat and nose were added.  The nose is made with Nuvo Drops.

 The finishing touches were added - the holly leaves with small beads for the center and the eyes and eyebrows.
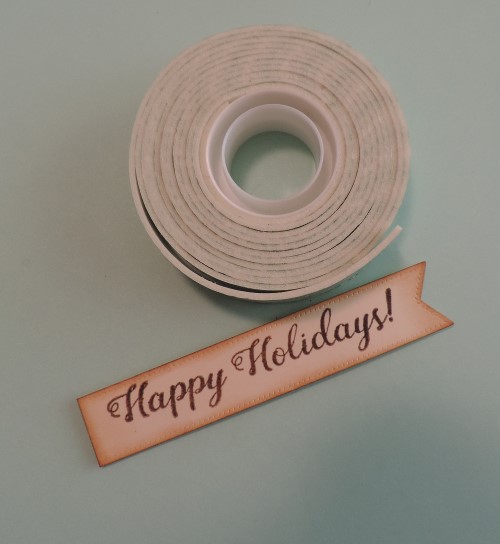
The Happy Holidays greeting was stamped on a banner (both from Elizabeth Craft Designs) and added to the card with foam tape to make it pop up.


Happy Holidays to you and your loved ones,
S@ndy

Friday, 14 December 2018

Paper Stash - Pinworthy Choices and Tag Friday Winner

Hello - S@ndy here with you today to announce our three Pinworthy winners for our Paper Stash challenge last month.  We had some fabulous entries, and we thank you all for joining in and sharing your creative adventures with us.

Selecting our pinworthies is difficult for the Creative Guides, and  narrowing it down to just three winners is a task taken seriously. So after much deliberation here are the three projects which really caught the eye of the Creative Guides:

In no particular order:


Congratulations to our winners - we will be in touch shortly with your badges and your creations will be pinned to our Pinterest boards.
Thanks once again to all of you who joined in the Paper Stash challenge. We hope you will join us this month for Julia's challenge Star Light Star Bright. All the Challenge details and an inspirational gallery of projects created by the Creative Guides can be located here.

Now for those of you who submitted a tag for our Tag Friday, we have a winner.  
That winner is:

#3 Karen's Creation


Congrats Karen!

Have a wonderful holiday season and happy crafting!
S@ndy & the Creative Guides


Friday, 2 November 2018

Paper Stash

Hi vintage travelers and welcome to a new challenge.  It's S@ndy - I'm your host this month with the theme of "Paper Stash".   Here is exactly how the challenge goes:

I am sure we all have them, those endless bits of beautiful scrapbook papers we have hoarded over the years. Create a project of any kind using them in creative ways in our preferred vintage, shabby, mixed media, art journaling, industrial, timeworn or steampunk styles.

We love to see what you make and how your imagination interrupts the challenge.  I invite you to link your creations below.  The creative guides have some fabulous Paper Stash projects to share as well - so let's take a look.

For this challenge I went with a Twist Panel Pop Up card.  I used some great paper from Graphic 45 and a die set from Karen Burniston.  I hope you will visit my blog where I have a video clip of how it opens.  Hope to see you there.

Our challenge this month is fabulous, but oh so difficult to cut into some of my absolutely favourite Paper Stash !!! I have used Eileen Hull's dies (Trinket Box and Needlework Book) to make a box with a little book inside using these gorgeous vintage papers, labels and tags. Please do join me on my blog if you would like to see more.

Tim Holtz Worn Wallpaper and Festive Overlay Stamp Set
Like many others, when I purchase new paper I really am reluctant to start using it! I have kept this project simple and got ahead with my Christmas Card making using the fabulous Tim Holtz Christmas Worn Wallpaper and Festive Overlay stamp set. More details and cards over on my blog today.

 
For our Paper Stash challenge, I pulled out the leftovers from my Tim Holtz Christmas pages from the last few years and pieced together a December Daily travelers journal using the Eileen Hull die.  I hope you'll pop by SewPaperPaint to see the details.

I am currently involved in a mail art group swap and decided to make the envelopes to send my swap items in, from one of my favourite paper collections. If you would like to see more, do come by
my blog

I am so happy to be playing in Sandy's Paper Stash challenge this month. Like many crafters I have so many lovely papers and it was really nice to be able to create this card for a dear friend's birthday, incorporating lots of papers/details. To view the step by step process on my blog click HERE Looking forward to viewing your entries xx

Brenda

I've chosen to make a vintage Christmas card using an off cut of an old 12x12 paper and a piece of the new Tim Holtz worn wallpapers. I really must use more of my paper stash to make cards this year then I'll hopefully make a bigger dent in the stack I've gt up on a shelf. If you'd like to see how the card came together please visit me over at Bumblebees and Butterflies.


Well, there you have it and I think you will agree, that's some awesome makes from the Creative Guides.  Don't forget to get that paper out and add your awesome project to the link below, you have until December 6.


Friday, 25 May 2018

Creative Card Making Tutorial - Time Flies

Hi Vintage Journey fans,

It's S@ndy here to share a card with you that is made in that wonderful vintage, steampunk style that we all love.  I hope you enjoy -

It seems that I'm always looking for a masculine card and they are a little difficult but I think this one fits the bill so let's get started.

First thing we need are some butterflies.  Two solid and two detailed butterflies were cut out using the Butterfly Apeture die from Elizabeth Craft Designs (ECD).  They were then cut in half and the patterns were mixed and attached to each other just at the body portion leaving the wings free.

The finished size of this card is 6" X 6" so start with a 6" X 12" piece of cardstock that is scored in the middle, wood grain paper was used here.  Using the Weathered Clock die from Tim Holtz - cut two clocks from black.  An extra clock was cut for the upper right corner of the card, not shown.  Using the ECD Take Time For You die set - cut one pocket watch and chain from tan cardstock and the hands from black.

Next using the Tim Holtz Clockwork Stencil - stencil some clocks on the front of the card, copper metallic ink was used here with a blending tool.

Add clock to lower left corner and trim off the excess.

  Using double sided foam tape, add  to butterfly and then add to card.  Add the pocket watch next using the same method with the foam tape.  Attach the chain piece to make the pocket watch appear to be flying.

Cut out all words and letters from black and attach as shown below.  Add one small piece of the Weathered Clock to the top right hand side of card.  Word Set 1 and Lower Case Alphabet were used here - both from ECD.

Use a corner rounder to round out the two bottom corners.  Edge all around the card with ink.  Distress Oxide Ink, Vintage Photo, was used here.

 For the inside - a woodgrain mat was cut 5.75" square and then bottom corners were rounded.
Stencil lightly with the same stencil as above and add ink around the edges of the panel.

For the finishing touch on the inside add any sentiment that you need.


Thanks for stopping by today - I hope you have been inspired.
S@ndy

If you would like more information on the items I used please stop by my blog HERE.

Friday, 12 January 2018

Winter Wonderland Winner and Pinworthies

Hi Vintage Journey Travelers,

Thank you everyone who entered. We had a fabulous array of talent this month. 
Our winner chosen by random org is:

That's #70 Aimeslee Winans of Paper-Paisley's Art Adventures with this lovely Artist Post Card featuring vintage German scrap images.


Congratulations Aimeslee!  We'll be in touch shortly with your winner's badge and details of your sponsor prize from the fabulous Andy Skinner.

We had so many wonderful entries this month that it was very difficult for the team to decide on our Pinworthy winners but here are the results. 

Our talented winners are:

Toni of Artistic Craft Dabbler 
https://craftdabbler-toni.blogspot.co.uk/2017/12/festive-stamps-and-stencils-stamps-and.html

Nicola of Paper Profusion
https://paperprofusion.blogspot.ie/2017/12/merry-christmas.html

Christine of Crafty Endeavours
http://craftyfield.blogspot.co.uk/2017/12/glistening-snow-and-winter-trees.html

Huge congratulations to our three Pinworthies this month, you really did create the most wonderful Winter Wonderlands. We will contact you shortly regarding your Pinworthy badge. 

We hope you will visit again on Monday for our regular Destination Inspiration post, using the contents of the monthly travel bag, and we hope too, that you will join in our current challenge - Think Inside Or Outside The Box, details of which can be found HERE.

Wishing you a creative weekend,

S@ndy and the Creative Guides 

Monday, 11 December 2017

Destination Inspiration - Welcome to Terminal 2

Hi Vintage Journey travelers and welcome to Terminal 2.  It's S@ndy here as your guide for this  creative stop.

Let's see what is in the travel bag -

Tissue paper
Embossing
Silver or Gold
Acetate

I've put together a large tag using these fun items so let's get started.


Beginning with one of the Tim Holtz Tags, coat with gesso.  Cover tag with Tissue Wrap using gel medium. 

For this project I'm trying out a new, to me, product from Aladine called Izink.  I put a drop on my craft matt and added some water (one spritz). 

After mixing the Izink and water, I applied the color to my tissue covered tag.
This color is Topaz - when dry, it leaves a lovely pearlized sheen on the surface.

Next I added some Izink Dye Ink around the edges.  I then wiped most of it off leaving me with that aged look that we all love.

Now for the embossing part - I dabbed embossing ink all around the edges of the tag and then added  silver embossing powder.  I worked in sections and heated it as I went along so it was easy to hold on to.

In the left corner of the tag I added some Geranium Izink and moved it around so that it faded into the background.  I stamped and embossed a flower from an Aladine clear stamp set and then glued in place.

Using the same stamp set I stamped and embossed three more flowers and five leaves on kraft cardstock and then cut them out.

Using the Tim Holtz Layered Butterfly die and matching embossing folder I cut 2 butterflies from acetate.  They were then embossed.

Using some thin wire I created the top of the butterfly.  From my stash I got some rhinestones for the swirl.

Because these inks have some unusual properties, being acrylic inks, I was able to add a drop of alcohol on my matt and then mix the ink unto it creating my own alcohol ink.  I used more Geranium, then Mimosa and was able to come up with the color I wanted.  I then dabbed the ink on one of the acetate butterflies with a color blender and a felt pad.  It's important to use a felt tip on the blender for this process.

For the second butterfly I again mixed the ink with alcohol but this time I added each color separately.  Using the Topaz first and then the Geranium right on top which made the two colors mix creating the desired color.

When everything was dry, which didn't take long, I began adding the elements to the tag.

I have miles of ribbon but, for some reason, it seems that I never have the color I'm looking for.  To solve this problem I simply colored my own.  Using white ribbon - wet ribbon completely with water, add a dot of Izink Topaz to craft matt & spritz with water.  After mixing the ink and water simply dip ribbon into ink.  Dry with heat tool and you have perfectly matched ribbon.


The flowers and leaves were added with some foam tape to give demention.
The final touches are some Tim Holtz Remnant Rubs and Nuvo Drops.

Thanks for joining me at this stop on our travels,
S@ndy