This is a unique challenge blog where we are inspired by and focus on the Vintage; shabby; mixed-media; art journaling; industrial, timeworn and steampunk genres and encompass the talent, flair, expertise and ideas of many artists that we are inspired by. We welcome all types of projects - cards, journaling, assemblage, layouts, albums, atcs, altered art in fact whatever you want to share (as long as it is in good taste).

Showing posts with label Christmas. Show all posts

Friday, 4 December 2020

Merry Little Christmas and Important News

 Welcome to our December Challenge.

 This time of year always brings us festive cheer and a focus on seasonal projects to inspire and motivate us leading into the winter and up to Christmas.  We continue with this focus but with a twist as we have some important news.  Sadly this is the very last challenge theme on A Vintage Journey.

(Image from The Graphics Fairy)

2020 has brought us all many different kinds of opportunities and challenges and while many people are hunkered down enjoying their hobbies and pastimes others of us have taken the opportunity to completely change and explore new paths.  There's no doubt about it, wherever you are in the world and due to the Covid-19 virus, life as we knew it has become different and as individuals we've had to make changes - both big and small - to our everyday lives.

What has become particularly noticeable to us is how we, as a creative community, seem to have changed our habits using the internet and over past months a wider use of differing social media platforms has allowed us to reach into each other's studios and meet together to learn and share our creations in a fascinating variety of distanced ways.  Internet relationships for many seem not to have suffered but blossomed allowing us to diversify and explore hobbies and interests we might never have had before.

A Vintage Journey has always been a place to motivate, inspire and share our creations within a likeminded community, a place to teach and learn, to excite and stretch the boundaries of our imaginations. But within this new world we live in and the changes to how we interact, blogging seems to be less popular than it was. It can be a very time consuming way to 'show and tell' whilst elsewhere 'like' buttons that are quicker and easier to express our feelings enable us to move around the community in much faster ways.

It is, therefore, with great sadness that we see fewer visits, entries and communications on our very successful blog and feel it is time to close it down and give ourselves time to see out the pandemic and watch with interest how the community relates to the changes it has brought to how we will all operate in the future.

We have come together for our last challenge to bring small ATC creations that focus on that Christmas cheer we look forward to and some nostalgic reflection in saying goodbye.


Merry Little Christmas

Celebrate the season by making one or a set of ATCs depicting Christmas scenes or colours. 


Brenda

A mixed media background and some festive embellishments with my favourite reds and green for that wintry Christmassy feel. Once I had finished them I decided I needed to use them for decorations at home. Do pop over to Bumblebees and Butterflies to see how I achieved that.


Jennie


I have returned to some old and loved Christmas dies, stamps and inks to create these two ATCs celebrating the Christmas Season. Do join me over on my blog if you would like to see how they came together.

 Creating ATCs is a first for me, who'd have thought that I'd have so much fun creating these mini artworks and of course I seem to have been singing "Have Yourself A Merry Little Christmas" all month too (grin!). I used some old playing cards as my base, layering my Christmassy design over the top using Tim Holtz collage paper, Distress Ink, embossing powder, die cuts and stickers - Merry Christmas everyone! For more details please pop over to my blog Let's Art Journal

 Astrid

With this Christmas ATC I would like to wish everyone a blessed and joyful Christmas time. May Peace replace anxiety, fear and all the upheavals this year has brought so many. A Merry Little Christmas to you all!


 Nikki


I am mixing it all up for my Christmas ATC's with paint, ink, Tim Holtz and PaperArtsy stamps. Be lovely to see you at Addicted to Art for a few details.

S@ndy


As the last make for Vintage Journey I have made two of my favorite things to share with you.  The flower of the season is one of beauties of the year.  Who wouldn't love a Candy Cane Heart to say, not goodbye, see you again soon.


 Alison

I've been playing with Rustic Wilderness Distress Inks and Oxides to create the winter greenery in the background of these festive ATCs, and then there's lots of lovely Tim Holtz ephemera collaged over the top.  Come and see more over at Words and Pictures.


 Julia

For our final AVJ Challenge - Merry Little Christmas ATCs,  I created a snowy woods using a Dox Spray for the background and Distress Ink and Embossing Paste through stencils.  The sparkle I added to the snowflakes is not showing in this photo but I have one on my blog that hopefully does!  Please come see how I created my Merry Christmas Winter Woods on my blog post here.


Annie


Hi everyone x Apologies for my less than clear photographs x  I really wish you could view the extraordinary sparkle that is coming from both these ATC's. It really is spectacular and will look even nicer in the evening light. I plan to adhere my ATC's to Christmas cards as they are so pretty. For more details please visit my blog HERE
 

 Barbara


For the final challenge of AVJ, I have prepared like my mates two Atcs about Christmas!  I think they reflect my mood a bit melancholy in thinking that we will no longer have this appointment! At the same time, I want to wish everyone from the bottom of my heart a wonderful Christmas certainly different from the previous ones and  I hope that the events of the last year we will make us understand what its sense really is! 


Since discovering the joy of 'shakers', in my last AVJ project, I'm afraid I just can't stop! I've coupled this with another new found pleasure to create these ATCs. If you'd like to see more, please hop over to my blog with this link and all will be revealed.


I don't often create ATC's so I had fun creating my little festive piece of art for this challenge using some of my much loved Tim Holtz dies and PaperArtsy paints and crackle glaze. 
There's more to see and read over on my blog, ink-a-pink so please feel free to pop by.


*******************************


Goodbye AVJ 

Reflect on what AVJ has brought to you in the time you have known us and share another one or set of ATCs to reflect those thoughts or memories.


“How lucky I am to have something that makes saying goodbye so hard.”

A.A. Milne (Winnie-the-Pooh)

So many happy memories of working with all the Creative Guides, present and past; so many friendships that have been forged and the wonderful journey of developing myself more as an artist. These have been an amazing 6+ years and I wouldn't have changed them for the world.
I will hold it all so close to my heart forever.

 Jennie

My ATC celebrates my seven wonderful years creating for A Vintage Journey. It has certainly been a journey of discovery with a wonderful team of supportive and creative friends from around the world. Each member of the team (both present and past) has been an inspirational star and this has been reflected in the wonderful entries we see each month from you all. Hopefully this is not goodbye .... but au revoir x


 Jo


This quote puts things into perspective for me - "Don't cry because it's over, smile because it happened" (Dr. Seuss).  I certainly have plenty to smile about; from joining in the AVJ challenges to becoming a Creative Guide something that I always wished for. I have made some wonderful friends along the way, thank you for all your inspiration and being part of my creative journey - it's been a blast! x


 Astrid

As one of of the original Creative Guides, creating this farewell ATC was a very special moment on my crafting journey, and what a special journey it has been. This team has always had a special place in my heart, and I know that my fellow teamies will remain my friends as our creative journey continues, albeit on different platforms perhaps. I would like to use this moment to thank everyone, team mates and participants of our challenges, thank you for all your inspiration!


Ann

 It's time to say goodbye to A Vintage Journey! I'm very happy and honored to be a part of this amazing team, thank you for your kindness and support. I'll miss you. 


 Nikki


Well it's time to say goodbye to A Vintage Journey! My first design team post was nearly at the beginning, but not quite - but it has been a wonderful 6.5 years of craft and friendship. This quote seemed appropriate for today. With love to you all.

 S@ndy


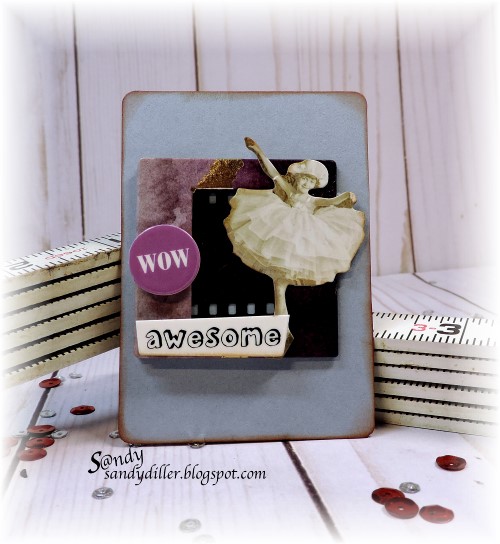
It has been Awesome seeing the talent of our followers and sharing creations here at A Vintage Journey.  As they say  "all good things must come to an end" but that does not mean that we won't be dropping by for a visit now and then.  It has been my great pleasure to be part of this great adventure.  I will not be sad that it has ended but happy that it happened.


 Julia


My ATC is celebrating all of the wonderful, talented and creative friends I have made being on the AVJ Creative Guides team for the past 5 years.  My sentiment speaks to a lot of my feelings felt both living through this past year and in the ending of this team and challenge blog - Gratitude, People, Peace, You, Freedom, Love, Beauty, Change, Compassion, Serenity and Friendship!  It may be the end of the blog - but certainly not the end of the friendships!  See how I made this on my blog post here.


 Annie


Being part of this wonderful challenge blog since the beginning has been the most amazing experience and I am very grateful to Brenda & Chris x Whilst I am sad that our journey is ending I know that I will continue to keep in touch with my DT sister's/friends, many of whom I have personally met.  I also thank our followers for all the inspiration they have provided during our 6 3/4 years.  Our journey has not ended it's just changed course xx Take care xx
 

Alison


I've been here from the beginning so this is a definitely a wrench, but I'm sure it's the right decision.  It was so exciting to be invited by Brenda to be a part of this wonderful Vintage Journey, and I've forged firm and lasting friendships en route.  Of course, it's sad that this stage of the journey is over, but I've no doubt we will all continue to meet one another somewhere along the road, so my ATC has a message of looking forward with excitement and hope, and includes some of my favourite things. You can see it in more detail over at Words and Pictures.  Love and thanks to all the Creative Guides I've enjoyed working alongside and to all the amazing participants over the years.  It's been a wonderful ride.


Barbara

I will really miss the appointment with A Vintage Journey and with all the Creative Guides that have always inspired me! I want to tell all of you who have always followed us that this group was a truly wonderful group, a group where you could always find support and friendship, and yes I say it again I will miss it very much! I know that I will not lose their friendship and that we will all stay in touch as I hope will happen with you who have always followed us. With love. 


It has been one of my greatest, crafting pleasures, to have hopped on board A Vintage Journey, as one of the Creative Guides. It's been a real honour to have shared at least part of the journey, with such a fantastic group of talented women. I would like to thank Brenda and the rest of the team for creating such a special space in blogland x


Amanda

I was thrilled to join AVJ back in November 2015 and have loved every minute being part of such an inspiring, encouraging, supportive, caring and creative team that I consider to be my family of valued friends. It's been an absolute pleasure and honour and an amazing ride AVJ and I thank you wholeheartedly for making my life so much richer both personally and creatively. 


**********************

Thank you to to each and every who has visited, participated, commented and loved what we developed and achieved. We have enjoyed every moment of designing, creating and sharing our ideas and projects hoping to bring our experience, talents and new perspectives with every new creative project.

If you would like to participate in the challenge one last time please add your ATC projects depicting the Festive and/or 'Au Revoir' themes to the Linky below by 6 pm GMT on the 28th December and we will be back to publish the winners as well and say our final farewells on the 31st December.  There won't be any additional posts this month, so we will announce the November Pairs, Trios and Sets Pinworthies in that farewell post on the 31st December too.  We will also add the projects to our Pinterest Pages. Just remember to create your project in one of our preferred styles: vintage, shabby, mixed media, art journalling, industrial, timeworn or steampunk.

Thank you and Merry Christmas from us all.

hugs Brenda and the Team xxxx

You are invited to the Inlinkz link party!

Click here to enter

Friday, 20 November 2020

Pairs Trios and Sets Tutorial

 Hi everybody! As promised I'm back with a tutorial showing how I made my shaker decorations, for our latest challenge, Pairs Trios and Sets. Lets get started....

I started off with these domed frames I bought from a craft show bargain bin several years ago. There were 5 in the pack and I've lost count of the number of times I've picked them up, looked at the, waited for inspiration to strike  and then put them away for another day. Luckily for me, this time inspiration was not far away! 
I used some lovely papers by Tim Holtz, from last year's Christmas release. Firstly, I cut out an oval shape, just a little bigger than the outer frame. I adhered this to the surface, and used a craft knife to cut away the centre. I then used a sanding block to remove the paper from around the outside edge.......
Sanding the inside edge of the oval was a little more tricky, to do this, I wrapped a piece of sand paper around a pencil. This made it much more easy to remove the surplus paper. Once this was done, I blended a little Vintage Photo Distress Ink around both the inside and outside edges of the frame. I then followed the same procedure for the other two frames, using different but similar papers from the pack.
 I covered the centre of the base of each frame, with an oval piece of paper, slightly larger than the open frame. I also drew around the inside of the frame to help with the placement of the elements that go inside the dome. 
I cut several pieces of foliage, using these Tim Holtz dies and some Craft Core paper. I dotted a little white paint on the surface to suggest snow.
I added a little colour to the Paper Dolls using my Distress Markers, as well as dimensional tape to the backs. It was then time to assemble the elements.....
I firstly adhered the background foliage die cuts and then the slightly raised Paper Dolls. Next I secured the acrylic dome using strong clear glue. I left about 1 1/2 inches unglued at the top so that I could add the 'snow'. Once the glue was dry, I gently lifted the open part and spooned in the glitter.....
 I used three different types of glitter, Diamond Dust which is slightly heavier and more like glass glitter, I also used some very fine holographic glitter, as well as a sprinkling of tiny glitter stars. 
I then secured the opening at the top of the dome with a little more clear glue, and attached the outer frame. The finishing touches, were to add an arrangement of die cut foliage with some tiny pine cones, and a little die cut paper bow. 

This was a most enjoyable project to make. I have one more dome left which I think I will use to make another shaker decoration, and this time, I shall use pictures of my own dearly departed ancestors. 
I have enjoyed seeing the wonderful projects you have uploaded for our Pairs Trios and Sets Challenge. If you haven't had chance to join in yet, don't worry as you have until 18:00hrs on December 3rd. Plenty of time ! x 


Friday, 22 November 2019

Vintage Easel Card - Creative Cardmarking

Vintage Easel Card with Tim Holtz products
Hi everyone, Nikki here to share an idea for this months Creative Cardmaking post. I am not normally one for fancy card folds but I recently saw a version of this card and thought it would make a great 'special' Christmas card.

The card is based on a square - so any size could be used. I used a 6 inch square card. I added an extra fold at 1 1/2 inches. All I then needed to do was remove the corners. I marked in pencil at 3 inches along the short edge and cut to the additional fold. I could then mirror this at the other end easily.
 You can see in my picture above some extra bits of card. There are 2 squares to fit the base and the easel part of the card, and an extra piece for the inside, although I used cream card in the end as you can see below.
I covered my 2 squares with some Christmas themed paper - I added a little ink to the edges. I didn't have quite enough and wanted an extra bit for my greeting on the base so I cut a square out of the top piece and replaced with the cream square stamped with some Christmas words.
The focal point on the card is the Poinsettia - I die cut several layers from Tim Holtz Tattered Poinsettia die and used Festive Berries and Aged Mahogany Distress inks to colour.

Tim's Holiday Greens dies were used to add some Holly and greenery behind the Poinsettia - again I used Distress Inks (Pine Needles and Mowed Lawn) to get some colour variation.

I chose one of the greetings from Tim Holtz stamp set Festive Overlays - stamped on card and then layered before using foam pads to raise this - so the easel stands up!
And it also folds flat - well it would if the flower wasn't a little dimensional - but I found it would still - just - go in the envelope which came with the card - but I won't be putting it in the post!
Now to decide who to give it to!
Thanks for stopping by today. Our latest challenge - Window on Your World - still has 2 weeks to run as there are 5 Fridays this month. That also means we will be back next week with Tag Friday.

In the meantime - have a great weekend.
Nikki
xxx

Friday, 15 November 2019

Window On Your World Tunnel Book Tutorial

Hello everyone and thank you for stopping by.  It's Deb here with you today to share a tutorial on how I made my Winter Wonderland tunnel book for our Window On Your World challenge.


Grab a cup of your favourite beverage and let's get started.

Cut a piece of 12" x 12" scrapbook paper in half so your have two pieces measuring 6" x 12".

Score both pieces on the long side, starting at 3 1/2" and scoring every half inch up to 6 1/2".

Fold on the score lines as shown.


The 3 1/2" segments will become the front cover of your tunnel book and the 5 1/2" segments will overlap to form the back cover of your book.

Adhere the back covers together, making sure that the back of the tunnel book is 6" wide from score line to score line.


We now have the cover of our tunnel book completed, set it aside for now.  Cut 4 pieces of cardstock, each one just a smidgen less than 6" square.  Set one 6" square piece aside for the time being (sorry, forgot to take a picture of that step!).

Select 3 graduated nesting dies, I used circular dies that measured 5", 4 1/2" and 4".  Center the 5" die on one of the 6" square pieces of cardstock and die cut a window.  Place another piece of 6" square cardstock behind the die cut opening, lining up all of the edges, and center the 4 1/2" die in the opening.  Die cut the window on the second piece of cardstock.


Place the third 6" square behind the piece with the 4 1/2" window and center the 4" die within the opening.  Die cut the third window.  Set all of the die cut pieces aside for the moment.

Ink the last piece of 6" square cardstock with Distress inks in shades of blue, dipping it into puddles of ink until you are happy with the colour.


Ink more cardstock with Distress inks in shades of green in the same manner and die cut two Tree Line die cuts.  Die cut the Winter Wonderland stag from sanded Classic Kraft Stock and add the wreath around his neck if you'd like (the wreath die is from the Village Christmastime die set).

Overlay the 4" die cut window onto the inked background so that you get the placement right and adhere the Tree Line die cuts, overlapping and offsetting them slightly.  Adhere the deer on top of the Tree Line die cuts.  Add some snow along the bottom if desired with a white sparkle embossing powder.


Apply double sided tape to the back of the background panel and adhere it onto the back cover of your tunnel book.

Stencil a design onto the front of the 4" die cut window piece (this is Carta Bella's Holly stencil).  Die cut some Mini Holiday Greens from more Distress Ink coloured cardstock.


Adhere the 4" window onto the front of the 1/2" accordion fold that is closest to the background, centering the window top and bottom and side to side.  I found it easier to use a liquid adhesive for this step so you had a little play time to make the sure the window was centered properly in your tunnel book.  Adhere the die cut greenery around the opening, making sure that it doesn't obscure your focal point.

Stencil the 4 1/2" die cut window  piece with a design of your choice (this is Simple Stories Happy Trials stencil) and stamp and die cut some Mini Swirly Snowflakes.


Adhere the 4 1/2" window on top of the next 1/2" accordion fold in our tunnel book.  Adhere the Mini Swirly Snowflakes on top of the window, staggering them so you can still see the Mini Holiday Greens die cuts behind.

Stencil a design on the last 5" die cut window piece.  Make sure that whatever stencil you use has a repeating pattern as we will be continuing this design onto the inside covers of your tunnel book (this is Tim Holtz's Starry Layering stencil).  Die cut some stars from sanded gold Metallic Kraft Stock.


Adhere the 5" window on top of the last 1/2" accordion fold in your tunnel book.  Don't glue the stars around the outside quick yet.

Line up your stencil with the pattern on the 5" window and continue to stencil the pattern onto the insides of your tunnel book covers.


Adhere the die cut gold stars around the outside of the 5" window, staggering their placement so you can see the layers below.  Cut more Tree Line die cuts from green inked cardstock and adhere them on either side of the tunnel book covers.  Die cut two Woodlands trees from green inked cardstock and adhere one on each side, over top of the Tree Line die cuts.  Add a small gold star to the top of each tree if desired.

Decorate the front covers of your tunnel book with more Tree Line die cuts and some Mini Paper Snowflakes die cuts.  I designed the covers to overlap slightly but if you don't want them overlapped trim a 1/2" off each cover so the meet in the middle (probably best to do that before you decorate the inside of the covers!!).  Dye a piece of ribbon with Distress Ink to tie around our tunnel book to keep it closed and you are done.


Here are a few closeups of the completed Winter Wonderland tunnel book.


Hope you enjoyed seeing how it came together and that you will consider joining in our Window On Your World challenge, you have until December 5th to enter.  Thanks so much for stopping by today and as always, happy creating!

Deb xo