This is a unique challenge blog where we are inspired by and focus on the Vintage; shabby; mixed-media; art journaling; industrial, timeworn and steampunk genres and encompass the talent, flair, expertise and ideas of many artists that we are inspired by. We welcome all types of projects - cards, journaling, assemblage, layouts, albums, atcs, altered art in fact whatever you want to share (as long as it is in good taste).
Hello everyone, Deb here to announce our Pinworthy winners for July's Watercolour Wonders challenge. As usual we had many fabulous entries and we want to thank each and every one of you for taking the time to enter our challenge. But we had to narrow it down to our three favourites so without further ado here are our choices.
Tracey's faux ceramic tiles are amazing! We loved the dimension and texture combined with the gouache, background stamping and triple embossing, simply lovely.
And what's not to love about Christine's lovely Christmas In July card. The soft watercolour washed sky in the background combined with that wonderful watercolour pencil stamped bird made for a delightful wintery scene.
Thanks again to everyone who joined in our July Watercolour Wonders challenge and we hope that you will also be able to join us for our current challenge, Tag Your It! Can't wait to see what you create,
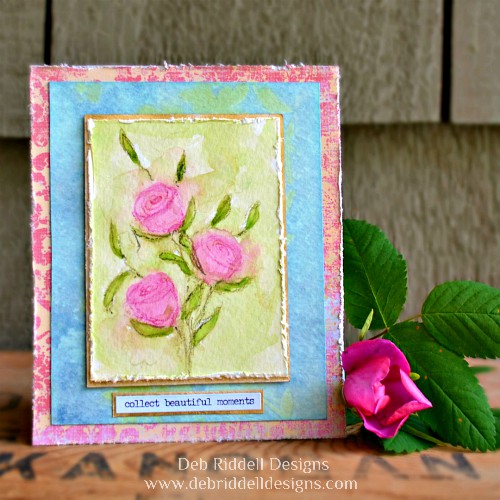
Hello, it's Deb back with you again to share a tutorial on how I created my Beautiful Moments watercolour painting for our current Watercolour Wonders challenge.
This month we want to see what can you create with water reactive mediums. There are lots of options - watercolour paints, dye inks that react with water, or any of those wonderful powders that bloom to life when sprinkled onto a wet surface. Just remember to create your project in one of our preferred styles: vintage, shabby, mixed media, art journaling, industrial, timeworn or steampunk.
I decided to paint my little floral watercolour study using watercolour paints and watercolour pencils.
It was super easy to do and believe me, if I can do it anyone can because I am most certainly not an illustrator! The secret I have found is to hold the watercolour pencil near the end and lightly sketch your florals without worrying about how realistic they look. You are looking for a representation of the flowers, not a botanical study. I've made a quick little video to show you how I made my sketch with the watercolour pencils.
See, easy right? After sketching, mix a little green watercolour paint and apply it to the sketched leaves in a loose fashion with a round paint brush.
Then mix some pink or red watercolour and apply it to the sketched flowers, don't worry if the paints bleed together a bit, that's part of the joy of watercolour!
While the paint is still wet, go back to the leaves and flowers and sketch back over them with the watercolour pencils. Add some 'swirls' to the top of the flowers to simulate petals.
Make a light green wash and colour in the background around your flowers, letting the paints mix and blend. Add a little bit of clean water here and there to help the paint colours move into each other.
Take the green watercolour pencil and sketch the stems back in while the paint is still damp. Set the painting aside to dry.
Add another water reactive medium to your painting by creating a background with Distress Ink. Ink up the BACK of a floral stencil with blue Distress Ink, spritz the inked stencil with water and press it firmly onto a piece of watercolour paper. Blot up any of the ink that comes up through the stencil. Let the blue ink dry.
Replace the stencil over top of your monoprint, lining it up, and then ink with green Distress Ink through the stencil as you normally would.
Trim your watercolour floral to size and tatter the edges with a distress tool or your scissors. Mount the watercolour painting on to a piece of sanded gold Metallic Kraft Stock with a scant 1/8" reveal.
Cut the stenciled background about 1/2" larger on all sides than your watercolour painting and mount the painting on top with foam strips or squares.
Select a sentiment and mount it on another piece of sanded gold Metallic Kraftstock with a scant 1/8" reveal. Centre the sentiment below the painting.
Select a piece of coordinating scrapbook paper for your background 'frame' and lightly distress the edges with a distress tool or your scissors.
If desired, add a die cut easel to the back of the scrapbook paper frame for display or you could also add the assembly to a card blank to make a lovely all occasions greeting card.
Centre your watercolour painting on top of the scrapbook paper frame and you are done.
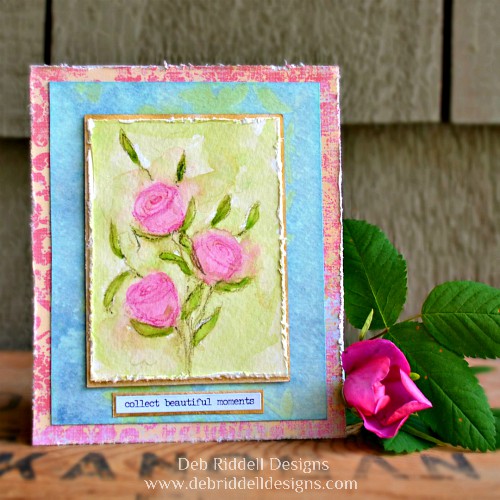
Here are a few more pictures of the finished painting.
I hope that you've enjoyed seeing how my little floral watercolour study came together and that you will join in our Watercolour Wonders challenge with your own watercolour project, you have until August 6th to enter. Can't wait to see what you create, thanks so much for stopping by and happy creating!
Hello everyone and welcome to our July challenge, Watercolour Wonders! It's Deb here and this month we would love to see projects created with any watercolour medium that you have in your stash. Here is the challenge brief:
This month we want to see what you can create with water reactive mediums. There are lots of options - watercolour paints, dye inks that react with water, or any of those wonderful powders that bloom to life when sprinkled onto a wet surface. Just remember to create your project in one of our preferred styles: vintage, shabby, mixed media, art journaling, industrial, timeworn or steampunk.
The Creative Guides will choose their three favourites from all of the entries and each winner will receive a Pinworthy Badge to post on their blog or website as well as having their project pinned to our Pinworthy board on Pinterest. You have until August 6th to enter our challenge so get out your paints, powders, inks and pencils and start creating!
As usual, the Creative Guides have some projects to help inspire you, be sure to visit their blogs and leave them some comment love.
For our challenge I created a little floral watercolour painting with watercolour paints and watercolour pencils, it was super easy to do and I will have a step by step tutorial to share with you here at A Vintage Journey in a couple of weeks time. In the meantime, pop over to my blog for a few closeups of the finished painting.
Although
I am challenging myself to some daily watercolouring for World
Watercolour Month, I actually used water-reactive Distress Inks for
Deb's lovely and well-timed Watercolour Wonders theme. If you'd like to
see some more details of these thistle tags, do come and visit Words and Pictures.
I
love using Distress Inks as a watercolour medium and had fun painting
these wonderful cone flowers and then going back to some basic watery
Distress Ink Techniques for the background and ribbon. Do join me over
at Live The Dream for all the details.
For Deb's lovely watercolour challenge, I've chosen to break out my
Brushos, Pixie Powders and watercolour pens to make this sea themed home
decor piece. If you'd like to see how it came together, feel free to
hop over to the Artistic Craft Dabbler blog with this link.
Wonderful projects as always, as I'm sure you will agree, and hope that you've been inspired to start playing in the water as well. Link your projects up below, we can't wait to see what you create!