This is a unique challenge blog where we are inspired by and focus on the Vintage; shabby; mixed-media; art journaling; industrial, timeworn and steampunk genres and encompass the talent, flair, expertise and ideas of many artists that we are inspired by. We welcome all types of projects - cards, journaling, assemblage, layouts, albums, atcs, altered art in fact whatever you want to share (as long as it is in good taste).

Monday, 14 December 2015

Destination Inspiration -December, Terminal #2

Hi everyone :-) we have reached Terminal 2 of December's Journey and it's Annie here as your Creative Guide.  I am ready to share some further inspiration using our amazing travel bag items as detailed below:

1. Product -Remnant Rubs
2. Technique-Extreme Masking-page, page 61 of CC1
3. Colour-Festive Berries
4. Substrate-ATC's

This was a real challenge as the extreme masking technique, which was my choice, actually works better on a larger substrate, where you can add more layers of stamping detail.
However, sometimes it's good to play outside your comfort zone !!!!!!

I cut my ATC using Tim Holtz Bigz Die, which includes small corners.
 As I did not have any of Tim's masking sheets I required to improvise. To do this I took the stamp and die set you can see below, cutting out the dies, which also left me with a negative over which to stamp.
 Holding the disc cut pieces in place I began to ink the ATC using Wilted Violet DI.  Once complete I applied Festive Berries and Mermaid Lagoon DI's.
 Once I was happy with the blend of colours on my ATC I inked some Tim Holtz stamps with Jet Black Archival Ink. 
 The ATC corners were inked with Festive Berries DI and then adhered to the ATC with Cosmic Shimmer Glue. I applied some glue to my non stick mat and used my fingers to apply it to my corners.
 Rub Ons were then applied to the ATC creating a further layer. I also added an embellishment from my stash and a little disc on which I stamped Merci.
The same technique was applied to the second ATC below using the butterfly die cuts from the same set as the Eiffel Tower etc. I applied Vintage Photo and Festive Berries DI's and more stamping of Tim's Stampers Anonymous stamps.
 More Rub Ons were applied using the rub on tool.
 And to finish it off I applied some little butterfly die cuts, which were gifted by my lovely friend Anne. (Redanne)
 And there you have it two ATC's using Tim's Extreme Masking Technique, Festive Berries DI and Rub-Ons.
Thank You for hopping on board and I hope you have been inspired. It's been great travelling with you xx

Our current monthly challenge is 'Vintage Christmas'(details HERE) and it would be lovely to see you joining in.  Do please check out what my talented teamies have created to inspire you.


Huge hugs
Annie xx

Sunday, 13 December 2015

A Seasonal Secret Santa

Welcome everyone to a very special post added as an extra into the normal routine of blogging for A Vintage Journey.  We have the most amazing group of gifted and talented Creative Guides who are also the most incredibly kind, supportive, helpful, giving and friendly people you could ever wish to be with on a design team with. As the festive season advances we turn our thoughts to designing and making for other people in our lives, in fact some-one of our very own team. Unfortunately when we started the process for getting this post done we didn't have Deb, Amanda and Olga with us so they were not able to join in and share a make with us but the other Creative Guides are here and so it is with great pleasure that I am able to share with you our Christmas gifts to each other.

For the second year running we have run a Secret Santa gift exchange with everyone's name going into a hat and being pulled out to see who they would make something for. You might like to grab a cuppa (or something stronger depending on the time of day you are reading this) and peruse the wonderful array of projects that have been winging their way - some across the world - to each other's houses.


I wanted to create something that Brenda could bring out each year to display with her cards, something that was vintage and dimensional. I also wanted to create something a little different and use one of Tim Holtz dies to create a type of shadow box. I always love to create dimension in my pieces of art, along with adding layers to add a design that are both tactile and interesting to look at. I used Tim Holtz Arched Frame and Sized Arches dies to create my piece decorated with Tim Holtz Merriment and Yuletide papers. I really enjoyed creating this piece and I hope Brenda enjoys displaying it!


I was Secret Santa for Anne Redfern this year and I made her a little Christmas book along with a box to store it in. I was inspired by a book made by Anna-Karin whom I link to on my post. It's the first small book of this kind that I have ever made - and I am so happy with how it came out. I hope Anne is too, that she will enjoy it for years to come and will think of me as she turns the pages! You will find a plethora of photos showing just how I put this together and how I decorated each page on my blog post here.


As my parcel was travelling to the US I had to ensure that it would get there in one piece so I decided to make this little Christmas folio book for Sandy to record some Christmas memories. Do hop on over to my blog if you want to see the pockets and tags inside.


Brenda to Alison

My Secret Santa gift this year is for the lovely Alison. Although I had a number of things in my head that I could possibly make, in the end I opted for a canvas board hanging. I wanted to include some of the things that I think Alison loves like vintage, grunge, weathered texture and the colours blue and brown, I also wanted to add dimension and collage and in the end I think I achieved all those things. I put it in the post hoping she would like it. :o) xx


Nikki to Astrid


When I knew I was making for the very talented Astrid Maclean I decided to be inspired by her. I know how much she loves texture and making mini books so I decided to make her a little book featuring some of her creations for A Vintage Journey in 2015. The photos are Astrid’s work and I have tried to use the style of each of her designs on my page layouts. Photos of all the pages can be found over at Addicted to Art today.


Astrid to Tracy

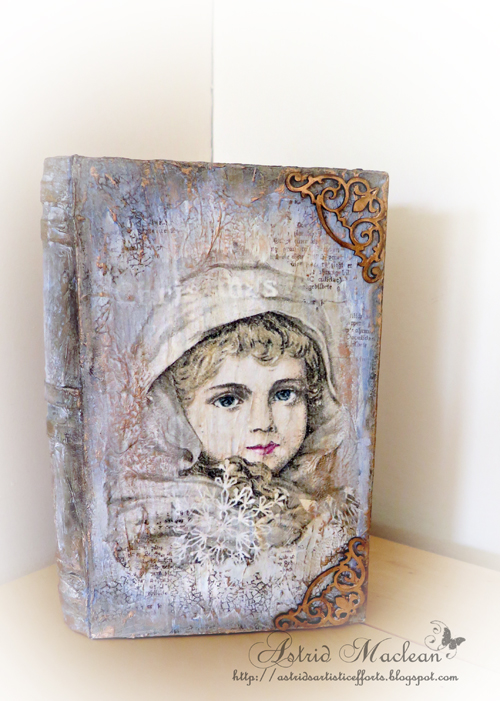
 I altered a book box for Tracy as I wanted to make a gift that would be useful. I created it in vintage style and along with the box there is also a tag holder. I thought perhaps Tracy could use the box to store her Christmas cards. To see more of how this was put together just visit my blog.


Sandy to Julia

I received a lovely gift and handmade card from Jennie. Thank you so much, it is a treasure. The attention to detail and vintage goodness is truly special. I will add my holiday memories to the many tags and cards inside.
I was so happy to see that I got the lovely Julia Aston as my recipient. I sent the handmade folio that I made at my class with Tammy Tutterow and a card of course. I have already received a thank you note from her. She now has a spot for her treasured holiday memories.
 To see more details simply visit my blog.
Happy Holidays,
S@ndy


Jenny to Annie

I was lucky enough to draw Annie as my recipient and when it came time to create a special gift for her fate intervened. My new Tim Holtz Sizzix 'Village Collection' dies had just arrived and I was desperate to find some time to play with them. Then Tim's December tag design was released and I figured it would be fun to combine those techniques with these dies, especially as it meant a battery operated candle could be placed inside (Annie loves candles you see!!!) And so my creative adventure began...


I know Julie has a dollshouse and an interest in miniatures, so when I discovered I was to be her Secret Santa it seemed obvious that a little house was in order! I had a lovely time creating the wooden roof, and enclosing the cottage in its own private little picture frame courtyard with a couple of frosted fir trees. And of course it simply had to light up! I hope she likes it. Hop over to Words and Pictures to see more close ups by day and by night. Merry Christmas to all!


 Annie to Jennie

I decorated a candle using a napkin, which I cut to fit the candle then removed a layer of the tissue. The napkin was tightly wrapped around the candle and held with pins. I then applied my heat gun to the candle and watched the tissue melt in to the wax. Another way to adhere the napkin is to wrap some greaseproof paper, holding it really tight. Having tried both techniques I really like using the pins as it is easier to see what you are doing as you have to be careful not to overheat the candle as you will melt the wax. My second gift is a little notebook and pen, made from card, with some Tim Holtz paper stash to embellish. One of my mum’s crafty friends sent her a notebook and I thought they made the perfect little gift for friends. I have put the link to the tutorial on my blog if you want to pop over for the details.


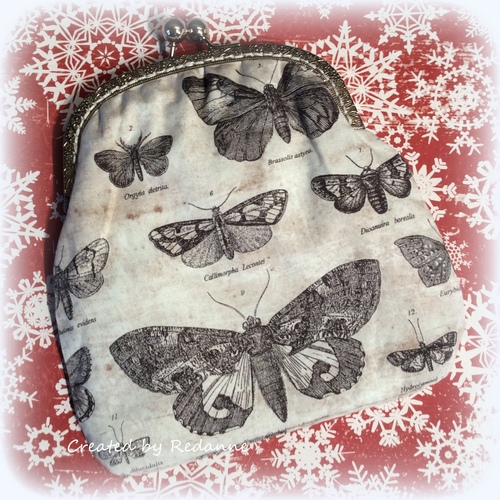
 I wanted to make something for Nikki that was a little different to my usual papercraft projects.  As I have a lovely stash of Tim Holtz fabric and I saw a pattern in a magazine, I knew I wanted to make one of these make up purses for Nikki as her Secret Santa gift.  I really enjoyed doing some sewing again and thanks to Nikki, I will be doing a lot more!


 Having met my lovely Teamie Jenny (Buttons) in London this year at Wendy Vecchi's workshop, I was delighted to make my Secret Santa gift for her. I made a Glistening Christmas Tree Decoration using a small balsa wood Birdhouse. Please stop by my Juliz Design Post to see lots of photographs and techniques used.


Aren't these the most fabulous gifts that you would like to receive? As being a recipient I can't tell you how exciting it is to both make and send a gift but to also open your parcel to see what is inside the one that has been lovingly sent to you, each and every one is a treasure.

It would be lovely if we could send all of our readers and challenge entrants a gift to say thank you for being part of our journey, so in the spirit of giving presents at Christmas we have a give-away for you instead.


Here is a little Tim Holtz collection for the lucky winner who will be chosen on New Years Day from the comment list below. Just remember the date on your comment must show 2015 as we will close the entries at midnight the start of 2016 (London time). Good luck and thank you for all your visits.

See you again tomorrow with another Destination Inspiration post.
Have a great Sunday.

hugs Brenda and all the Creative Guides xxx


Friday, 11 December 2015

Baby You're a Firework Winner, Pinworthies and Guest Day

Hi everyone and welcome! It's time to announce the names of our latest Winner and Pinworthies; our last challenge,  'Baby You're a Firework', only had a few entries but those we got were absolutely gorgeous and we thank you all for joining us.

Before we get to that just a quick 'heads up' that we will be back on Sunday 13th December with a very special AVJ Secret Santa 'reveal'. Please join us for that!

Next up, we're delighted to welcome the lovely Cuka as our Guest Creative Guide this month with more inspiration for our latest challenge, 'Vintage Christmas'.

Hi everyone. I'm a new Guest Designer and I'm very excited to be here. 
Here's a little bit about me.


My name is Carmen Vallés, a.k.a CUKA. I'm from a town near Valencia, Spain.
BA in Art History. I have 35 years old. I'm married and mother of two children.
I love everything handmade, scrapbooking, illustration, photography, mixed-media... everything!!

I started with scrapbooking about 4 years ago when I made a pregnancy mini album for my sister, and since February this year I have a blog where I show the little things I do for different challenges and swap. If you would like you are very welcome to visit my blog.

My biggest challenge is continue working creativity and never stop learning.


To this invitation I've made a Christmas Card.


I start my card gluing tissue paper on cardboard, and coloring with distress inks (fossilised ambar, brushed corduroy and tea dye ) to give an aged look.


After I make a few snowflakes with texture paste.


One done, I add decorative elements (doily, bow, jingle bell…) and some stickers with the word JOY.


I hope you like it!

Hugs

CUKA


______________________

And now on to the 'Baby You're a Firework' Winner and Pinworthies. First of all, here's our randomly chosen winner who will receive the prize voucher from our sponsor, Country View Crafts.


Congratulations Jan! We all adored the drama of that sky and the contrast of the warm yellow vintage tones against the children watching on. We hope you will be a Guest Creative Guide with us here in the future, and your voucher and winner's badge will be with you very soon.

Now on to the Pinworthies. let's be honest here, we couldn't separate them - so we didn't!!! Oh yes, for this month only we have not three, but FOUR Pinworthies!!! So, in numerical order;


That explosion of stars in the night sky perfectly complimented the vintage style, traditional Christmas Eve scene.


The sparkle captured in that sky was magnificent in this very Tim style project.


The sparkles contained within those explosive poinsettias are certainly reminiscent of the glitter trails left by fireworks.


That impressive firework background stamp came alive with the addition of bright colours and Stardust Stickles.


Well deserved congratulations all round ladies! Your badges and invitations will be on their way to you very soon.
______________________

Thanks so much for stopping by today. Don't forget that AVJ Secret Santa 'reveal' this Sunday and then we'll be back on Monday when one of our Creative Guides will be stopping at Destination Inspiration to unpack their travel bag and have a play with the contents.


Meantime we'd love you to come and play along with our current challenge, 'Vintage Christmas'. You could be our next Winner or Pinworthy!

Monday, 7 December 2015

Destination Inspiration - December - Terminal #1

Hello everyone, Anne  here! 

Hop aboard, on the first leg of the journey for December, here at Terminal 1, with a brand new line-up of essential items in our travel bags this month!

1.  Product - Remnant Rubs
2.  Technique  - Extreme Masking (Compendium of Curiosities I, page 61)
3.  Colour  -  Festive Berries
4.  Substrate  -  ATC


At first I felt a little challenged by the travel bag contents but once I got started I really enjoyed the process and ended up making several pieces, all ATCs of course, but the technique could easily be applied to larger projects.


The technique can be found on Page 61 of Tim's Compendium of Curiosities I.

This is an interesting technique, it is not one that I have used before. 
(Apologies for the photos, it is very miserable and wet here)

I have had a set of Tim's masks in my stash for years and never used them so I got them out along with some Ranger Speciality Stamping artist trading cards and my chosen colours of ink - Festive Berries and Blueprint Sketch. 
I laid down the mask with a sticky note at the bottom to create a grounding for the snowman.
I applied the technique as outlined in Tim's book.
Next I over-stamped using a word stamp from Tim's Merchantile set of stamps.
I chose my Remnant rubs and applied these.  The Tim Holtz Rub on tool never lets me down....
To create the scarf and to use the required Festive Berries, I cut a thin length of gauze and soaked it in Festive Berries Distress Spray Stain and dried this with a heat tool.
To attach the scarf I used a large eye needle and poked two holes on either side of the snowman's neck and threaded it through.  I think it gives a much more realistic appearance.
For my second attempt, I did the technique and then I used some sticky back canvas to create a scarf, which was stained with Festive Berries Distress Spray Stain.  I wasn't so happy with the result on this one...
For my third and final ATC I cut an ice skate from Tim's Movers and Shapers die and applied some re-positionable glue to the back of the skate so that the colour would not seep underneath.
  The stamping on the skate was created with a freebie stamp (not sure where it came from).  The base colour is Festive Berries.  I love the combination of the red, white and blue on this one.
Finally, here are my two favourite ATCs.  I am going to punch a little hole in the top corner of each one and used them as gift tags - I might even make some more!

It has been lovely to have you travel along with me here, I hope you will come back next week to see what's on offer in Terminal 2!

Our current challenge, hosted by the lovely Annie, is 'Vintage Christmas' (details HERE) and it would be lovely to see you joining in.  Do please check out what my talented teamies have created to inspire you.

Hugs, Anne xx

Friday, 4 December 2015

Vintage Christmas

Hi everyone.........Annie here as this month's challenge host xx and isn't it hard to believe that its the 4th December !!!!! If you celebrate Christmas then probably ...like me.....you are extremely busy!!!! There's just not enough hours in the day and days of the week!!! ( Don't worry I am not going to remind you just how long it is still Christmas as you probably know...eeek!!!!

For this theme you may find that your Christmas projects might just meet the challenge theme.....as long as they are 'vintage' and we can see that you have in some way been inspired by Tim Holtz. (The inspiration can be in the form of a product or technique from Tim's vast range of crafty items)
Remember to check out the Travelling Instructions too x

We are very fortunate to have the lovely Susan from Country View Crafts sponsor us every month and she is offering the random  org winner a £20 voucher to spend online. Susan does not charge for UK postage, however, international charges may apply.
As well as the randomly chosen winner the Creative Guides will choose three pin worthy projects created by our fellow travellers..........i.e YOU................. with the chance to debut a Guest Creative Guide spot here on AVJ.  So get creating as we would love to have you on board our Vintage Christmas Journey
Both myself and fellow Creative Guides have been busy creating projects to inspire you...for more details on how they achieved the outcome of their projects below please visit their individual blog by clicking the link on their name.............but don't forget to click back to AVJ !!! xx

Without further ado.....here is my project : 


I have decorated a lovely window box using lots of goodies from  the Tim Holtz range of products as well as other  well known  brands. For more details and a step by step pop over to my blog HERE........but be warned it is a picture heavy post so you might want to grab a cuppa xx

I love Vintage Christmas themes and I really enjoyed creating this card. I was inspired to use Tim Holtz Retro Ornaments and Stacked Stars Dies set against a brayered backdrop using Distress Paints. I love the vintage tones with a touch of shimmer, understated but elegant. Vintage tones are one of my all time favourites to create with and I was inspired to create a batch of these cards!


I was so excited when I learned of Annie's fabulous Vintage Christmas theme!  I decided to make a Christmas folio album from a recycled manila file folder that I filled with pages and tags showcasing many different techniques that the wonderful Tim Holtz has shared with us.  It's designed to be used as a Christmas gift list before the holidays and then afterwards can be used as a photo album or journal to record the special memories of the season.  Come on over to my blog for a look inside.


I loved Annie's chosen theme and as Christmas is a time for giving I created a little gift set, - a card, matching envelope and a gift card holder. To get more details of how I put this together, just visit 


It's dollshouse time again at Words and Pictures - well, almost!  I started out with a simple idea for Annie's lovely seasonal challenge, and ended up with a very complicated creation.  You can hear the full story (with the swearing edited out) if you hop over to Words and Pictures.  Oh, and you'll get to see what happens at night too!


I was excited to use my Village Dwelling, Belltower and Winter dies for my Vintage Christmas project today.  I just LOVE minatures and these dies are so easy to cut and assemble.  I used colors to mimic my own church.
There are details of how I inked my walls and roof with photos of each side of my Vintage Church as well as a photo of the windows being lit up over at my blog post here if you'd like to take a peek!


I just had to share this Vintage Christmas folio made in a class with Tammy Tutterow.  It is full of all things Tim.
Please stop by my blog here to see all the details and what is on the inside.


 For Annies 'Vintage Christmas' theme I have taken inspiration from some of my own treasured Christmas decorations and created a piece of Home decor rich in texture and traditional Christmas colour .
 If you would like to find out more you are more than welcome to stop by my blog 


I love making these crusty looking poinsettias using the Poinsettia Die and combined one of them with papers from the Yuletide Paper Stash to create a hanging ornament. Hop on over to my blog if you would like more details and a link to my tutorial for making the poinsettias.


I've loved this fabulous challenge theme from Annie and collected a number of my smaller Tim dies together as well as some ideaolgy and other embellishments to create this vintage Christmas block which will be displayed on my sideboard over the festive period. I've lots more photos at Bumblebees and Butterflies if you'd like to see further details.
I hope you all have a wonderful Christmas and some fun over the next few weeks as we all get everything prepared.
hugs Brenda xxx

We'll I am certainly inspired  by the wonderful creations from my fellow Creative Guides and I hope you are too x

Use your dies, stamps, rub ons, Idea-Ology along with paints, inks and stains- anything you choose to create a Vintage Christmas card, home decor piece, altered art or gift for someone special.
This challenge runs for 4 weeks and finishes on the 31st December at 18:00 hours UK time.
To enter please use the Inklinkz below

From everyone here at A Vintage Journey

Have a wonderful Christmas xxx