This is a unique challenge blog where we are inspired by and focus on the Vintage; shabby; mixed-media; art journaling; industrial, timeworn and steampunk genres and encompass the talent, flair, expertise and ideas of many artists that we are inspired by. We welcome all types of projects - cards, journaling, assemblage, layouts, albums, atcs, altered art in fact whatever you want to share (as long as it is in good taste).

Monday, 12 September 2016

Destination Inspiration : Terminal Two

Hello Everyone! Jennie here welcoming you to Terminal Two all ready with my travel bag of goodies. Nikki used the travel bag first this month and now it is my turn to create a project with the wonderful contents which this month are:

Product : Texture or Modelling Paste
Substrate : Fabric/Burlap
Colour : Autumnal/Fall Colours (orange, brown, rust)
Technique : Collage

And this is what I came up with .....


I didn't have any large pieces of burlap so I needed a base and decided to go with a blank heavy cardboard tag which got a couple of coats of gesso before being covered in Crackle Texture Paste. My smallish piece of burlap was then adhered (with difficulty!) to the crackle paste tag and when it was dried and stuck down (which I thought it would never do!) I used Tim Holtz Texture Paste through a script stencil to add more texture.


Spritzing came next ..... and my favourite autumnul colours, Rusty Hinge, Fossilised Amber and Seedless Preserves.  I was a bit worried at this stage that having got the burlap stuck down it would then lift off ..... but all was ok!


I then had fun making my collage embellishments.


The cardboard cogs were covered with various coats of DecoArt Fluid Acrylics until I was happy with the colour and then I added a final coat of Antiqued Bronze Distress Paint here and there.
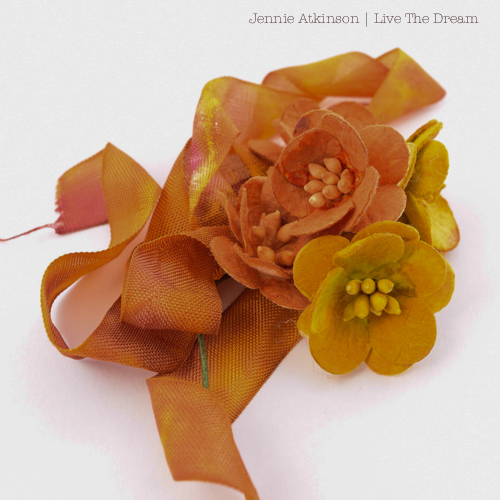

Small purchased flowers and ribbon then got a spraying with Rusty Hinge, Fossilised Amber and Seedless Preserves.


Tim Holtz has a fabulous technique video HERE for autumn leaves.  Again I used Rusty Hinge and Fossilised Amber but with a little Peeled Paint to create my pattered sheet before using the Sissix Leaf Die to cut the leaves. 


My leaf stamps didn't quite fit the leaf shape but I did get a reasonable texture pattern on the leaves. I shaped them with a ball tool to create more depth.

And then it was time to create my collage on the prepared tag playing around with the placing of the embellishments until I was happy with the design.  Finally I went in with some gesso on the flowers to take away the starkness of the colour and then added a few watery gesso splatters here and there.


Do drop in next Monday to see which Creative Guide is at Terminal Three sharing their take on the travel bag for September. And in the meantime there is plenty of time to join in with Julia's wonderful challenge this month : Create Within A Frame.

As always thank you for joining me today and have a great week!

Jennie


Friday, 9 September 2016

Winner and Pinworthies for Stencil It Challenge and Winning Guest

 Hello Everyone!
Today we welcome you to our Winners post where we feature a previous winner as a Guest Designer and also reveal the Winner and Pinworthies of our August Challenge -'Stencil it!'
There was a great response to the challenge and many fantastic entries so thank you all for embracing those stencils and sharing your talent with us.
________________________________

So lets begin by welcoming the wonderful Autumn of Sew, Paper, Paint.  She's been busy making a project to fit Julia's "Create Within a Frame" challenge here at Words and Pictures so, without more ado, let's see what she's come up with and hear about it in her own words.  Welcome, Autumn!
                     

I am married to an amazing man, and my biggest supporter.  We have four children, yes four!  I live in the US and work full time as a church secretary.  I have been stamping for over 15 years.  Creativity is my outlet, passion and purpose.  I define my style as grunge meets elegance.  Though I love to distress everything, I like to balance my work with a touch of pretty and neat.  In addition to stamping, I love to draw and paint and have found that mixed media allows me to blend these skills and create rich artwork, filled with depth and texture.  I'm thrilled to be joining the A Vintage Journey team today for this fabulous challenge!


Often, with such a busy schedule and commitments, I sketch out my designs beforehand so I can get right to it. But project was the result of pure play and experimentation. I started out with a thrifted frame, purchased for a dollar because of its unique size. I have about 40 frames in my stash because I can’t resist taking them home and giving them new life! Some people pick up kittens, I pick up frames! So this challenge was truly up my alley! After I cleaned up and dismantled my frame, I prepped the backing board with gesso.


I was in the mood to paint something, so I cracked open my brand new IndigoBlu paints and thought I would experiment with color mixing right onto my board. I used a palette knife and scraped on and blended my colors (red, blue and yellow) randomly. But since this is A Vintage Journey, I had to take the bright colors down a notch! So I used a cosmetic sponge to apply gesso lightly over the entire panel. Then I dripped a mixture of alcohol inks diluted with alcohol over the gesso. I was loving the variation in color, but still wanted to bring more white and subtlety, so I stenciled an “airy” stencil over my background.


I built my grouping around this Found Relatives photo of four children, two boys and two girls – just like my own children. I opted for leaves and branches as a nod to the changing seasons. The clock die was embossed in Clossone plum embossing powder, a UTEE. What fun it has been to design for this fabulous challenge! I hope you’ll be inspired to alter an old frame of your own. Thank you so much AVJ for having me today.


What a beautiful and inspirational piece, Autumn.  Thanks so much for being our guest this month.
        ______________________________________

Time now to reveal our August Winners and Pinworthies.
The Winner of our Sponsored prize last month - a £20 gift Voucher to spend at Country View Crafts as selected by Random Generator is........


That's Tone of Tones Scrapperom with this lovely card.


Congratulations to our winner, Tone K .
Your winners badge and Gift Voucher will be will you shortly and we hope you will join us as a Guest Designer in the near future. 
_______________________

Now for our Pinworthies as chosen by our Creative Guide.
It is always difficult for us to narrow our choices down to just three with so many wonderful and worthy submissions but after much deliberation here are the pinworthy winners of the Stencil it Challenge
In no particular order:


Congratulations to our Pinworthies.
We will be in touch shortly with your badges and invitations to be Guest Designers here at A Vintage Journey in the near future.

Thank you so much to everyone who joined us in this Challenge. We really do appreciate all your entries and always enjoy seeing all your creations.
We hope you will join us this month for Julia's fabulous challenge, 'Create inside a Frame'.
One of us will be back Monday to share the latest Destination Inspiration so until then
we wish you all a lovely weekend

Amanda and all the Creative Guides.


Monday, 5 September 2016

A new journey for September - Destination Inspiration, Terminal 1

Hello all, it's Nikki here introducing our Destination Inspiration for September. Our travel bag this month includes:
Product - Texture or Modelling Paste
Substrate - Fabric/Burlap
Colour - Autumnal / Fall colours - orange, brown, rust
Technique - Collage

If you are new here, just a reminder how this works.  Four (or five) Creative Guides go on the journey each month and each has independently selected either the product, the substrate, the colour or the technique. We each make a project featuring those selections and share them every Monday throughout the month.

I don't always find this easy as the 4 elements are sometimes a challenge to fit together. My dilemma here was the substrate - as all I could find was a little burlap canvas - 3'' x 3'' - so I didn't have much to work on
I began with some gesso on the panel and then some Deco Art Burnt Sienna.
I mixed some distress paints with Ranger texture paste and stencilled onto my canvas.
 As you can see - I added some splashes of black paint using my paint brush and a little water.

Next I took some scraps of paper, added some random stamping and a little ink and cut some bricks to collage onto my substrate.
While gluing these on I also added some mica flakes. I highlighted the textured area with a little treasure gold too.
I have been collecting twigs from my garden and cut a few to size and adhered to the centre of the panel before adding a wooden butterfly that I painted with Distress Paints and highlighted with stickles.
Some large chit chat stickers (coloured with mustard seed distress stain) completed my little project.
Do join us again next Monday for the next stop along this month's Destination Inspiration journey. In the me meantime our new challenge - Create Inside a Frame - started on Friday and so we will be announcing last month's winner and pinworthies on Friday.
Happy Crafting
Nikki
xxx

Friday, 2 September 2016

A Vintage Journey - September Challenge - Create Within a Frame!

Welcome to the September A Vintage Journey Challenge everyone!  Julia Aston here - I am excited to be your hostess this month - and to share with you my challenge!   I would like everyone to Create within a Frame!

For this month's challenge we would like you to create something inside a frame. Whatever you use show us how you have incorporated a frame on your vintage; shabby; mixed-media; art journaling; industrial or steampunk project. We can't wait to see all of your creative framing ideas!

Just look below at all of the wonderful ways the Creative Guides have taken on the challenge! We look forward to seeing what YOU create within a frame!

After thinking about many different kinds of frames I might use - I settled on using a Cabinet Card to create this dimensional Graveyard scene using many of Tim's dies, including his brand new Lost Zombie! You can get a better idea of the 3 dimensional look of my creation over at my blog post here.

This theme really had me challenged, not because it was difficult to get ideas, no rather the opposite my head was bursting with different ways to create a frame, but unusually for me I opted for the easiest way - a bought frame. I think it was because I have been playing with resin plaster and moulds and now have a small boxful to choose from, all thanks to Andy Skinner who used one on his workshop project at the Dare to Create retreat (remember the skull on the box?). But if you'd like to see the process steps for the frame please click my name above and you will be transported over to Bumblebees and Butterflies for all the details.

I have just received the new IndigoBlu products and this seemed the perfect opportunity to put them to the test. I combined a laser cut tag with Luscious Pigment Powders and a fabulous new stamp to create my opulent design. Pop by my Blog for step by steps.

This started off as an experiment using the new Distress Grit Paste by Tim Holtz and comparing it to Ranger's Texture Paste.  I created a frame from a single 12" x 12" piece of card and I just love the fabulous new Crazy Dog stamps.  If you would like to see how I did this, please visit my blog HERE. 

I rather indulged myself with Julia's fabulous challenge theme using some of my favourite textures, embellishments and colours to firstly alter an old shabby wooden frame and then decorate inside it. 
If you would like to see more then please do hop on over to Live The Dream for the details.

I had some fun with this great challenge from Julia. I went industrial with this mixed media piece using one of the resist techniques learned in Creative Chemistry 103. If you would like to see more photos and details please stop by my blog My "Crafty" Life on the Internet.

I think I must have had the last three AVJ Challenges in mind when I created my project for Julia's challenge. I have been creative inside the framed area of a mirror using texture paste and a selection of Tim Holtz layering stencils keeping it all very monochrome! You are more than welcome to stop by my blog to see and read more.

My canvas for this challenge focused on the two key words in the title - frame and create - Seth Apter's fabulous die designs were perfect for creating interlocking frames and I embellished them with representations of some of the many hobbies/crafts we use to create art. Find out more about how it came together on my blog.

Awesome inspiration don't you agree??!!!

Thank you to all who joined us for our August challenge, we just loved all your stenciled creations - and we look forward to seeing how you are inspired by this month's Create Within a Frame Challenge!

Our challenge is a monthly one and a randomly chosen winner will receive a prize of fabulous DecoArt media fluid acrylic paints with tinting base which is a premium, all purpose white base that can be tinted with any of the fluid acrylic colours.


   We also award Pinworthy badges to the Top 3, chosen by the Creative Guides, who are then invited to join us on the blog as guest designers -  it could be you!!!  So get those projects linked up here!

This challenge runs through October 6, 2016 -  6 pm British Summer Time.

Monday, 29 August 2016

Final Stop - August Destination Inspiration

Hi everyone and welcome! Jenny here reporting for duty. So here we are, arriving at our final stop for this month's Destination Inspiration and it's my turn to create with the contents of the travel bag this month.

Just as a reminder, this is what's in the suitcase:

Product - Paint
Substrate - Tag
Colour - Smoky Grey Blue (think Stormy Sky and Weathered Wood)
Technique - Resist (paint, embossing or mediums)

And here's the tag I came up with...


I started with a jumbo manilla tag, trimmed on each side to fit a DL card base. Smearing it with Weathered Wood Distress Paint using my finger gave a nice uneven coverage which acted as a resist to the Brushed Corduroy Distress Ink blended over the top.


A little 'spritz and flick' with water allowed the Distress Ink to do it's magic and I added a little Walnut Stain to the edges to create a more distinct edge.


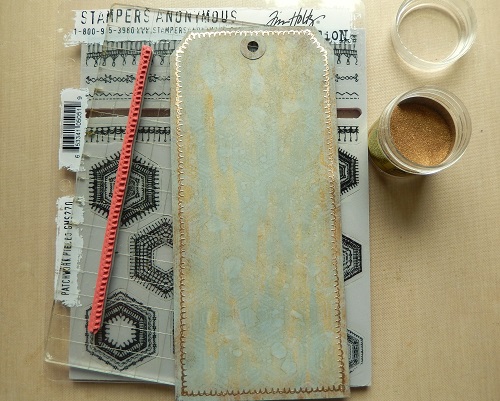
One of my new Patchwork Pieces borders was ideal for creating a border around the tag. Simply remove the gold embossing powder from the corners where you overlap the design before heating and the joins are seamless!


The whole thing needed a little va-va-voom so I used Tumbled Glass Distress Paint on the larger of the Patchwork backgrounds and covered the entire tag.


From the same Patchwork set I used the smaller design on a piece of black card, stamping with Picket Fence Distress Paint.


I HAD to play with the new Distress Crayons that have just arrived in the craft room courtesy of Tim and Mario, and reached for my all time favourite, Tumbled Glass, to coordinate with the tag. If you add a little to the uncovered areas of the Wildflower stencil and blend through with your finger you get a fabulous translucent effect with a distinct opaque border.


With the two main layers created I combined them, using a strip of Textile Surfaces, Linen Ribbon, some Idea-Ology Ephemera and stitching. To make the Wildflower die cut less one dimensional I blended a little of the Frayed Burlap Distress Crayon with water and painted it on. And as this is going in my card stash a die cut sentiment provided the finishing touch.

Here are some close ups of the completed tag...


As this is our final stop on this month's Destination Inspiration journey, let's take a look back at the wonderful projects created by my fellow Creative Guides.


Once again a simple travel bag of ingredients has resulted in such varied and wonderful creations from my uber-talented fellow Creative Guides. They never fail to amaze and inspire me and I'm sure that's true for you too.

Thanks so much for travelling along with us this month. September will bring a new travel bag and another amazing Destination Inspiration journey. And remember, there are still a few days left to join in the fun with the August challenge 'Stencil It!'

Have a wonderful week and whatever you're up to, take care of yourselves.
Jenny xxx