This is a unique challenge blog where we are inspired by and focus on the Vintage; shabby; mixed-media; art journaling; industrial, timeworn and steampunk genres and encompass the talent, flair, expertise and ideas of many artists that we are inspired by. We welcome all types of projects - cards, journaling, assemblage, layouts, albums, atcs, altered art in fact whatever you want to share (as long as it is in good taste).

Friday 28 November 2014

Challenge #20 - Birds of a feather

Good morning everyone and welcome to a new challenge here at  A Vintage Journey!

In the last couple of years we have seen an abundance of paper designs, dies and embossing folders all depicting birds and bird themes. So, in order to give everyone the widest opportunity of joining in our challenge the theme I've chosen for the next two weeks is....

'BIRDS OF A FEATHER'

We'd like to see what you can create. We don't mind whether it's a card, a tag, a scrapbook layout, a journal page, altered art, home decor or anything else as long as (a) it meets our THEME and (b) you follow our RULES.

Our winner receives a £10 shop voucher from our wonderful sponsor, Country View Crafts as well as a blog badge and the opportunity to join us here as a guest for a future month's challenge. We also award 'Pinworthy' badges to 3 runners up.

As usual, our fabulous team of Creative Guides have put together their selection for you to see to get you fired up and raring to go...


Chris
 
 I adore anything to do with birds so I guess there's no surprise in my choosing this theme. I've used several Tim techniques and products on my matching birthday set but I've mixed in some B-Line stamps and Sizzix die cuts too! More details HERE.


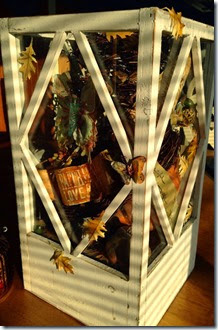
What a fun theme from Chris for this fortnight.  My block is jam packed with Tim's goodies and techniques from the cage to the letter press blocks.  I hope you will stop by my blog here to see photos of all four sides.


Chris's challenge was the perfect opportunity for me to make this sweet needle felted owl from a kit I purchased several years ago.  I placed him on a tree branch from my backyard inside a Configuration Box decorated with many of Tim's Idea-ology pieces.
You can see just how I created my woods hollow scene on my blog post here


 I just had to use the gorgeous birdcage die and lots of distress crackle paste for my contribution this month. I love a neutral pallet so kept it in blacks, greys and whites. If you would like to see some more details, please hop over to Addicted to Art.


 Jennie
With very little in the way of birdie stash other than those wonderful Wallflower Stack papers I used a tutorial by Aida (one of Tim's Mixed Media Team) as inspiration for my canvas and making my little bird house from the Artful Dwellings Die.  If you want to see the fun I had creating this then hop on over to my blog for more pictures and details (and a link to Aida's tutorial of course!)


With Christmas coming ever closer, I decided to use this challenge theme to create a Christmas gift for a crafty friend. It's not just a card, but a tag and/or  gift card holder. For a step by step and more photos of course, visit my blog.


Julie
I was inspired to use cardboard on this project after Tim used this on his inspirational November tag. I also recently purchased some of the new Distress Spray Stains, so how could I resist having a play with them. If you would like to see how I made my wall hanging please pop over to Juliz Design Post.
I've gone simple for this one... a couple of very wintry tags featuring birds and bare branches.  There are lots of Tim Holtz products involved - Distress Inks, Idea-ology, Layered Stencils, most of the stamps and more - but more than anything else, these pay tribute to the initial inspiration that got me hooked on this whole business - Tim's stamped and inked tags.  Come and see some close-ups at Words and Pictures.


Oh how I love birds and was so thrilled when Chris chose this challenge theme. I have had birds most of my life, so it is always such fun to work these into challenges and DT work. Keeping in true Tim style, I have used his Distress inks, designer paper, stencil and some other fun stuff along with my stamps of choice! For all the details please click HERE.


I've really come back to collage work at the moment and combined it with mixed media and made a wall hanging inspired by Tim’s papers, images and ephemera and the fact that he has a fabulous mixed-media team who create some wonderful pieces to share with us. 


Now you've seen our line up it's time for YOU to get busy. Get out your inks, paints, chalks, Gelatos etc and grab your bird dies, stencils, masks, stamps, whatever avian stash you have and conjure up something that sings of our feathered friends. Whatever you create, we want to see Tim's influence clearly identified. Let's see your magic folks!  >:o)

We hope you have lots of fun with this and join in with us, we can't wait to see all your fabulous entries - good luck!

Chris xxx


Monday 24 November 2014

We welcome Vicki Evans as our Guest Creative Guide

 Happy Monday everyone. I am so pleased to be able to welcome Vicki as a Guest Creative Guide here at AVJ. Vicki is a very versatile artist who loves to play with inks and paints but also to experiment and learn new techniques. You will find her at [dig] that crazy chick where she provides very visual process steps in many of her posts. You will certainly pick up a new trick or two.
So this is Vicki, love this photo of her.
 
Vicki Photo
I live the life of Riley, in Calgary, Alberta with “the” Jaeger; costume-king, pirate and creative cohort; and Io, my 5 year old Bernese Mountain dog daughter. I have been making things for people and occasions for as long as I can remember. I started making “tags” for Tim’s twelve tags challenge in March of 2012 as the one creative endeavor I do, quite selfishly, for me. Not for “some-one” or “some-thing” but, to set aside the time to make something purely for the joy of doing so. On June 12th, I started my blog to participate (submit) the tags I was making for his challenges. (The name for my blog comes from a song of the same title by Sam “The Big Horn” Butera and the Witnesses--it always makes me smile, you can get it on iTunes.) It has been an inexpressibly amazing journey every day since.

I am excited to be here at a Vintage Journey as a guest creative guide, especially because it is challenge where I get to create something from that “other” corner of my little craft room. Sewing, like paper crafting (like cooking), is an exploration where the whole is always greater than the sum of its parts: cloth becomes clothes; paper becomes precious; (and ingredients become delicious).

Tim, with his creative chemistry techniques and specialty products; are skills and tools. Once you understand the basics, it’s only your imagination that will limit how you continue view the “rules”, and perhaps…bend them (my favourites get tested more rigorously than others).

My mother taught me how to sew when I was small. (She demonstrated all kinds of hands-on, messy fingers, and creative endeavours). She would draw out patterns on brown paper shopping bags and transform these flat expanses of paper, and fabric, into whatever she had envisioned in her minds-eye. (The first thing I can remember sewing was pants and a buttoned top for a small doll–on my battery operated, blue plastic, Holly Hobbie sewing machine.) She taught me a solid foundation of skills and rules for fabrics and stitches; enough so, that I challenge myself with how to break bend them (sometimes more challenging than others).

I was thrilled when Tim released the Eclectic Elements line of fabrics. I knew that these designs/patterns would be a motivator to put my sewing machine back-to-use for more than mending and costume-making.
 
SewnUp003a
The Melange is one of my favourite patterns from the original release (I haven’t had the opportunity to buy yardage of the new release locally…yet). The juxtaposition of seemingly incongruous elements is what draws me to this particular fabric.
 
SewnUp006a
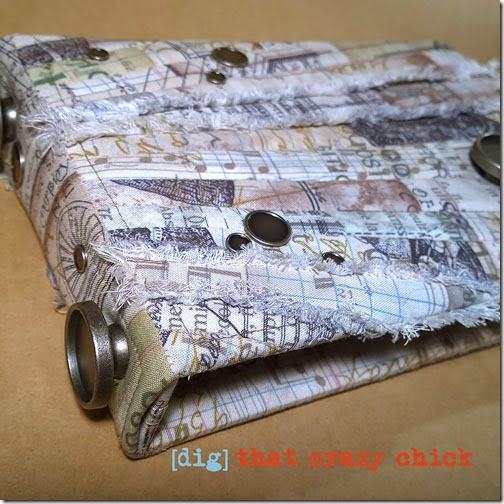
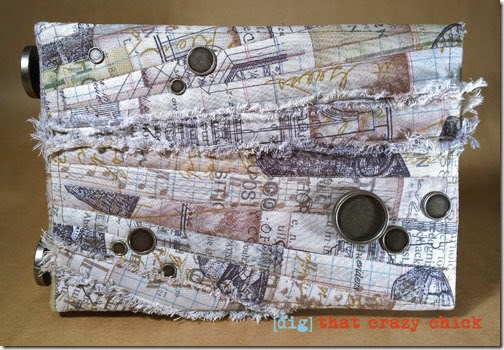
All of the pieces have been cut off-grain and some are sewn with tapered exposed seams that I have frayed to reveal a new-ly vintage-d look.
 
SewnUp005a
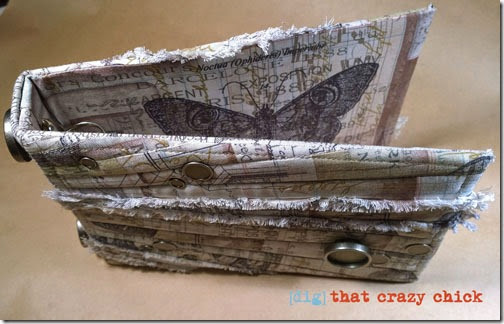
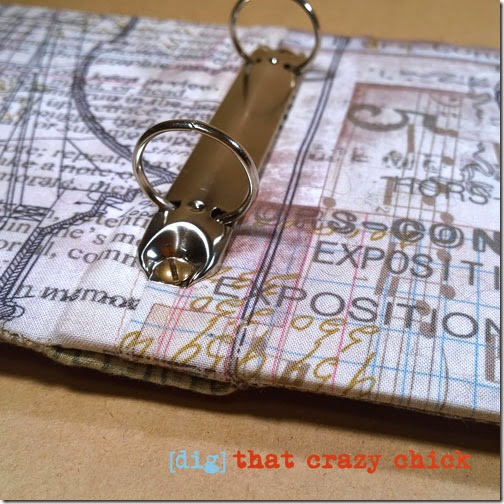
I’ve used the Melange in neutral fabric to create a quilted cover for a Chronicle Worn Cover (Idea-ology) book. The book cover is literally “all stitched up” inside an envelope of fabric.
 
SewnUp001a
Embellished with un-adorned and un-epoxied; custom fasteners and knobs (I love dots) to complete the project.


Wow what an amazing project Vicki and oh boy you sure know how to put fabrics together. The binder is a sheer delight, the way you have covered it both inside and out, those amazing exposed seams to give that vintage appeal and the sunburst effect on the cover is so clever.

Thank you for taking the time to put this together for us and to share your skills and talent with the readers.

Have a great week everyone and we’ll see you again on Friday with another new challenge and would love to see a few more entries to join the amazing ones we already have for the 'All Sewn Up' theme currently running.

Take care.

hugs Brenda xxx


Friday 21 November 2014

Welcome Angela as our guest

It’s fabulous to welcome Angela as our guest designer this week after she won the ‘Heavy Metal’ challenge a few weeks ago, you may remember that incredible metal hand she produced. Angela resides at ‘Felix the Crafty Cat’ and there's always something different and exiting to see there. She started blogging last year and loves to share her experiments and techniques with everyone, so please pop over to share some love. Thanks for sharing your sewing project with us this week Angels – over to you.
 
Hi everyone! My name is Angela Radford and I live in Lincolnshire UK with my husband and our two Schnauzers, Maisie and Stanley.
I have been crafting in some form or another for what seems like forever and was lucky enough to spend my working life teaching Textiles and Art.
P1030310
I must have tried just about every craft going over the years and now work mostly with mixed media. I still cannot resist trying out new techniques and testing new medium that becomes
available.
I enjoy many different styles but my favourites are Steampunk, Gothic and Vintage which is why I love anything Tim Holtz.

When the team from A Vintage Journey asked me to be a Guest Creative Guide, I was so excited especially when they said that the theme would be "All Sewn Up", how could an ex textiles teacher say no to that lol! So I hope you will enjoy what I've made.
I have been wanting for sometime to make something using the Tim Holtz fabrics and had some just waiting.
I had one of the design rolls to start the project off. It was obviously perfect for patchwork though at the time I had no idea where this would take me.
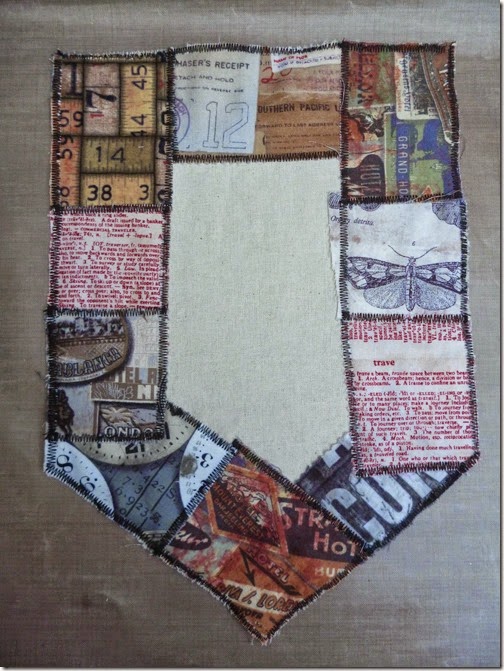
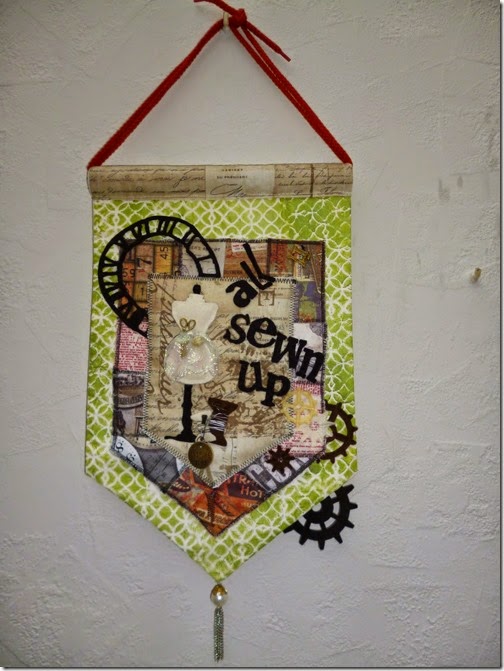
So I started by creating a small banner with a patchwork effect around the edge and gradually the whole thing came to life.
It began here:
P1050271
After making this section I decided it needed a background to sit on and took one of the Tim Holtz masks to sponge through.
I did this fairly randomly to give a shabby chic effect and this was what it looked like at this stage.
P1050270
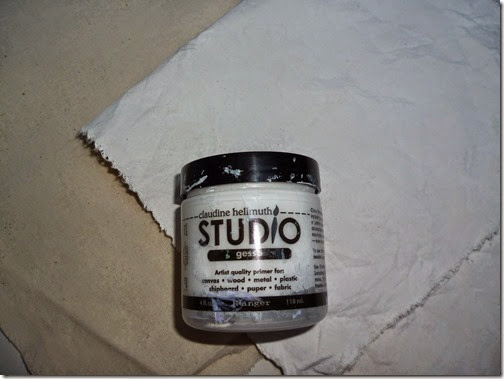
I used a cotton calico for this effect but it is very absorbent so it is a good idea to seal the fabric with Gesso which means you use less paint.
The fabric on the left is before application and the one on the right is after.
P1050268
Sorry about the jar, as you can see it gets plenty of use lol!
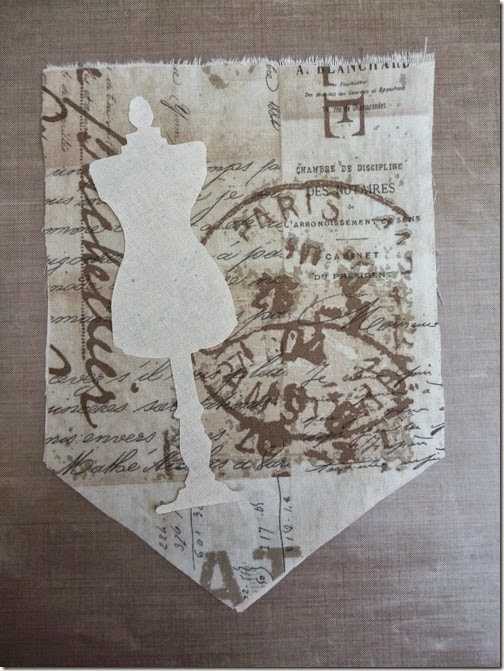
I then turned to what would be the top of the banner. I used another of Tim's fabrics and the "Sewing Room" die (perfect) which was cut in calico, felt and wadding, these would be layered together.
P1050272
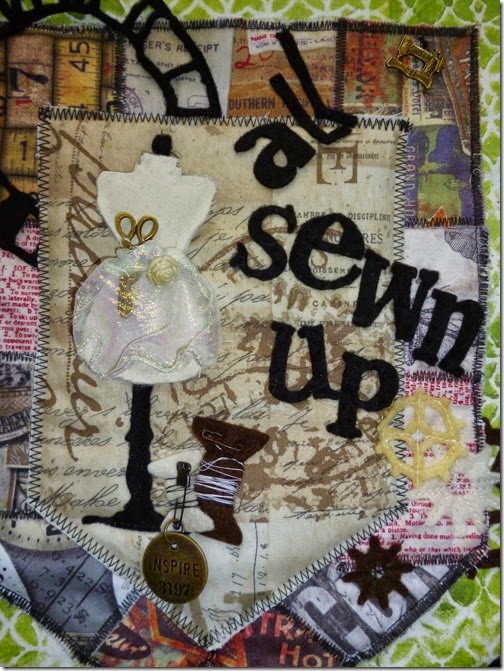
Next it was time to start putting the whole thing together with the addition of some text from "Word Play Alphabet" die and some extra embellishments in the form of gadget gears and the weathered clock cut in felt.
With a few bits and pieces and quite a lot of hand and machine sewing and what do you know, It's "All Sewn Up".
P1050416
P1050420
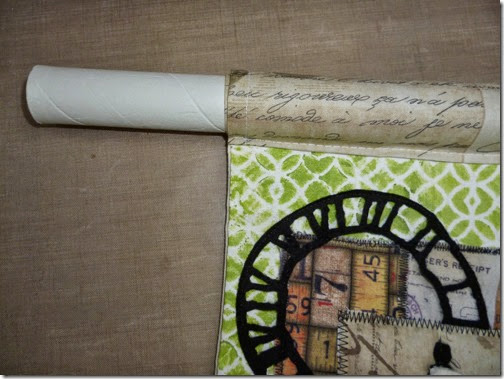
In case you were wondering how I finished the top to thread the cord through, here it is...
P1050415
An old cardboard tube Lol! but it gives the top a lovely shape.
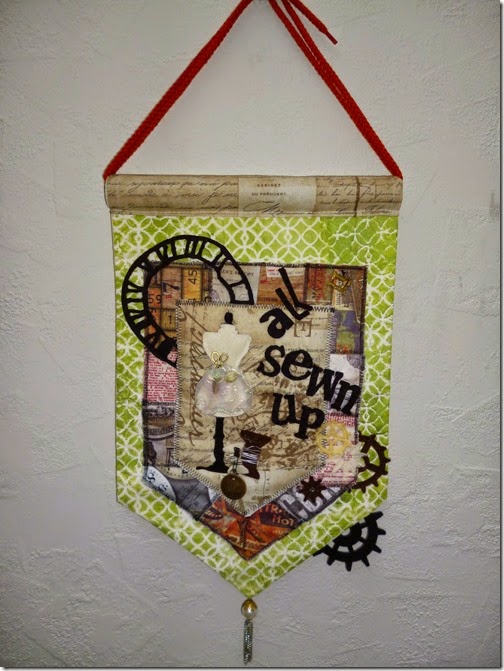
And here is the finished piece again.
P1050422
Hope you liked it.
Happy crafting,
Angela x
 
Wow, this is a beautiful pennant and a great way to combine some sewing with some mixed-media techniques. Thanks Angela for taking the time to create a fabulous and unique project and show us your process steps.

………………………………………………


Now it’s time to share the winner and pinworthies from the ‘Bountiful Harvest’ challenge and it’s the lovely S@ndy who had the hard task of choosing from all the fabulous projects that were entered.

With such wonderful entries, the team had a very difficult job choosing only one winner.  This challenge was truly a Bountiful Harvest of wonderful creations. 
Thanks to everyone who travelled along with us on this leg of our artistic journey.
It is great fun seeing how you interrupt each curve of the path and come out at a  destination that is uniquely you.  

Winner - #10  Sara at Sarascloset
autumn 046
Sara your voucher and badge will be on it’s way soon and your project will be pinned to our winners board. Thank you for sharing such an original and unique project with us.

Pinworthies -
#13 Jane at Jane’s Journal
#18  Ruth at lerusho
#20 Lys at Impression Scrap
All these amazing creations will be added to our Pinworthies board and badges will be on their way to you too.

Thanks everyone for taking the time to share in our Tim focussed challenges, we hope you are up for designing and making something for our current theme – ‘All Sewn Up’. WE hope to see you there.

Have a wonderful weekend.

hugs Brenda, S@ndy and the team. xxx


Monday 17 November 2014

Destination Inspiration- Perfect Pearls

Hi Everyone, Annie here with this fortnight's Destination Inspiration project, sharing tips and techniques using Perfect Pearls. Like most crafters I have a huge stash and it was while searching for an item that I came across my Perfect Pearls and decided to have a play, as they create so many varying effects wet or dry and can be used with inks, acrylic paints, embossing powders even Ultra Thick Embossing Enamel in your melt pot. 
I have used them in several ways so let's get going...and you might like to grab a cuppa as there are quite a few photograph's!!!

The project below demonstrates Perfect Pearls on vellum, mixed with embossing powders. I also altered the background paper using Perfect Pearl's.
The large Butterfly was die cut using Tim Holtz Sizzix Die, Layered Butterfly. I wanted  a very light floaty effect so  decided to use the Perfect Pearl's on vellum.
I gathered my Perefect Pearls, PP Brushes and Perfect medium. I don't have the PP pen so used my Versamark pen instead. You can see the brush sizes below, just in case you don't have the PP set.
Taking my Versamark Pen I applied the embossing medium to the vellum and then brushed on the Perfect Pearls, using the small, fine tipped brush. I used three colours and once the butterfly was covered I took the large brush to  blend/remove excess powders.
See below for the finished effect and comparison. 
I then took a page from Tim Holtz Wallflower Paper Stash and once distressed, stencilled etc I applied  embossing ink using my Versamark Pen to alter the paper. I then took some dry  PP powders and applied them to the inked areas, which included some foliage and  parts of the butterflies. This really altered the paper to accommodate my beautiful, shimmering butterfly.
I have tried to catch the highlighted areas on camera and you can just see the effect in the photograph below.
Tim Holtz Sizzix Trellis die was inked in Perfect Pearl's Medium.  
Perfect Pearls were then well mixed with clear embossing powder and applied to the die cut shapes before heat embossing. (I just mixed products in my lid as it was easy to clean and i used a coffee stirrer to mix, but you may require something bigger depending on the size of the areas you are embossing x)
Please be very careful when heat embossing and allow the items to cool as you could burn your fingers etc. You can see the finished look below, which was stitched on to the background paper's in keeping with Brenda's current challenge theme 'All Sewn Up'.
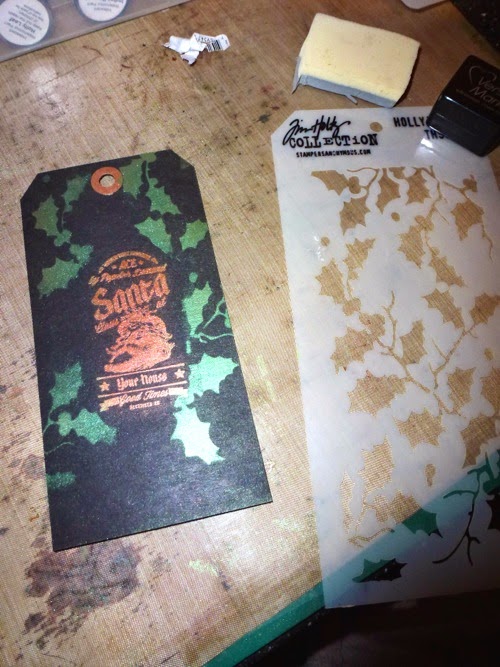
On the tag below I used Perfect Pearls with Stamps and Stencil's
You can use any stamp, which you ink up with Perfect medium, Versamark or any other embossing ink of your choice. Although Perfect pearls can be used on any colour of paper, I chose to chose a black tag for this project as I liked the vibrancy created. The stamp I used is a new release from Paper Artsy and is now a huge favourite.
Once I had stamped my image on to the tag I dry brushed the Perfect Pearls powders over it, once again using the fine brush. The large soft brush was then used to remove excess powder. 
Tim Holtz Holly Bough stencil was placed on top of the tag and Perfect Medium was applied over it using Ranger Cut 'N' Dry Foam. Again I took the Perfect Pearl's powders and dry brushed them over the inked images. Ranger Stickles  then completed the look.
The tag below was created using Perfect Pearl's and Tim Holtz  Holiday Knit Stencil.
For this project I decided to tape down my tag and the stencil so I had the continuity of the pattern without worrying it might move. 
Ranger Cut 'n' Dry Foam was used to apply the Perfect Medium to the tag.
I applied two colours of Perfect Pearls using the dry brush technique and you can see the outcome below.
Once brushed with the larger soft brush this is how it looks........I love it !!! To finish I die cut Tim Holtz New Alterations Thinlits, Holiday Greens and Holiday Words-Script in Kraft card stock and adhered some berries/hand dyed ribbon
On the tag below I used the Perfect Pearls with water, painting in some of the area within my stamped image. 
First of all I stamped my image using Jet Black Archival Ink, then applied clear embossing powder before heat setting with my heat gun. 
Once it has cooled I placed some water on my brush and then mixed in a little Perfect Pearl's powder on my craft mat. ( You could use a little palette if you had a larger area to cover)
 Once satisfied with the consistency of the PP's I painted Santa's hair and beard. ( I wish you could see the shimmer  :-))
I then took some Distress Marker Pens to highlight Santa's cheeks and to colour the foliage in his hat. Vintage Photo was then applied through Tim's Holiday Knit Stencil. I then blended Vintage Photo DI around the sides of the tag and edged with Walnut Stain for more depth.
So there we have it, some simple ways to use perfect pearls, with stunning effect...................I am thrilled with these tags and I love the shimmer of the Perfect Pearls :-)
The project below is not quite complete but will be posted on my blog at some point next week..so I hope you can join me then x
Thank You for sticking with me and I hope that I have managed to inspire you or refresh your knowledge of this wonderful product and it's amazing uses.  (Can also be mixed with your home made sprays to obtain that wonderful shimmer effect, just mix with water and your favourite DI.)


Products used can be purchased from Country View Crafts, who are our regular sponsor here at A Vintage Journey, and Susan's prices are very competitive, coupled with free P&P.
I have provided a list and link to the products for your use below.


Huge Hugs to you all and I hope to see you soon. Particularly looking forward to viewing your entries  in our current challenge theme, which was chosen by Brenda and is 'All Sewn Up'. The winner receives an online gift voucher to spend at Country View Crafts and we have a Top 3, with Pinworthy Badges to display on your blog.

Take Care
Annie xx


Friday 14 November 2014

Challenge 19 - All Sewn Up

Happy Friday to you all and welcome to our next new challenge pit stop. Today we are asking you to think about how you can include the theme of sewing or something sewing related in a project with some Tim inspiration added in. It's simple - a sewing inspired creation, any style - it could be that you use a Tim technique, use some of his products, maybe you will case one of his tags but make it sewing based, you choose but please make it clear what the Tim influence is as so many people disqualify themselves from being able to win the prize when we are not sure how the entry fits to our challenge and rules. Be adventurous and make whatever you like, it doesn't have to include real sewing but must be focused within that theme. So what are you waiting for?

Let's take a look at what the amazing Creative Guides have been inspired to make.


I was inspired to use plain cotton fabric to make a journal. The background is layered with distress inks and gesso with a Tim stencil and a text stamp. The collage incorporates eclectic elements fabric images, ideaology and personal items as well as Tim's gorgeous layered butterfly die and texture fade, if you love using crinoline I'm sure you'll love the texture and dimension created using them together. I explain the whole process for making this over at Bumblebees and Butterflies including the materials used to make the flexible covers.


Brenda's challenge was just the push I needed to sew up this sweet little fabric basket using a free tutorial I found on line several years ago (but never made!) and some of Tim's wonderful Eclectic Elements fabric pieces. Then I just had to dress it up a bit using several Idea-ology findings! You can see just how I made and decorated my fabric basket on my blog post here.


I'm "sew" glad Brenda chose this theme for the challenge, one of my favorites. I'm sharing a card made for my Mom's birthday. There can be no doubt about Tim's influence with the Sewing Room Die and the Sewing Edge Die used here. Please stop by my blog here to see all the details.


A needle case with a difference... ring bound, grungey and full of Tim inspiration! From distressed and torn, stamped and dyed, and full of Tim products too (although not entirely). My little book is going to be a little stocking filler for a friend who likes her needlecraft. I just hope it doesn't give HER the needle, lol! You'll find my step x step here. Chris xxx

I have taken Brenda's challenge to make a sewing inspired project quite literally by creating a pin cushion using Tim Holtz dies and fabric. If you would like to see what the back of the dress form holds you can check it out here on my blog.


I decided to make a sewing box, which I gave to my daughter to take to London with her. Using Tim's papers and an eclectic mix of goodies and techniques to decorate it. To see how I made this box and what's inside it, please pop over to my blog Juliz Design Post.


Tim's Eclectic Elements fabric was the inspiration for my textile hanging but I got quite carried away adding lace and other sewing ephemera! I had great fun making this tattered flower from crinoline and scrim using the Tattered Poinsettia die - it is not just for Christmas! Join me on my blog if you want to see more details.


Christmas is now looming and I need to get a start on cards for friends and family (with DT samples pretty much done and dusted). So thoughts turned to how I could incorporate a seasonal twist on the sewing theme. As is always the case for these challenges I headed straight to Tim's blog for some ideas and techniques and (of course) wasn't disappointed!

Head over to my blog to find out where he took me...


So now we are looking forward to seeing what has inspired you and how you take this theme forward. Come take this trip with us and join in the fun. Leave your entry link below and we will be taking a stop at your blog to leave some love.


hugs Brenda and the team. xx

We look forward to seeing your entries. This link-up will close on Thursday 27th November at 6.30 pm GMT