This is a unique challenge blog where we are inspired by and focus on the Vintage; shabby; mixed-media; art journaling; industrial, timeworn and steampunk genres and encompass the talent, flair, expertise and ideas of many artists that we are inspired by. We welcome all types of projects - cards, journaling, assemblage, layouts, albums, atcs, altered art in fact whatever you want to share (as long as it is in good taste).

Monday 28 July 2014

Destination Inspiration - Using Distress Stains

Hello everyone, Anne here and it is my pleasure today to host our regular feature - Destination Inspiration here at A Vintage Journey. 

 I am going back to basics using only Distress Stains (and a little stamping and embellishing).  I love using Distress Stains, they are my go to choice for colouring.  They are so versatile and easy to use, the colours stay true and they can be used in a whole variety of ways.  If you saw my post last Friday (here) you will see that I used them for watercolouring, so I am not repeating that technique here.  

In this tutorial I have concentrated on three techniques for using Distress Stains to create your tag bases.

Technique 1 - Brayering & Spritzing with Distress Stains

Take a tag, I used a white one (cut from Ranger Speciality Paper), dab some Distress Stain directly onto your mat (I use a glass one just for ease), take a brayer and roll it lightly through the Distress Stain.


Run the brayer up and down the tag, picking up more DS if necessary.  The brayering gives an uneven and very light coating on the tag, as you can see below.  Cover as much or as little as you wish.  On this sample I was happy with rolling back and forth twice.  You could use several colours here and if you do I recommend that you do them one by one, drying thoroughly each time, so as not to muddy your colours. Dry the tag thoroughly. 


Take a stencil, I have used Tim's doily stencil and place it over the dry tag.  Take some of the Distress Stain and put it in a mini spritzer bottle (Tim does a demo showing how to do this easily HERE) and lightly spritz over the stencil.  You can tape the stencil down if you wish but mine was lying quite flat and I just spritzed gently, ensuring I covered the whole area.


Carefully lift the stencil and you should have a nice covering over your tag.  Dry with a heat tool or just leave to air dry.  Some of the colour may run a little, but I am quite happy with that.


Finish the tag off by adding stamping and/or your favourite embellishments.  I used Tim's Frameworks trellis die and cut it the from another tag I created from mopping up left over stains.  I never waste any of the lovely stains! The vintage seam binding was also coloured with Distress Stains.


Technique 2 - Stenciling with Stains

For this technique take your favoured colours of Distress Stains and dab them onto your mat.  I used Wild Honey, Peacock Feathers, Peeled Paint and Salty Ocean.  Take a tag and spritz it very, very lightly with water.  I find this easier than spritzing at the next stage, with this particular technique, but the choice is yours.


Drag your tag (in this case I used a Manila one) through the stains in the same way you would do for Tim's wrinkle free technique, moving and tipping the tag to let some of the colours run.  Dry it and drag it through again until you are happy with the covering and dry thoroughly.  Remember to mop up any remaining stain from your mat onto another tag.


Dab some Distress Stain onto your mat and place a stencil of your choice over the tag.  Take a sponge (I used a simple make up one), dab it lightly into the stain and then dab gently through the stencil where you want it to show.


Carefully lift the stencil and dry the tag thoroughly.  With this technique it is best to dry it with a heat tool so the colour does not 'seep' further into the tag.  I love the effect of the DS stenciling - hard dabbing creates strong colour and lighter dabbing creates a ghost of colour.


I wanted to create a seaweed effect on my tag so I took a second stencil, some Peeled Paint Distress Stain and again dabbed it through the stencil, where I wanted the seaweed to be.


Carefully lift off the stencil and dry the tag thoroughly.  Don't forget to clean off your stencil or it may transfer unwanted ink onto your next project.


Now decorate your tag in your chosen way.  I wanted to use my favourite seahorse from the Blueprints set.  I added a starfish from the mini Blueprints set and some more grasses which I cut from the Movers and Shapers Mini Branch and Leaf die. 


Technique 3 - Wrinkle Technique using Stains

Many of you will use and be very familiar with Tim's wrinkle free technique but Tim also did a 'wrinkle' technique although I have not seen it used very often.  This involves screwing up a tag really tightly, in this case I used a manila one. You can lightly spray the tag with water to make the job easier but I used the tag dry in this case, as I wanted fairly big creases.


Unfold the tag and smooth it out.  If you pre-wet your tag the 'wrinkles' are likely to be a lot smaller.


Dab your chosen Distress Stains on your mat (about the same amount as in the previous technique) and drag the tag through the stains.  If you need more than one drag, make sure you dry thoroughly between drags.  I needed two drags on this tag.  It was still not totally covered so I spritzed a little water over the tag and let it blend.


Once I was happy with the coverage, I dried the tag thoroughly.  Next, I ironed the tag between two pieces of thin fabric.  You could also use brown paper or plain copier paper.  If you are using your household iron, do not iron directly onto the tag, as some of the stain may transfer onto the iron and then onto your clothes (ask me how I know that...)!  I use a little travel iron that I keep for craft work only.  This flattens the tag beautifully but leaves lovely wrinkle imprints.


The surface is now flat enough to stamp on.  The tag shrinks slightly with this technique and so I usually add another tag underneath, in this case a Ranger black tag and it gives a lovely little border around the whole tag.  You can see how well the stamping works, even though the wrinkles look quite deep.


I finished this tag simply by adding some vintage seam binding which I also coloured with Distress Stain.  They really are amazingly versatile!


So there you have it, three ways to use Distress Stain for creating backgrounds.  If you have not tried these techniques before I hope you will feel inspired to do so.

The current challenge (HERE), at A Vintage Journey is being hosted by the uber talented Jenny and as some of you will know, it is all about stains. My Creative Guide Teamies have created some fabulous pieces using Distress Stains.  We hope that you will get your stains out and create something, inspired by Tim Holtz and join in the journey!

For more techniques for using Distress Stain you can see Tim in a video HERE.

Products used in this post can be found at Country View Crafts as follows:

Distress Stains - Find them HERE
Tim Holtz Stampers Anonymous Stamps - Find them HERE
Tim Holtz Collection of Layering Stencils - Find them HERE
Tim Holtz Idea-ology - Find it HERE
Tim Holtz Crinkle Ribbon - Find it HERE


Friday 25 July 2014

Challenge 11 - Just Stain It

Hi there fellow travellers and welcome to the next challenge here at A Vintage Journey. Jenny here from Pushing The Right Buttons as your host for the next fortnight with a theme designed to get you diving into those Distress Stains. Distress Stains are the best way of getting your favourite Distress Ink colours in liquid form without losing their intensity. That makes them ideal for staining flat surfaces/edges and crackled surfaces, painting, dripping, splatting and so much more. Show us what you can do with your Distress Stains.

At A Vintage Journey we ask that the name of our current challenge theme and a direct link to that challenge be included in your blog post. There is so much beautiful art to be shared in our blogging world, but we are a Tim Holtz inspired challenge blog and we need to see a strong Tim Holtz influence in what you produce, using his techniques, projects, ideas or products. Please take a few minutes to look at our Travelling Instructions and also visit Tim's Blog for further inspiration.

Our regular sponsor, Country View Crafts, is offering a £10 gift voucher to be redeemed at their online store for one lucky winner and we have a Pinworthy Badge for the Top 3 projects, so why not hop on board!


The Creative Guides have made some wonderful pieces to inspire you. Click on their names and you'll be whisked away to each Guide's blog to see how they've been using their Distress Stains.

Jenny

Those of you who know my friend and fellow team mate Anne will be well aware how talented and imaginative she is, so a present for my 'birthday twin' had to be out of the top drawer. This Eileen Hull Mini Album has been cleverly designed to make it a great size and easy to put together. The dilemma (as always) was how to decorate it so, along with many other Tim Holtz products, I delved back through time to the class some of us in the UK were lucky enough to take with Tim last year and figured Distress Stains were definitely the way to go.

Chris

This is probably the strangest project I've made during a summer but I guess that's the way our crafting goes, particularly if you love Tim's influences. What started out as a floral (tattered pinecone roses) tag turned into a Halloween hanging and all because of Tim's Fired brick DS! LOL Tim shook the world of craft upside down and inside out when he started producing all his wonderful products so I no longer worry about where something takes me, it's all part of MY vintage journey. A detailed step x step and more piccies are over on my own blog if you want further details.

Anne


I was thrilled to see Jenny use 'Just Stain It' as her choice for this challenge.  I love to use stains, particularly for watercolouring and stenciling.  I used Tim's wonderful Mini Blueprint 6 set for my card, full details can be seen over on my blog, if you would like to see more.

Nikki

I am quite new to distress stains so this was quite an experiment for me - but great fun. I decided to use my stains to create some backgrounds and then got carried away staining my die cut clocks and arrows, chipboard letters and using them with my paintbrush too. I have a little montage of photos over at A2A - Addicted to Art so do hop over if you would like to see them. 


I am into making masterboards for journal covers at the moment and this is one made for a bought sketchbook from a UK chain of shops that sells craft and art products. I used distress stains for all the colouring, over gesso, texture paste and distress crackle paint. They are so versatile and you can use them for many techniques.


I love Distress Stains, a great way of applying ink and creating lots of stunning effects varying from backgrounds to embellishments. I usually use them for Journal pages, but decided to create pages to decorate a Tim Holtz Configurations Book to see how I used them on my project please visit my blog.


It has been some time since I played with Distress Stains and boy did I have fun using various techniques a la Tim Holtz :-) The papers used are from Tim's Wallflower Stash and of course I just had to use Distress Stains on kraft glassine paper, kraft card, tissue tape and ribbons.  To view more details please click on my name (above), which will take you directly to my blog x 


I do love playing with those Distress Stains and there are just so many uses for them. For my very large taggy card, I combined the used of stains and Painted Industrial and this was layered up using some of Tim's fabulous paper and other sewing themed goodies. For more information you can visit my blog and thank you. 


I love the versatility of distress stains..yummy distress colours in a liquid form. I set too using stains to create the background, stamp with, dye the ribbon and create the focal butterfly..stain was certainly the name of the game..for all the details please see  here on my blog.


Well I'm sure you'll now have lots of ideas with all that fabulous inspiration from our Creative Guides. Let's see them put into action and shared right here at A Vintage Journey. Don't forget, please make sure you have followed the rules set out in the Travelling Instructions as failure to do so will mean you will not be eligible for the prize draw. And if you would like the Creative Guides to leave a comment on your entry please remember to switch off Word Verification on your blog.

Take care of yourselves, Jenny xxx

Monday 21 July 2014

Welcome Sandra as Guest Creative Guide

Happy Monday Readers, so glad to have you along to see our next amazing Guest Creative Guide and today we welcome the lovely Sandra Mouwen who has a fabulous project to share with us and a visit to her blog will reveal even more wonderful art to admire.

photo
Hi, I’m Sandra Mouwen from The Netherlands. I started with paper crafting a few years back, in 2011 to be exact. I fell in love with the products of Tim Holt and love watching tutorials of him on YouTube! He is such an enthusiast, and he really motivated me to try and experiment with products and techniques. I started my blog in that same year and I love the supporting blog community so much! Soon I started joining in with challenges, and took workshops with all kind of techniques. I’m on the DT of Simon Says Stamp Monday challenge since 2012 and it’s so much fun. I like all kinds of styles, but the messy, mixed media, grungy styles are my favorites.
 
IMG_3988
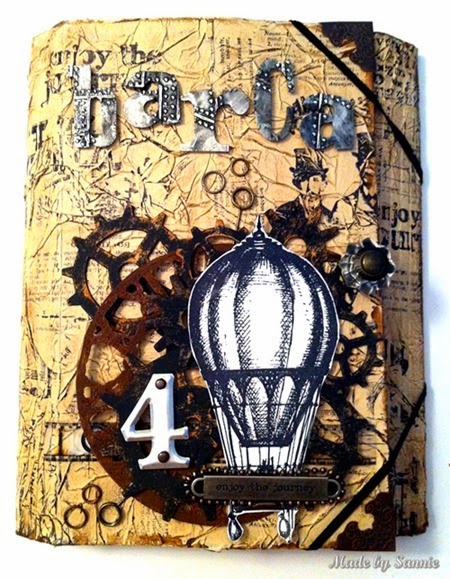
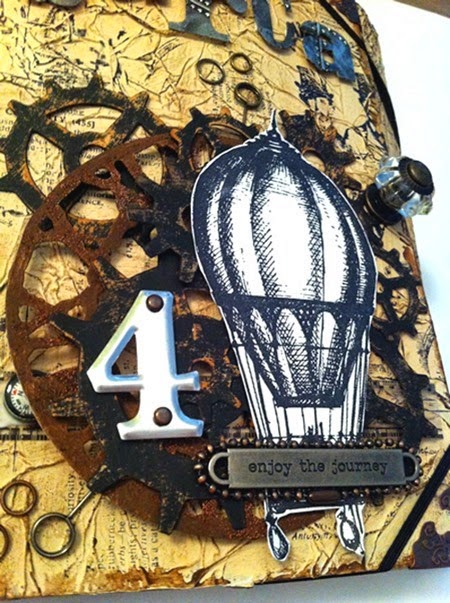
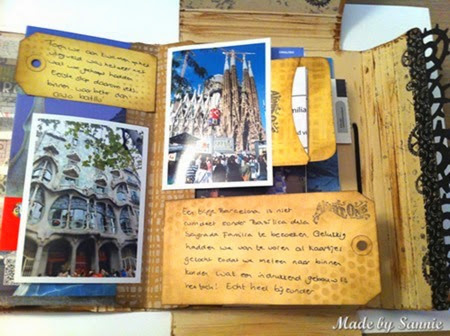
I’m so thrilled to be a guest designer here at a Vintage Journey! Thanks for the invitation, Brenda! I like to share the folio I made for this challenge. Annie is the host of this challenge, which is ‘Dies and Distress’. Well two of my favorite things in crafting. I love steampunk, and I went for it with this folio. I went all nostalgic with this challenge, because I used the first Tim Holtz dies I bought, the Weathered Clock, the Gadget Gears and the Steampunk On Edge.
IMG_3989
I distressed the gears by painting them black first and then sanding them with a Sanding Grip. The parts that were distressed I inked with Rusty Hinge or Walnut Stain Distress Ink. The clock I painted brown and while the paint was still wet in a few places I poured some Rust Embossing powder over it and melted it with my Heat tool.
IMG_3990
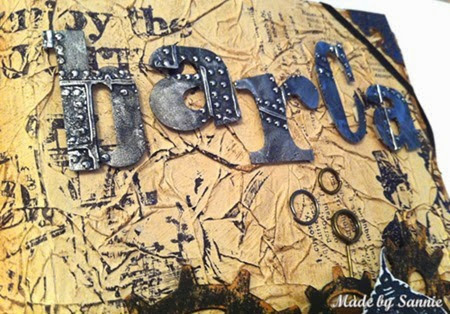
My all-time favorite alphabet die is the Word Play set. I cut the letters BARCA out of Metal foil that I adhered to a piece of cardboard and ran it through my vagabond in the Riveted Metal Embossing folder. To distress the letters, I painted them black and when it was almost dry, I rubbed the excess paint off. For the full tutorial please visited my blog: Made by Sannie.
IMG_3995
 
Wow Sandra, what a fabulous folio and great techniques and effects to give it that aged look. Thank you so much for sharing your fabulous work here at A Vintage Journey, we really appreciate the time and effort taken to create such a special and inspiring creation.
 
 
………
 
Just a quick reminder that the current challenge finishes this Thursday evening and a brand new challenge begins at midnight UK time Friday morning and it’s the amazing Jenny (Pushing the right Buttons) who will be hosting. We look forward to seeing you there.
 
Have a wonderful week.
 
hugs Brenda and the Team xxx


Friday 18 July 2014

Guest inspiration and the newest winners

It’s the Friday after a new challenge launch and we love sharing a guest winner’s project with you. Today we have the lovely Karen joining us who was the winner of Jenny’s ‘Get some texture’ challenge. So without further ado let’s find out something about Karen and see the fabulous project she has made for us – an altered book.

Slide1

Hello I'm Karen Garrard from Winton Rose Paper Creations in Australia.  I am super excited to be Guest Designer here on A Vintage Journey. When I was told about Challenge #10 'Dies and Distress' I couldn't wait to get started. There's just so much you can do with the Tim's Distress Range. So many different finishes can be created. The dies make our lives so much easier and there's a wonderful selection of designs.  I have always been fascinated with what can be created with paper.  As a child I used to send a stamped self addressed envelope to the children's programs for the origami sheets, always asking my mother for another stamp.  The only other crafty thing I remember having were cane baskets that I could glue lace onto.  I knew I enjoyed creativity but in the back of my mind it would have to get A LOT better for me to continue with it.  It wasn't until 2006 I got right into card making.  Then in 2010 I discovered the wonderfully talented Tim Holtz.....I know!!... call me a late bloomer. This AMAZING guy has bought vintage into my life, taken me back to a time way before I was even born, and I love him for it!!! THANK-YOU TIM!!  From a very early age I have always been fascinated with antiques particularly from the Victorian/Edwardian times and am really pleased I can now create my own vintage looking pieces with all the wonderful tools we have available to us today.   I decided I wanted a place to share my creations so started my blog in 2012, set up the spare room as my studio and have never looked back.  I hope you enjoy the piece I have created here for you today.  
I would also like to extend a HUGE thank-you to Brenda and the Creative Guides for asking me to be guest designer. 
 
yes 102
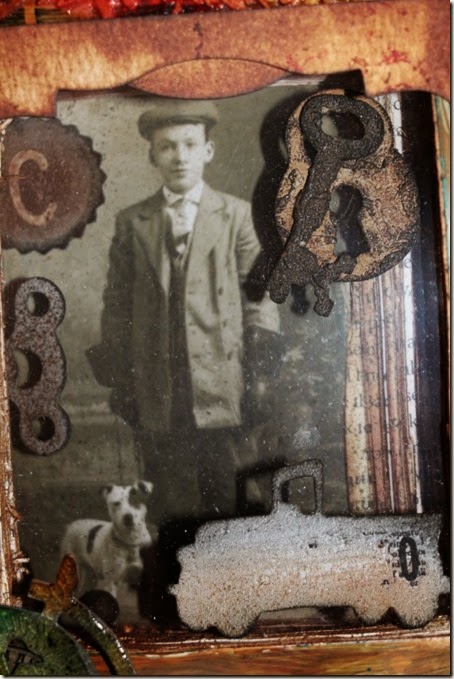
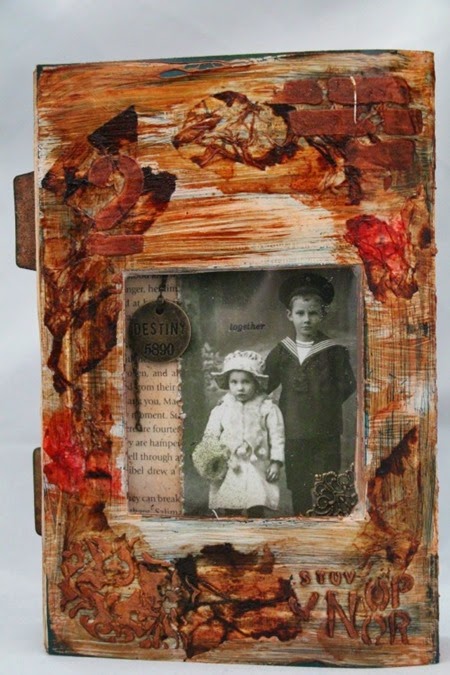
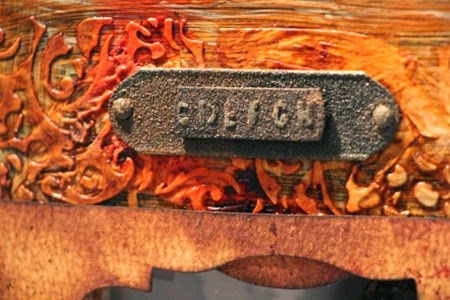
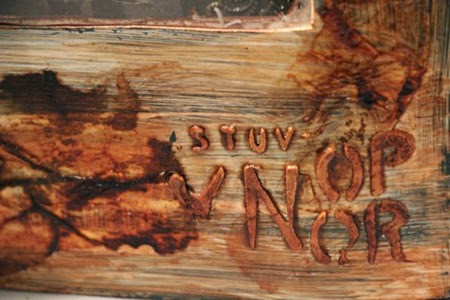
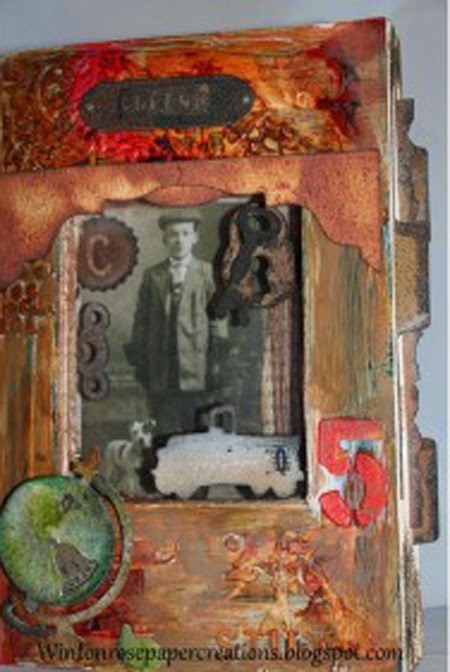
This is the front of my altered book. Firstly I cut the pages away to form two windows, one in the front and one in the back.  Then I used Picket Fence Distress Paint for the base and added some tissue paper with Modge Podge. Then some stenciling with texture paste have been added before using the Distress Stains.
YES 20
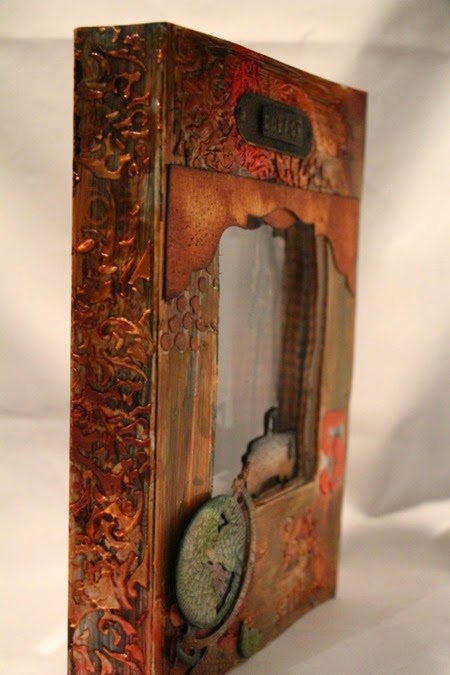
On the spine I have used tissue paper and  a stencil with embossing paste. I like how you can still see some of the original writing on the book under all that distress stain. ​
YES 27
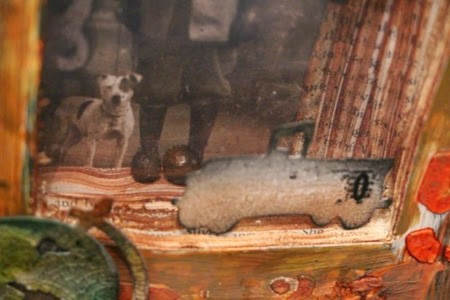
The back of the book has been decorated in the same fashion as the front. This window of the book features one of Tim's Found Relatives which I have grunged and sprayed with the Distress Marker Spritzer using a  Distress Marker. I have also added a corner flourish, some metal chain and a philosophy tag.​
yes 104
This is a close up of my distressed pearls and my very first time using the Distress Embossing Powder........ I LOVE them! I placed some pearls in a small tray so they wouldn't run away and coated them with Embossing Ink. Then I rolled them around in Vintage Photo and Walnut Stain Distress Embossing Powder and heat set them on the end of my tweezers. Now I have some little vintage looking balls which I placed behind the third piece of acetate. As you roll the book from side to side they role around adding some more interest. ​
YES 21
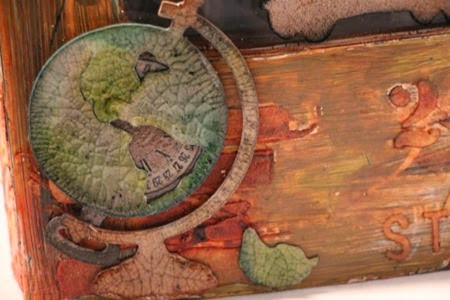
Here is the mini Globe and Pocket Watch dies placed one behind the other. I inked the pieces cut from grunge paper, then on the globe I added crackle accents. On the pocket watch I added one of Tim's rub-ons and Glossy Accents. I removed part of the globe to reveal the pocket watch underneath.​
YES 22
This is one of the reasons I LOVE Tim's Distress Powders. Here is a metal plate with some brads and the bottom piece from the clip board die which I have added some embossing paste through a stencil. Then I added the distress powders. 
YES 24
A close up of more stenciling and tissue paper. ​
Slide25a
For a list of all items used and a step by step you can visit my blog....wintonrosepapercreations.blogspot.com
 
Thank you Karen for sharing your amazing project with us today, it’s a fantastic work of art and I for one will be hopping over to take a closer look at your process steps.
 
 
……………………………………………….
 
Now onto the winner’s of Nikki’s challenge which was to use every stamp in a set. We had some fabulous entries as always and without further ado here are what Nikki and the Creative Guides chose for winner and pinworthy mentions.
 
Drum roll …..
Our winner for this week is -
 
Nikki says - I love how Rosie has created this fantastic composition from Tim Holtz’s Classic #1 stamp set. The stencilled and inked background is wonderful and Rosie’s use of distress markers to colour some of the stamped images complements this beautifully.
 
This is  a beautiful piece Rosie, thank you so much for entering our challenges and you are the winner of the £10 shop voucher from our sponsor, Country View Crafts. Your project will be pinned to our winner's Pinterest board and will be invited to join us on an excursion shortly. A blog badge is also on it's way.
 
We also have three Pinworthy mentions and these projects will be pinned to our Pinworthy board and badges will also be on their way to you too.
Congratulations go to -
No 10 – Claudine Criner
No 17 – Julia Aston
 
Thanks everyone for your support and continued travels with us on A Vintage Journey.
 
We will see you Monday with another of our fabulous Guest Creative Guides, but for now enjoy Friday and the weekend wherever you are and whatever you have planned.
 
hugs Brenda and the Team xx


Monday 14 July 2014

Destination Inspiration - Altered Clay Pot

 
Terry here with my first Destination Inspiration Share and thank you for joining me today. I decided to alter a clay pot using a variety of fun Tim Holtz products most which are available at Country View Crafts, our wonderful sponsor.  Here we go and feel free to contact me should you have any questions! This will be photo heavy, so grab that cup of whatever makes you happy!

The first step is to wash and lightly sand your clay pot and let this dry completely, apply a coat of matte sealer of your choice. Once dry, using the applicator tool,  I applied alcohol inks (Salmon and Sunshine Yellow) and a mixative (Snow Cap) with a squirt of blending solution over the colors. Next torn tissue paper was applied and I used Americana Decou-page, but any medium you like is fine. I left some areas uncovered.
Then I applied Wild Honey and Mustard Seed Distress stains in a random pattern and gave a spray with water to blend. Have a damp paint brush available to catch any drips or to move color around. When dry, I gave a spray of matte sealer.
Next is to tone done some of the brightness using some Antique Linen Distress paint, lightly load one side of a paint brush and rub off excess on a paper towel and then begin highlighting the raised tissue wrap areas and don't be concerned with a little extra paint going where you don't want it. You can rub that into to pot for more color variation using your fingers.
Now we repeat the layering process using Brushed Corduroy and Black Soot. With the last application of color, I also turned the pot upside down to hit areas in a different direction. Once happy this was sealed with a spray. Sorry this photo blurred.
The stages of the lonely clay pot!
The Latticeworks stencil fit perfectly around the rim of the pot with just slightly off from start to finish, but not even noticeable. Loved that. I taped down the stencil and pounced on Black Soot using the applicator and each section was heat set and sealed with spray before moving onto the next areas. You could use paint, but I really wanted a more translucent look, so went with the Distress ink. The spray sealer will also lift off a little of the Distress ink and that is exactly the look I wanted to achieve.
Now that the pot is all prepared, I decided to decorate the pot with some stamped images from Classic #17 and Papillon. Some images were masked, stamped directly on the pot and then colored with Distress Markers (Antique Linen, Spiced Marmalade, Mustard Seed) or stamped on tissue paper and colored on the reverse side with Distress ink (Dried Marigold). After I apply a tissue image to the pot, I always apply another coat of medium over the image, but starting in the center and working to the edge. All imaged were stamped using Black Archival and then heat set.

A little secret is to always have a cotton swab and some alcohol handy in the event of a stamping mishap. Most of the Archival ink will lift off with alcohol when done quickly. Don't rub, but blot off and then gently wipe with water. Images stamped and colored with markers were given a quick spray with sealer to set color. All tissue stamped and colored images were applied with Americana Decou-page. When all was finished, again I gave the entire pot a couple of sprays with sealer. This will be varnished once I am sure I don't want to add more images.
 
I sure hope you enjoyed this little adventure and will go find an old pot and have a little fun altering it. Again I thank you for stopping by!