Hi everyone and welcome to our Winners and Pinworthies day here at A Vintage Journey!
We hope you enjoyed our Canvas challenge - we certainly had some fabulous entries. The Creative Guides always have a tough job selecting our favourites.
Before we share them with you, here's a fantastic project from one of our former winners. Iris of Whimsy Touches was the Random Generator pick from the April challenge, The Magic of Three, and she's here today with some more inspiration for the current All Squared Up theme. Over to you, Iris...
We hope you enjoyed our Canvas challenge - we certainly had some fabulous entries. The Creative Guides always have a tough job selecting our favourites.
Before we share them with you, here's a fantastic project from one of our former winners. Iris of Whimsy Touches was the Random Generator pick from the April challenge, The Magic of Three, and she's here today with some more inspiration for the current All Squared Up theme. Over to you, Iris...
_____________________

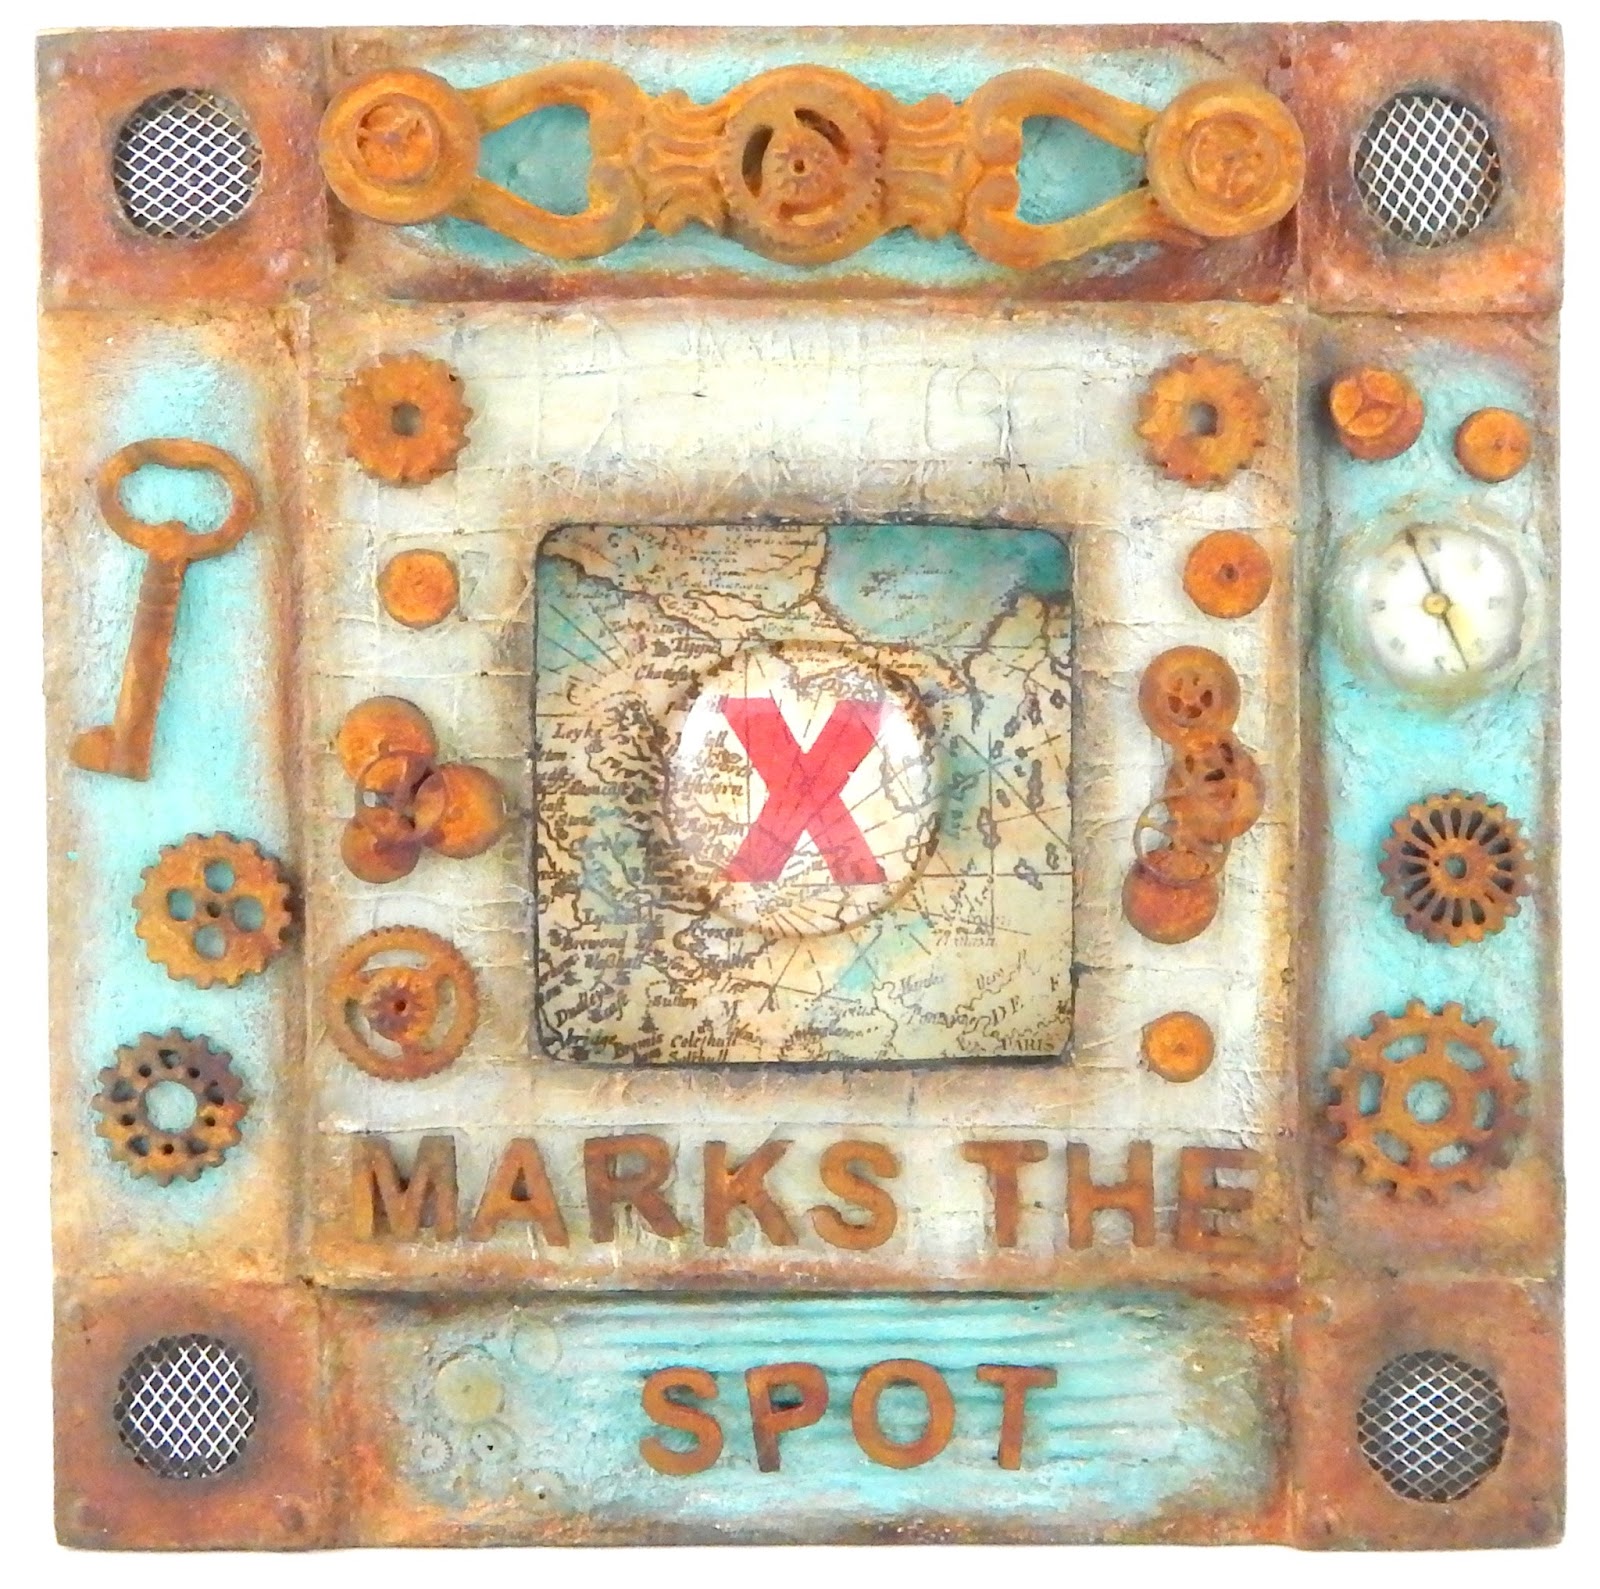
Hello makers! I am so excited to be a Guest Designer at Vintage Journey and share my Assemblage piece, I call "X Marks the Spot". A little about me; I live in the Washington DC metro area and I am around Arts and Crafts Enthusiast. I have never met an art medium I did not like. I enjoy creating with clay, acrylic paint, sprays, metallic waxes, texture medium, paper, and metal. I like sculpting, creating mixed media canvasses, assemblage, altering bottles, making jewelry. My style ranges from modern, Shabby to Steampunk/Industrial.

I got excited about the the July "All Squared Up" theme; it invoked several ideas. But before starting, wanted to see if I had anything square in my stash, then go from there. I found a Thrift store picture frame I bought a long time ago. The frame has this square within squares type thing going; how perfect is that? Now the frame inspired ideas too. Being that the frame has this shapes within shapes, I wanted to keep going on the same concept. So I decided to add a different shape in the center square. Went ahead with a circle and inside the circle...mystery.


Painting the Frame
I started by priming the frame with Gesso. Then painted the first layer with Golden Quinachridone Nickel Azo Gold. I painted the top layer square with Golden Teal. I have also adhered texture paper.


Making the Corner Squares
I cut the corner squares out of chipboard. Inside the squares, again going with my shape within shape theme, I cut out circles with an Xacto knife and added mesh wire. I created faux rivets using Viva Pearl Paint and painted the squares black.


I added Golden Fiber paste on the outer edges of the corner squares and blended with the rest of the frame. Sorry forgot to take a pic of this process when I first started. I do have some images of a second layer after painting the first layer.
I adhered an image of a compass onto the back of a one inch glass cabochon using Diamond Glaze and added it to the frame.


I then painted the frame with Golden paints: Red Iron Oxide, Titanium White, Teal, Buff and Titanium White. There was some back and with blending the colors. I painted the square on the top layer using Buff, Titanium White and Red Iron Oxide.
The corner squares and edges were painted using Golden Red Iron Oxide (great for a rust color effect) and used DecoArt Media Fluid Payne's Gray around the edges.


Embellishments
The embellishments; chipboard gears, metal key, letters, watch parts, and washers were treated with iron metal paint and rusting oxidation solution by Modern Masters following their instructions.

The Center Square
I cut a square for the frame's backing out of chipboard. This is where the X will go. I decoupage it with map scrapbooking paper. I then sealed it with Matte Medium. Added light wash of Red Iron Oxide and Teal to give it a distressed vintage look. The Matte Medium keeps the paper from getting too soaked with paint.
I did not have a desired size stamp of an X. So I drew it using block letter format, then cut it out with an Xacto knife. I used the negative space as a stencil and inked in the X using a makeup sponge and red ink.
Next, adhere a 1.5 inch diameter glass cabochon over the X. I gently squeezing out a drop of Diamond Glaze; measuring about 6 mm. You can also use Ranger's Glossy Accent, both work equally well. I then placed the cabochon over the X, ensuring to push downward and firmly and ensuring to eliminate any bubbles. My ink was not archival, so I added another coat of Matte Medium to seal it before affixing the cabochon. I stamped the X because if you're going to use a cabochon; the surface needs to be even or else you get a lot of bubbles and are impossible to get out as long as the surface is uneven.


Putting it all Together
Last but not least, I glued the embellishments to the frame and fastened the backing to the frame.

Below are some close up images. Well, my journey ends here. I hope you enjoyed my X Marks the Spot Assemblage.


_________________________
Thanks so much, Iris. What a fantastic project - definitely All Squared Up! - and so many great tips and techniques in your making-of details.
_________________________
So now, let's move on to today's winner drawn by the Random Generator.

Hello makers! I am so excited to be a Guest Designer at Vintage Journey and share my Assemblage piece, I call "X Marks the Spot". A little about me; I live in the Washington DC metro area and I am around Arts and Crafts Enthusiast. I have never met an art medium I did not like. I enjoy creating with clay, acrylic paint, sprays, metallic waxes, texture medium, paper, and metal. I like sculpting, creating mixed media canvasses, assemblage, altering bottles, making jewelry. My style ranges from modern, Shabby to Steampunk/Industrial.

I got excited about the the July "All Squared Up" theme; it invoked several ideas. But before starting, wanted to see if I had anything square in my stash, then go from there. I found a Thrift store picture frame I bought a long time ago. The frame has this square within squares type thing going; how perfect is that? Now the frame inspired ideas too. Being that the frame has this shapes within shapes, I wanted to keep going on the same concept. So I decided to add a different shape in the center square. Went ahead with a circle and inside the circle...mystery.


Painting the Frame
I started by priming the frame with Gesso. Then painted the first layer with Golden Quinachridone Nickel Azo Gold. I painted the top layer square with Golden Teal. I have also adhered texture paper.

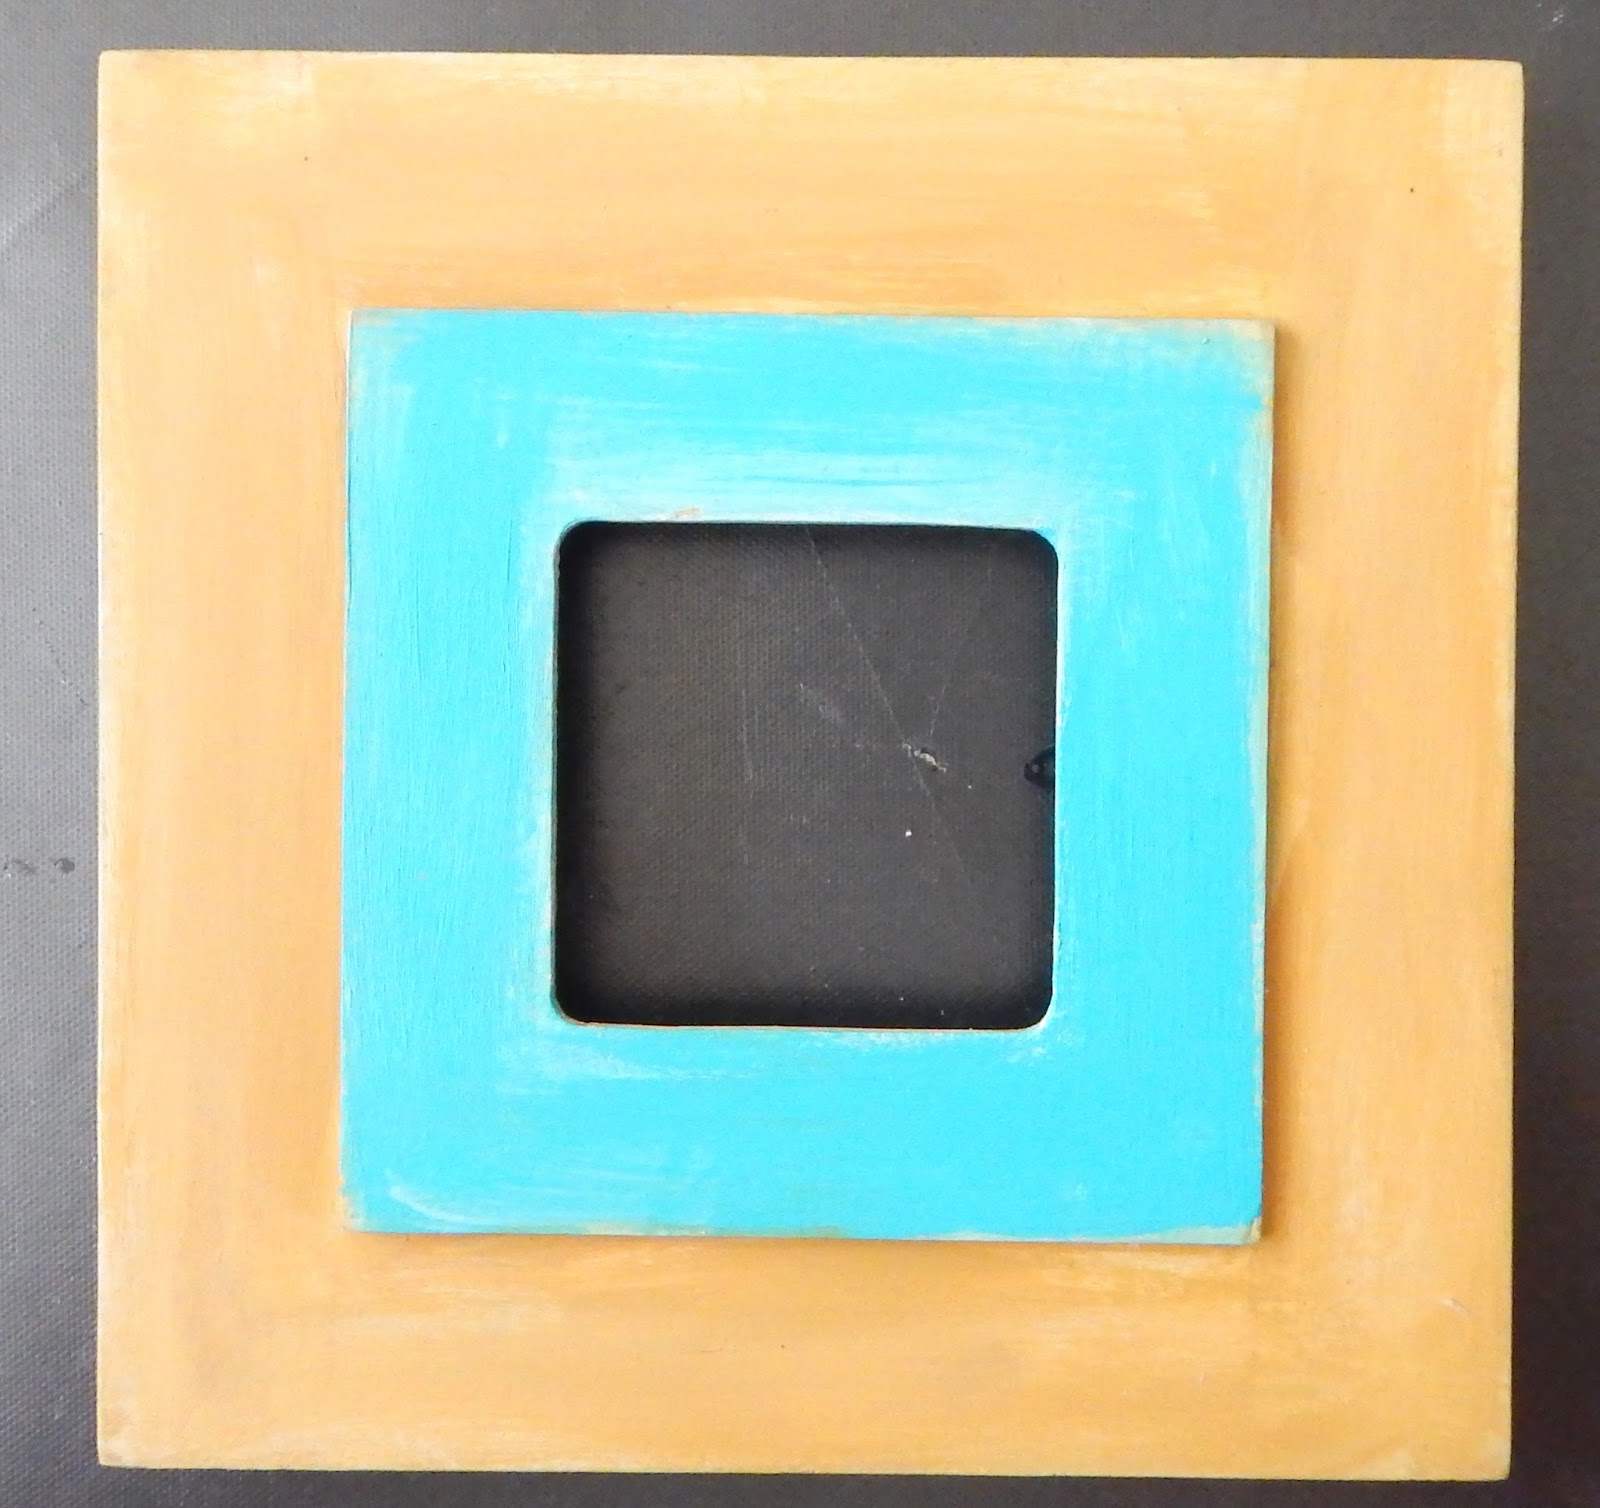

Making the Corner Squares
I cut the corner squares out of chipboard. Inside the squares, again going with my shape within shape theme, I cut out circles with an Xacto knife and added mesh wire. I created faux rivets using Viva Pearl Paint and painted the squares black.


I added Golden Fiber paste on the outer edges of the corner squares and blended with the rest of the frame. Sorry forgot to take a pic of this process when I first started. I do have some images of a second layer after painting the first layer.
I adhered an image of a compass onto the back of a one inch glass cabochon using Diamond Glaze and added it to the frame.


I then painted the frame with Golden paints: Red Iron Oxide, Titanium White, Teal, Buff and Titanium White. There was some back and with blending the colors. I painted the square on the top layer using Buff, Titanium White and Red Iron Oxide.
The corner squares and edges were painted using Golden Red Iron Oxide (great for a rust color effect) and used DecoArt Media Fluid Payne's Gray around the edges.


Embellishments
The embellishments; chipboard gears, metal key, letters, watch parts, and washers were treated with iron metal paint and rusting oxidation solution by Modern Masters following their instructions.

The Center Square
I cut a square for the frame's backing out of chipboard. This is where the X will go. I decoupage it with map scrapbooking paper. I then sealed it with Matte Medium. Added light wash of Red Iron Oxide and Teal to give it a distressed vintage look. The Matte Medium keeps the paper from getting too soaked with paint.
I did not have a desired size stamp of an X. So I drew it using block letter format, then cut it out with an Xacto knife. I used the negative space as a stencil and inked in the X using a makeup sponge and red ink.
Next, adhere a 1.5 inch diameter glass cabochon over the X. I gently squeezing out a drop of Diamond Glaze; measuring about 6 mm. You can also use Ranger's Glossy Accent, both work equally well. I then placed the cabochon over the X, ensuring to push downward and firmly and ensuring to eliminate any bubbles. My ink was not archival, so I added another coat of Matte Medium to seal it before affixing the cabochon. I stamped the X because if you're going to use a cabochon; the surface needs to be even or else you get a lot of bubbles and are impossible to get out as long as the surface is uneven.


Putting it all Together
Last but not least, I glued the embellishments to the frame and fastened the backing to the frame.

Below are some close up images. Well, my journey ends here. I hope you enjoyed my X Marks the Spot Assemblage.


_________________________
_________________________
So now, let's move on to today's winner drawn by the Random Generator.

Irit Shalom - No. 17


Our selected favourites become our three Pinworthies whose designs are pinned to our Pinterest board and you are invited to be a Guest Creative Guide. In no particular order, we have chosen:
No. 5 - Lys

No 6 - Jul D


No. 5 - Lys


Huge congratulations to you all. Your Pinworthy Badges will be on their way to you shortly and we hope you will join us here as guests for a forthcoming challenge.
Many thanks again to everyone who joined in this challenge. Our current challenge All Squared Up is currently underway - we look forward to seeing your entries. Check out the Creative Guide inspiration to see some of the diverse ways this theme has been interpreted.
Until next time - happy crafting!
Nikki
xxx