
Welcome everyone, it's our special invited guest week and we have the amazing Mark Gould with us today. Mark tours the country and venues teaching his amazing projects and loves the grungy style. So let's take a look at what he has made especially for our Create Within A Frame challenge.
**************
Morning all, Mark here and I am so happy and honoured to have been asked to be the guest designer for the Create Within a Frame challenge set by Julia this month. There is still about two weeks for you to take part.
I still class myself as a newbie to the craft industry and it's been an amazing and whirlwind experience and I'm loving every minute! I live in London and am a landscape gardener by day, but after a quick change into my cape I love nothing more than getting creative in my man cave - (with the help of my 2 cats of course).
My style has been influenced by many things including music, art and sculpture. I love mixed media and seeing how I can be as innovate as possible with colour and texture.
( I got my gf to write this as I'm no good at writing about me ;) )

*****

For this challenge I decided to go down the Shabby Chic route and up cycle one of the iconic Ikea Mirrors using Decoart's Chalky Finish paints and waxes along with their Media fluids and Media modeling paste.

I used a heat gun to gently melt the glue holding the mirror in and popped it out, Next the frame was given a coat of Decoart Media Gesso.

Using various stencils from Tando-Creative and some modeling paste I added some detail in random places around the frame.

Once the paste is dry the whole frame was painted with Decoart chalky finish Everlasting, I gave it two coats for a nice solid colour.
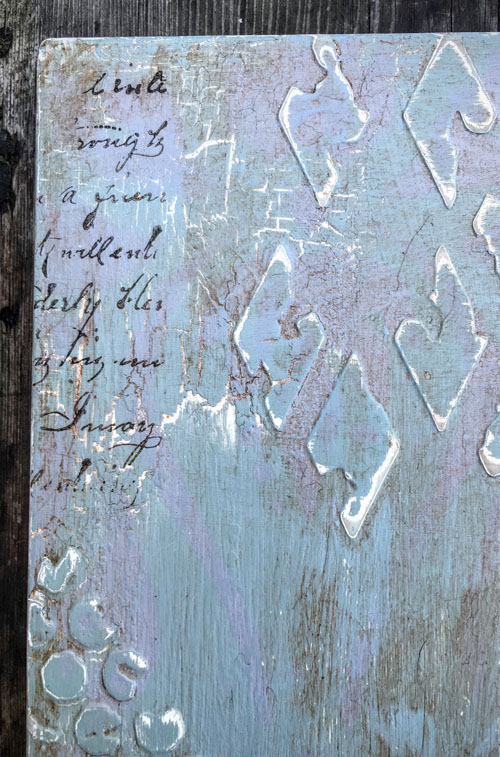
I also added some Chalky finish crackle medium in a few spots, You can just make it out as the shiny spots on the frame.

Once the crackle medium is dry I applied a coat of chalky finish Vintage, the colour doesn't quite show up in this light but its a subtle duck egg green colour. You can see where the crackle medium is working as the white paint is showing through.
At this stage I added some very subtle stenciling using a baroque pattern and the light grey chalky finish Yesteryear.
Using a fine grade sanding block/paper gently start sanding across the textured areas and edges of the frame to create a distressed look.

To finish the frame off and to give it more of an aged look I applied a coat of the chalky finish clear cream wax, left to dry and then applied a coat of the dark wax. Once the dark wax is applied take some kitchen roll and start to wipe back to achieve a look you are happy with. At this stage it's best to work light and build up layers of the dark wax instead of going heavy straight away.
I also added some stamping using a vintage script stamp from Stampendous and some dark brown Stazon ink.

For the inside of the frame I used a 4 inch canvas board and stamped it with a vintage cockerel stamp and some black stazon.
I added colour by adding colour washes of Decoart Media Fluids,A watered down base of Transparent Yellow Oxide was left to dry to give an aged base and washes of Pyrrole Red and Green Gold were added allowing each stage to dry first so as not to muddy the colours.
The canvas board was then sealed with some Matte Medium and then given a coat of Decoart One Step Crackle.
The aged effect was finished off with some Raw umber Antiquing cream to age the cracks.


Same frame, this time I added an old Bisque tile I painted as a coaster a few years ago.
Thank you so much to Brenda and the amazing team here at A Vintage Journey for having me play along. The projects I have seen so far have been beautiful and I look forward to seeing more of you playing along in this months challenge.
And thank you for stopping by and having a look at what I have created xx.
***********
Wow, don't you just love Marks's grungy shabby style and the effects he has created and I love the contrasting coasters in the middle. Mark resides at Spesh Ink blog and there can be found many wonderful samples of his fabulous projects and his class list. I have to say I am really proud to be teaching alongside him and Andy Skinner in Coventry this November, so if you are booked on you'll get to take a class with him and be wowed with what he makes. In the meantime it would be lovely if you could pop over to visit his blog.
Thanks for being such a great guest Mark, see you soon.
*****
As Mark said you still have a couple of weeks to enter the challenge and it would be wonderful to see you there if you are not already. We have had lots of amazing projects entered and don't forget a frame can be as simple as a doodled line, a mount or a proper bought frame, there are lots of ways to interpret it.
It is also a five week month for us so you get an extra Destination Inspiration post and next Friday is Tag Friday when we get to have fun creating a tag in any theme or way we want, so I hope you will come back again every Monday and Friday to see what awaits you.
Have a wonderful weekend.
hugs Brenda, Mark and the Team xxxx
Gorgeous work, Mark!
ReplyDeleteI love the shabby vintage look Mark has created on this frame, the colours are wonderful! Both the cockerel and the dragonfly look beautiful in the middle - a lovely pop of colour! Thanks so much for joining us here Mark, I am definitely looking forward to November too! Anne x
ReplyDeleteWow, what a super project and a fantastic step out Mark! I just love how you built up the layers on the frame (I now need that dark wax...)! The pops of colour for the inside make such a brilliant contrast!! Love the trick of getting the mirror out with the help of a heatgun! Oh and well done to your gf for writing such a brilliant bit about you!! :o)
ReplyDeleteThanks so much for guesting with us!!
Thanks Mark, you are a star for joining us with your fabulous project xxx
ReplyDeleteHi Mark, welcome. Love your shabby chic mirror . Love the focal imagery you used and the pop of colour used in the imagery which works so well set against the mirror. Love the touch of crackle too. Great idea using your hear tool to melt the glue to,remove the mirror. Thanks so much for guesting . Tracy x
ReplyDeleteAbsolutely gorgeous!! Both Frames! I love them both, with all of the stenciling and textures- just yummy Mark!! Bravo!
ReplyDeleteJackie ")
Thanks Jackie xx
DeleteI managed to fool you. It's one frame with two different inserts 😜 Xx.
Hi Mark great to see you here at AVJ sharing your creative talent with us all . Your altered frame is fabulous . Just love all the textured stenciling and the whole vintage distressed look you have created . Gorgeous colour tones too. Great step by step and like the heat gun tip for removing the mirror. One to remember for sure and love that it creates a space to add your own imagery panels- yours are both wonderful.
ReplyDeleteHave a great weekend Everyone . Amanda x
Such an amazing project...Loved both the looks Mark. Thanks for such a detailed tute and this shabby vintage one is just so appealing!
ReplyDeleteWhat a wonderful transformation of a plain black frame Mark! So many creative layers and colors, love the texture you achieved with the stencils and crackle - the contrast of the colors inside your frame on both samples are lovely! Thank you so much for joining us as Guest Designer at AVJ --- AND for creating for my create within a frame challenge!! It's a pleasure to 'meet' you! Julia xx
ReplyDeleteIt's such a fun challenge Julia. Painting and altering frames is one of my fave things to do. Being able to custome your own style to what ever picture you want to show off is so much fun xx.
DeleteAWESOME frame Mark. Both inserts are totally eye candy to me - love orange, roosters and dragonflies. It's so interesting how different the frame looks with both inserts - so different! You did a super work on that frame - it's just FAB. You hit this guest design spot OVER THE TOP Mark - SUPER FINE! j.
ReplyDeleteFabulous and great step by step.
ReplyDeleteHugs
Linda xxx
Great projects, gorgeous frames. Happy crafting, Angela x
ReplyDeleteFabulous project, Mark. Love the step out process. TFS
ReplyDeleteWonderful transformation as ever Mark. Love the subtle patterning from the stencilling and emphasis of cracks and raised textures. Fantastic to see you here as a Guest Designer x
ReplyDeleteI so love this frame. The gorgeous vintage feel you gave it is just amazing. Perfect foil for both of the framed images. This is the first time I've seen some of your work Mark. I'm heading over to your blog to see more. Great guest designer pieces. Thanks so much for sharing them! -- Mary Elizabeth
ReplyDeleteWhat a fabulous shabby textured frame, and I just love that crackled image. Brilliant project, Mark, and so wonderful to have you guesting with us this month.
ReplyDeleteAlison x
Love all the distressed layers Mark and the whole design is so you! Love it. Julia xx
ReplyDelete