

This is quite a long post so you might need to pour yourself a cuppa !!!

It is quite a daunting task to fill even the smallest of journals but I like to make a pile of embellishments which I can then use quite quickly to decorate my pages. For this journal I put aside a couple of days and cleared my desk both to tea dye elements and also to make lots of envelopes and ephemera ........

I quite literally poured myself a mug of tea from the left overs in the pot after tea one evening. Even in a small mug it is possible to dye quite a bit of lace, ribbon, pieces of wood, little flowers ......

You can get different levels of colour by using different types of textile. For example cotton lace takes the tea far more than an acylic based one. The lace and ribbon on the right hand side of the photograph was removed after one hour, while those on the left were left in the cup overnight.

Dyeing paper requires a bit more organisation and access to the kitchen. I make up a watery solution in a large washing up bowl and immerse ordinary copy paper into the water, shake it a little and hang it on the clothes airer. Do put an old shower curtain or something similar on the floor or the drips will stain the floor! Once they have hung for about 20 minutes I collect 4/5 pieces together and lay them on top of each other and put them in the oven (140 degrees) for about 10 minutes which really "crisps" them up!
By this time I had a lovely pile of dyed papers and textiles to work with.

I folded an A4 page of dyed paper into four and used a few of my favourite tag dies to cut as many shapes as possible.

I then stamped these with some favourite stamps. The child in me loves little piles of labels to work with!

I also used some of my ticket and label stamps to create some mats. I have added a little Vintage Photo Distress Ink around the edges to make them look more complete.

Next I made some small packets from the tea dyed paper using the Tim Holtz mini packet die and then stamped and decorated them with various tags, stamps and ribbons. Creating in this way - focusing on a single element - means I can have a lot of creative fun and even if they are not going to all be used for this project they will be used for another.

I had some vellum lying on the desk so added some elements on top and behind to create a little collage which then got stiched on the machine rather than glued.

This is a good opportunity to go through the bits box to find elements stamped for other projects and not used. Add in a couple of favourite dolls ........

Finally I cut my pages for the journal using Eileen's Passport die (they fit perfectly into the Wrap Around Journal).
For the front of each individual booklet I created a large vintage layered pocket for some journalling.

I started with a glassine pocket (stamp collectors use these and are easy to purchase on Ebay) and added a piece of card for journalling. I started decorating the front by adding some old text paper ......
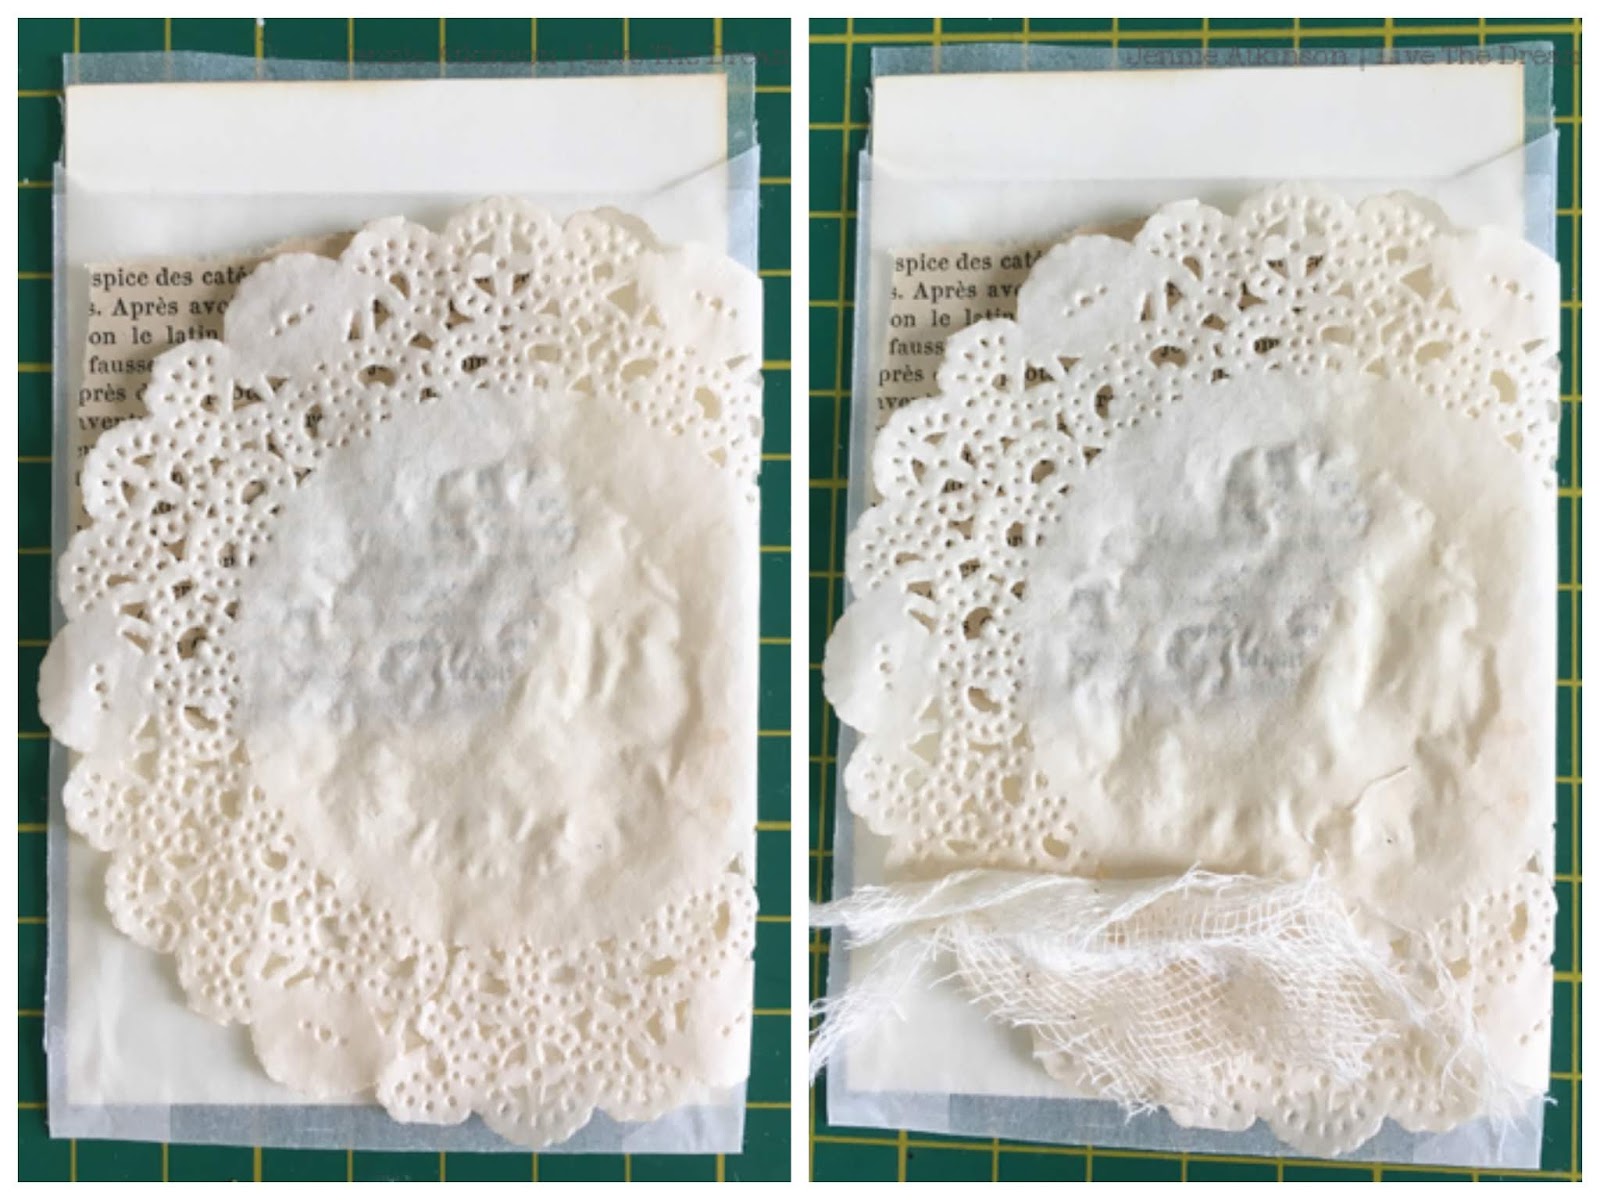
..... next I added a tea dyed doily and some white muslin ......

..... followed by a vintage photograph and then ribbon was tied around the whole envelope

..... finally I used one of my stamped labels and pearl button.

As I created I placed the finished items in a little box all ready for me to use. As a child I loved collecting things and having them in boxes ..... nothing changes!
I was then able to sit down and decide what I wanted to stick into each of the individual booklets and to set aside elements for the front cover.

I made a little pocket for the cover which I then stitched onto some vellum which was then stitched on to another label, a doily and some lace. It is a little fragile for a cover but the stitching will help to hold it all together over time. I used lashings of lace and ribbon to hide the elastic holding in the booklets, however I had dyed that in tea as well to tone it down a bit.
Hopefully you are still with me ! I will finish up with a few photographs of the inside pages so you can see how I used all those wonderful tickets, labels and pockets.


I hope this tutorial and a peek into the way I make up a journal will inspire you to give it a go. There is still plenty of time to join in our Cup of Tea challenge and you can get all the details HERE along with some fabulous inspiration from my fellow Creative Guides.
As always thank you for joining me and have a wonderful crafty weekend.
Jennie x
Hi Jennie. I love your post today. I am working on the same type of journal. I have always loved journal-creating but lately I have become obsessed with the tea/coffee dyed papers, envelopes, tags, etc. as well as more vintage/shabby chic than before. Thanks so much for sharing. You have given me some ideas I can use in my journals. Thank you. Have a lovely weekend.
ReplyDeleteWow!!!!! Amazing tips and tricks to make gorgeous journals!!!!
ReplyDeleteA lovely book Jennie and a great tutorial. Must get some tea dying done!
ReplyDeleteLove your book, and I like the idea of collecting bits and bobs before you start, great tute.xx
ReplyDeleteWhat a wonderful post, Jennie... breaking down all those individual elements that go to making up this glorious vintage journal. Such great tips about how to create delightful treats for every page. I loved the photo of your little piles of stamped tags, and the beautiful pockets and mats of layered ephemera. Beautifully done, and so clearly explained - and of course the finished album is exquisite.
ReplyDeleteAlison x
Jennie, these are gorgeous! Your art always has a quiet beauty to it - a throwback to a gentler time - and I adore it!
ReplyDeleteFantastic tutorial Jennie and I loved reading all the details/techniques used along the way to create this fantastic journal. Some great inspiration here and I absolutely love this make xx
ReplyDeleteTFS and huge hugs
Annie x
fabulous post Jennie! I love the pretty, vintage style of your journal and it's really inspiring to see how it came together.
ReplyDeleteWow! This is absolutely gorgeous. I think you've stirred my mojo out of hibernation :) Have a lovely weekend x
ReplyDeleteWow, this is so amazing! It's such a gorgeous make and I love all the pieces that you created for the inside - stunning 😁. Thanks for a wonderful challenge! Happy and creative wishes! Hugs, Jo x
ReplyDeleteOh my goodness Jennie. What a fabulous tutorial. I thoroughly enjoyed reading it and seeing how it all finished up. Reminded me of a fun day we had at Astrid's many years ago now. This Journal is a Wonderful example of the work you do. Hugs Rita xx
ReplyDeleteSuch a beautiful journal and an absolutely fabulous tutorial Jennie!
ReplyDeleteThank you Jennie for teaching me some new tricks which I will hopefully get to try soon x
What a wonderful tutorial showing how you created all your beautiful tea dyed pieces for your wrap journal Jennie! What a lot of work and thought went into this - I feel like a slug having just made a tea dyed card front for my project! :) xx
ReplyDeleteOMG Jennie! this post is fantastic! I adore every little detail of your project! It's amazing! barbara
ReplyDeleteAs everyone has said already Jennie your tutorial is fabulous - thorough, informative and inspirational. It's been a joy to read and see all your 'collections of loveliness' brought together to create an absolutely gorgeous vintage journal. Tfs
ReplyDeleteIt is well worthy of the Award /Trophy it received
Hugs x