
I've been given the honour of having my second excursion ticket today for Destination Inspiration and decided to keep to our floral theme with this pastel shadow box:

The glass fronted frame is made of a smooth, natural wood so I started with a layer of Picket fence DP rather than Gesso:

Next came Milled lavender and Shaded lilac DPs painted in rough patches all around the frame. When dry, Picket fence DP was stippled all over the block colours with a stippling brush:

So far:

Turning to the inside, I cut a square smaller that the size of the box frame and misted it all over with water then sponged on the lavendar and lilac DPs with a fine sponge. Before it dried I added sploshes of Milled lavender DS with a pipette which I then blew about around with the spritz tool to get a marbled effect:

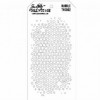
Using Tim's Bubble layering stencil and some Dusty concord DI I added some inky texture:

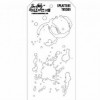
Then another stencil (Splatters) and Picket fence DP before adding some random stamping (Tim's Curiosities set - CMS 104):

The edges were inked with Antique linen DI before being mounted on a piece of block colour card:

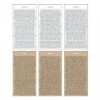
I tore a strip of white paper diagonally and stained it all over with Milled lavender DS dabbing Dusty concord DS randomly over it before it was completely dry. Once it had dried, it was torn into 3 pieces and edged with Antique linen DI then rolled and glued into tubes:

Now it's time for the flowers and, of course, it has to be Tim's Tattered floral die (standard Bigz) cut from thin white card and book pages. The larger shape has been smear stained with Shaded lilac DI and then misted whereas the medium and small shapes were stained with Milled lavender and Victorian velvet DSs. The larger shape was then debossed using a spotty embossing folder rubbed with DI:

I made the smaller flower by reducing the petals on the medium shape and just adding a fringed centre:

Stained tissue tape was added to the background before mounting it on it's final white base:

Leaves for the flowers were cut from mount board using Tim's Regal crest Bigz die then painted white. The silver tone butterfly was painted lilac and some chit chat stickers edged with Dusty concord:

Finally, it's putting it all together...

and adding the final touches - top left:

Roses and flower:

Adding a zip pull and staining the edge of the frame with Antique linen DI:

Finished:

Thanks for joining me in my journey today, I hope you've enjoyed it.
Have a fabulous week!
Chris xxx


This is a beautiful shadow box Chris and a great step by step. Having seen this irl I know how how fabulous it looks so thanks for sharing it with us today. xx
ReplyDeleteWonderful creation Chris. I love it. Hugs Rita xxxxxx
ReplyDeleteWow, your shadow box is gorgeous, Chris
ReplyDeleteYour shadow box is beautiful Chris, I love the soft tones you have used and those flowers are gorgeous. The step by step is excellent too - love this! Hugs, Anne xx
ReplyDeleteIt's beautiful, Chris.
ReplyDeleteA stunning shadow box Chris! Love the subtle effect of the paint on the frame and background, and your flowers look fantastic! Very clear step by step too, wonderful inspiration all round!!
ReplyDeletewonderful shadow box Brenda - wonderful - love the colours and textures - and those flowers look awesome xx
ReplyDeletestunning DI project Chris :-) love all the details and fabulous tutorial. TFS and hugs
ReplyDeleteAnnie x
What a fabulous tutorial Chris and the shadow box looks so good. The way you've put that background together works a real treat. Jenny x
ReplyDeleteGreat tutorial Chris and a beautiful floral shadow box! What an inspiration! Hugs, Candy
ReplyDeleteAmazing when a plain wooden frame is turned into a total work of art! Love the soft and delicate color palette and those flowers are so pretty! You may have inspired me to make more flowers! Great tutorial, Chris. Have a fabulous week, Hugs!
ReplyDeleteI love the step by step and I keep the idea! Lys.
ReplyDeleteBeautiful piece Chris. Gorgeously soft. Love your curled papers and flowers. Nicola x
ReplyDeleteSo, so pretty, Chris - the flowers look gorgeous, and I love that stippled effect on the frame - lovely step-by-step too!
ReplyDeleteAlison xx
What an amazing make-over you gave the wooden frame Chris! Fabulous and thanks for the wonderful step by step. The flowers look gorgeous and all the little elements inside are wonderful. Jennie x
ReplyDeleteLove your shadow box! It's absolutely fabulous and thanks for the how-to photos (always appreciated). xx
ReplyDeleteWhat a lovely make! Like the step by step pictures of this vintage make...chapeau!
ReplyDeletekind regards, Alie